Put background Picture on Slides in PowerPoint
This post will provide a step by step instructions demonstrating How to add a background picture on your slides in PowerPoint.
What is the use of the background in PowerPoint?
PowerPoint offers four ways to change the background: Solid fill: Creates a solid background color. Gradient fill: Creates a background that’s a mix of two colors that gradually fade into one another. Picture or texture fill: Lets you choose a picture stored on your computer as the background. Pattern fill: Lets you select the pattern for the background.
How to Put a Background Picture on Slides in PowerPoint?
Steps to add a background picture on your slides in PowerPoint and are:
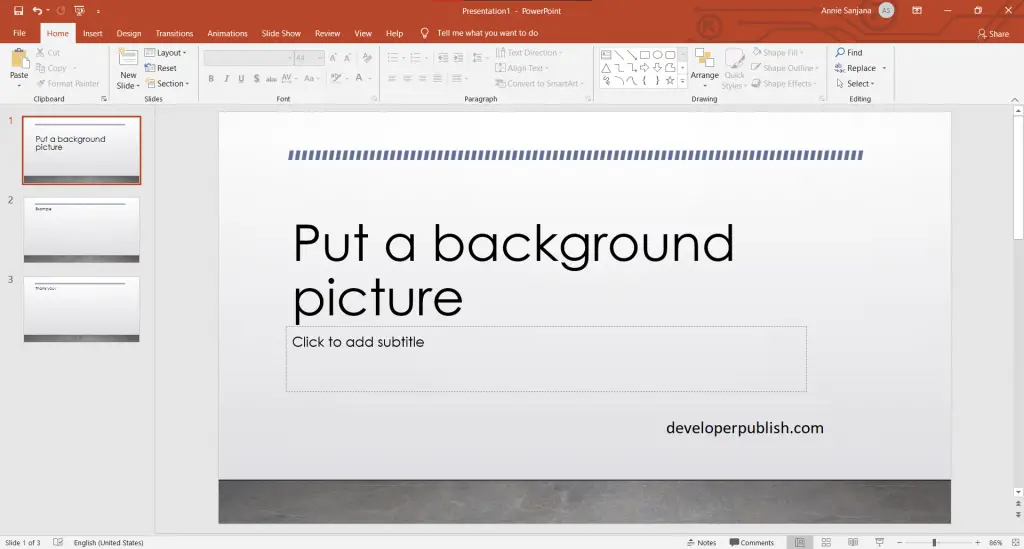
- First, create a PowerPoint presentation with the required number of slides in it.
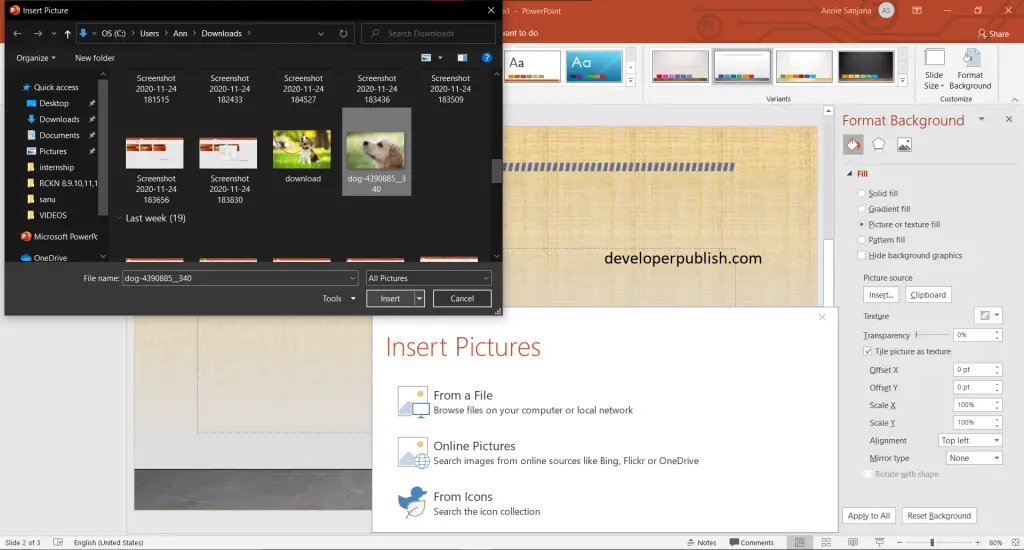
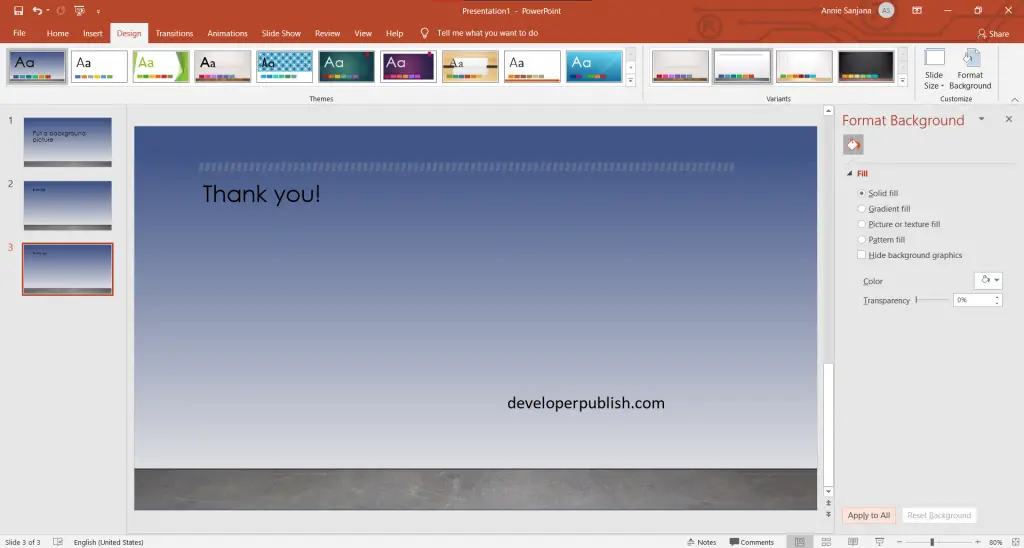
- To add the background picture, select the slide to which you want to add the background picture > then click on the Design tab > Format Background.
- In the Format Background pane > Picture or texture fill > File menu > In the Insert Picture dialog box, choose the picture you want to use and then select Insert.
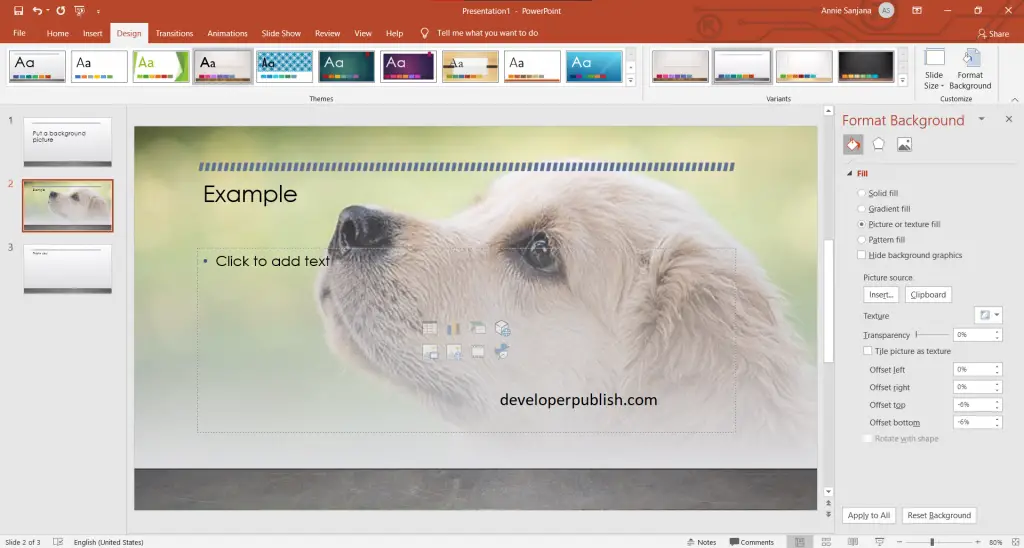
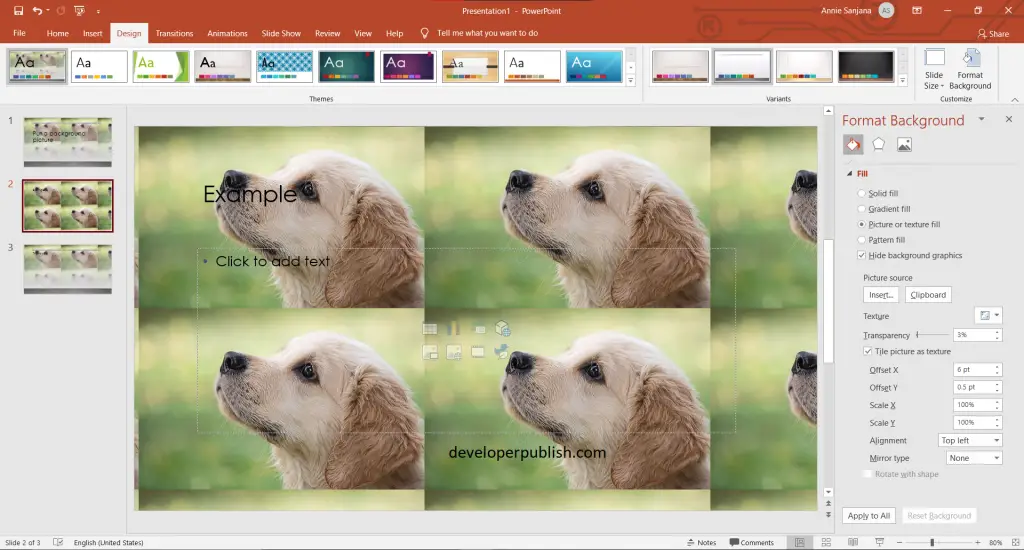
- Make some adjustments for the text to be visible, use the following options: Transparency to make the picture lighter, the Offset settings to adjust the position of the picture, and the Tile picture as texture to repeat the picture across the slide.
- If you wish to add the background picture on every slide, press the Apply to All button.
- The below shown picture is the result of the steps mentioned above.
- You can use the hide background graphics option to hide the graphics that are visible in the background.
- To remove the background image, select the slide which you want to remove background picture > Design > Format Background > then click on Solid fill > then on Color button if you want a color change.
- If you wish to remove the background picture on every slide, press the Apply to All button.
- Here you can see the result of the above mentioned steps.
We hope that this article is helpful and understandable.


Leave a Review