How to use Spell check in Microsoft Excel?
Here in this article, you’ll get to know how to use the feature Spell check in Microsoft Excel.
How to use Spell check in Microsoft Excel?
This feature provided by Microsoft Office helps us in correcting the misspelled words in the worksheet itself without needing to look upon the internet or dictionaries. This feature suggests the correct spellings of the misspelled words.
How to use Spellcheck in Excel?
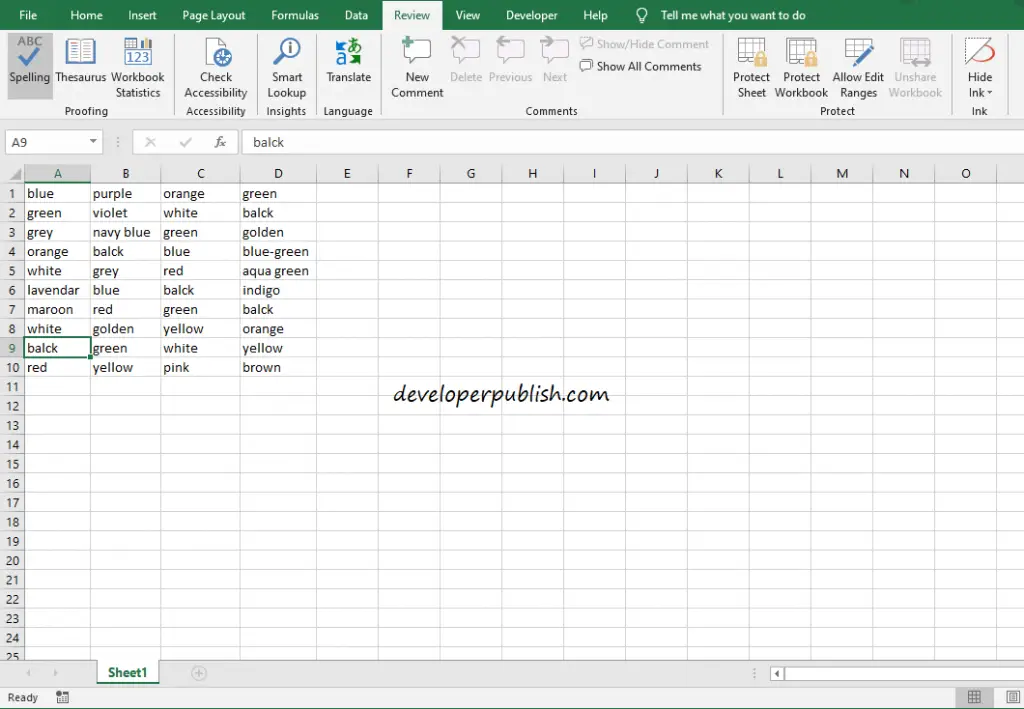
When you enter data in any of the cells in the worksheet and if you are unsure of the spelling and want it checked, to do the following steps.
- Select the cell in which the word is entered.
- Go to the Review tab and select the Spelling option.
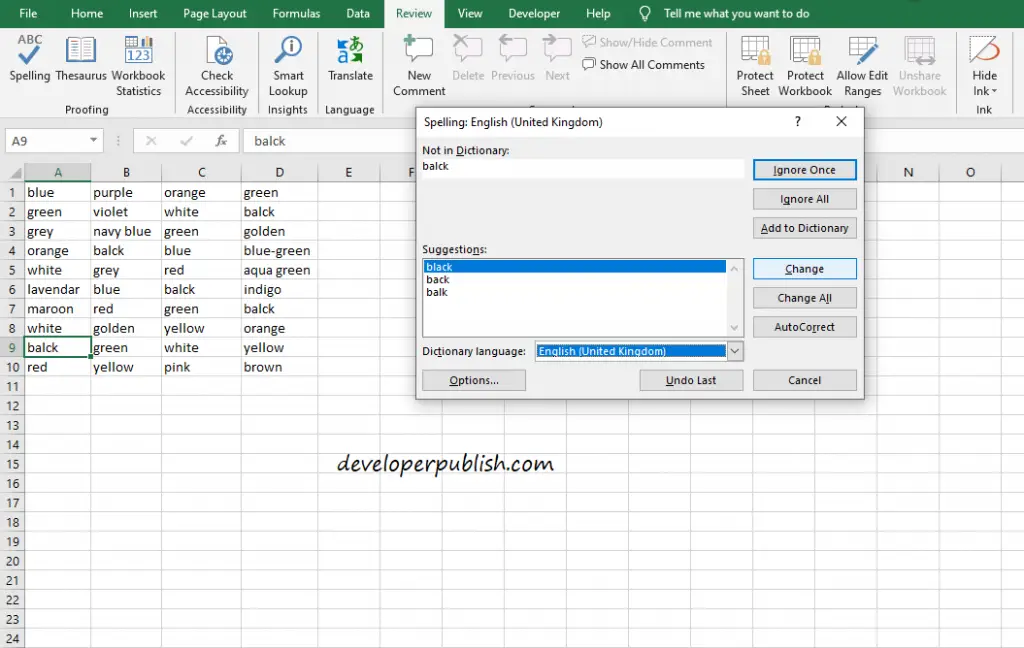
- If the spelling you’ve entered is incorrect suggestions pop-up for the word.
- Then choose the correct term that you want.
- Click on Change to change the word.
NOTE: If you select a cell for spellcheck, the whole worksheets get checked. If you select a few particular cells, only those cells get checked.
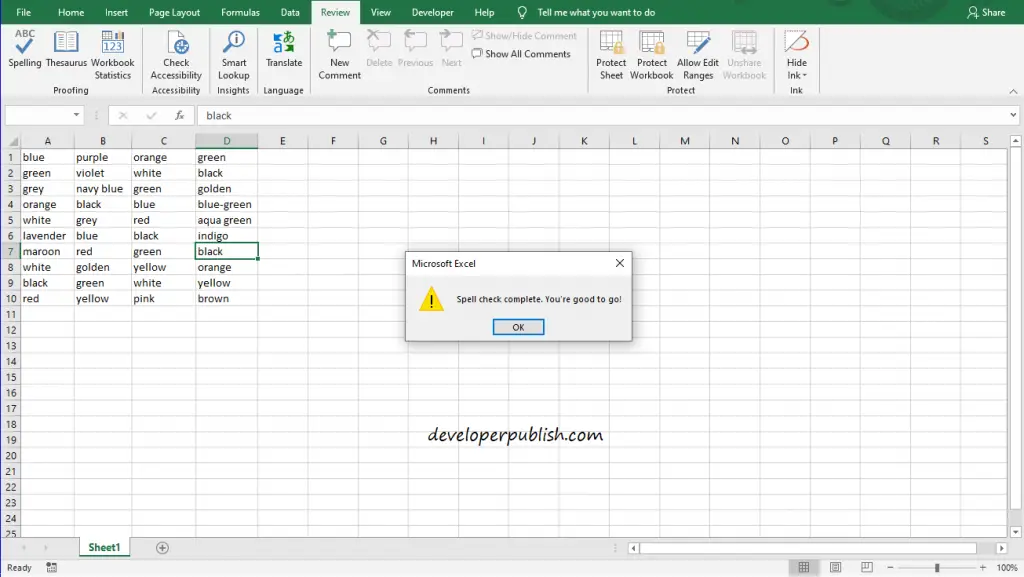
If there aren’t any typos in the data entered. This dialogue box gets displayed.
TIPS: You can also the key F7 to use Spell Check.
Autocorrect Feature in Microsoft Excel
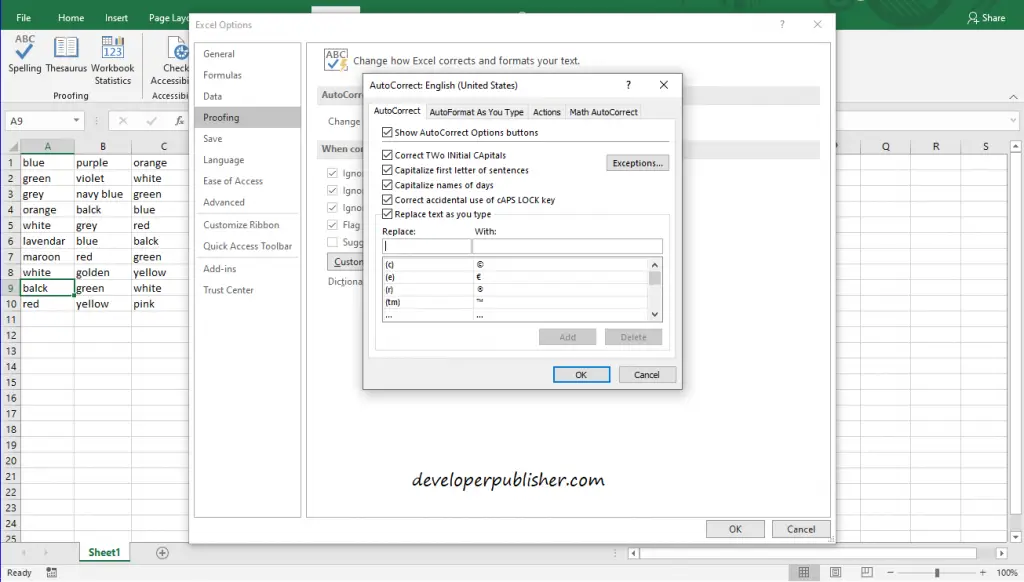
Autocorrect corrects the most common or habitual typos that occur.
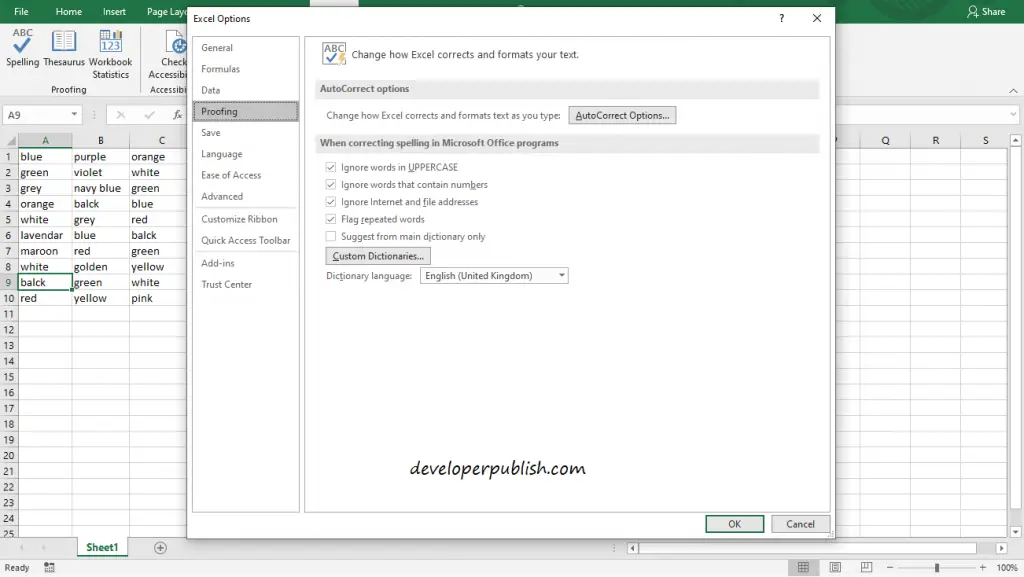
To set up this feature go to the File tab choose Options under it.
Go to Proofing and select AutoCorrect Options.
Customize it for your convenience.
This is how the AutoCorrect feature is put into use.



Leave a Review