In this tutorial, you’ll learn how to show and hide the navigation pane in Windows 11 which is usually found in the left pane of the File explorer.
How to Show or Hide Navigation Pane in Windows 11 File Explorer?
When you set this property to show or hide the navigation page, this gets applied to all the folders and drives in Windows 11 as this forms a kind of global settings.
Follow the below steps to show or hide the navigation pane in the File explorer of Windows 11.
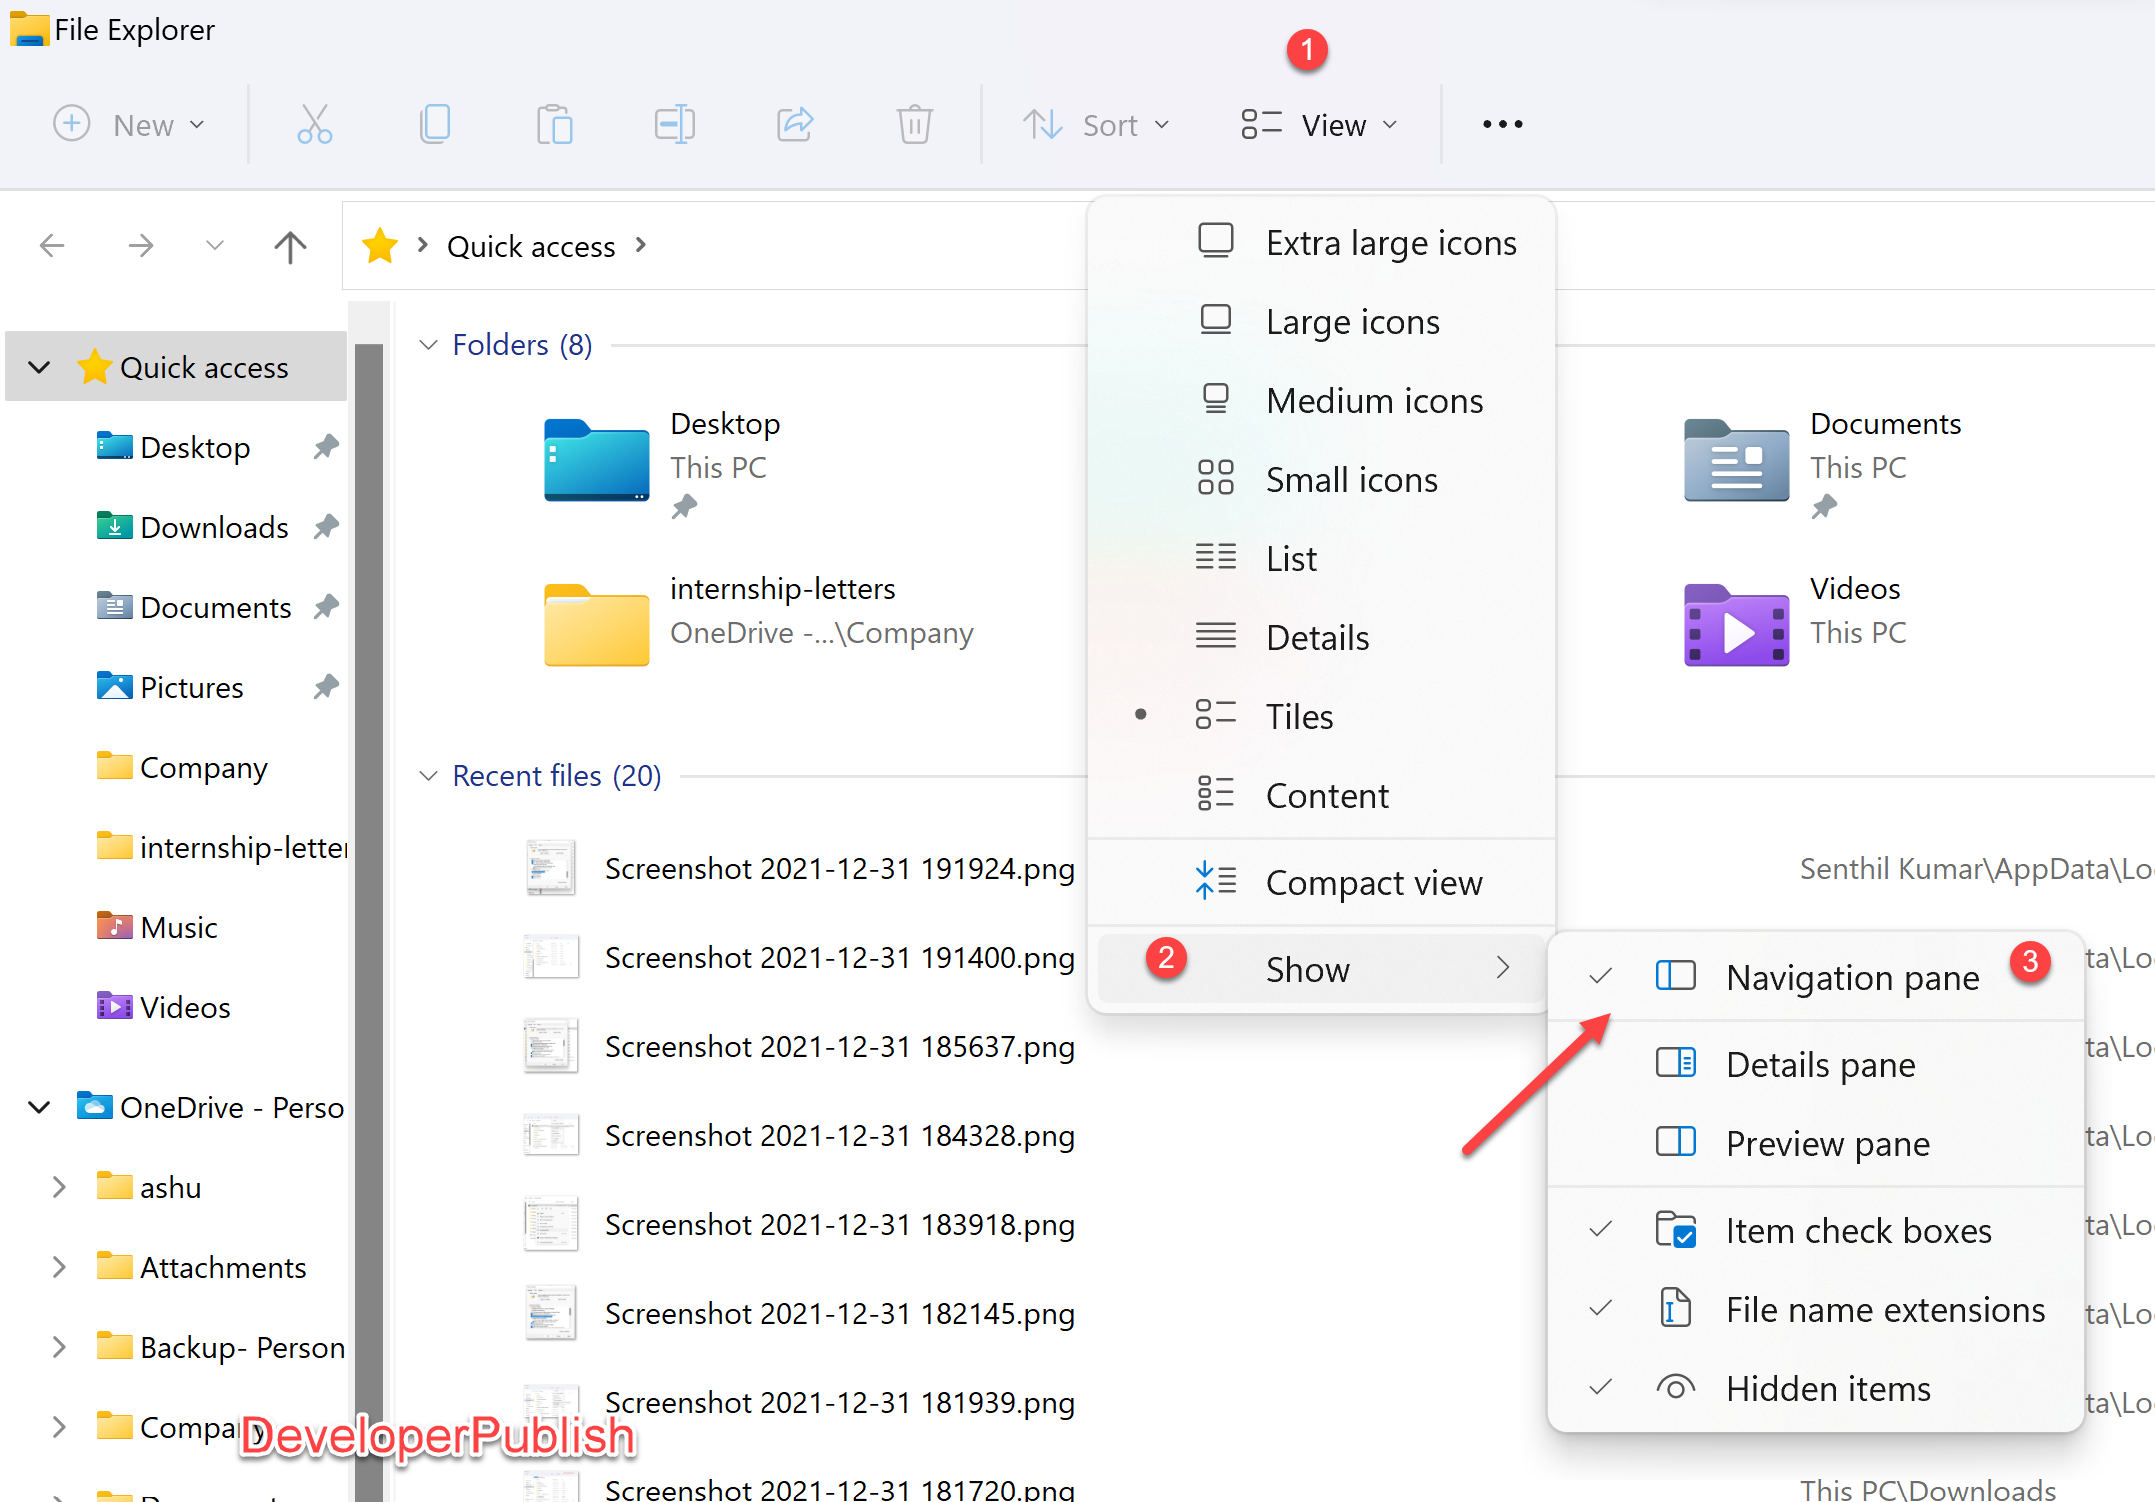
- Open the File Explorer in Windows 11. You can use the shortcut key (Windows + E) to open it quickly.
- In the File Command bar, click “View” and then select “Show” which will show you more options. Check or uncheck Navigation Page to show or hide the navigation pane.