Date Filters in Excel
Date Filters in Excel help us sort and filter the dates in a document. This exactly works like we filter a set of text or numerical data. This post will explain how it works.
Date Filters
There will be a situation where we have to display only a set of dates or data and hide the rest. Date Filters shows us a way to filter the dates in an excel sheet. We can filter the dates and display the required & hide the rest. The Date Filters also help in arranging the dates in a specific order. Let’s get to know how it exactly helps us in filtering the dates.
How it works?
- Once you have entered all the required dates in the document, just click on any cell in the data set. Go to Data Tab in the excel ribbon and choose the Filter option.
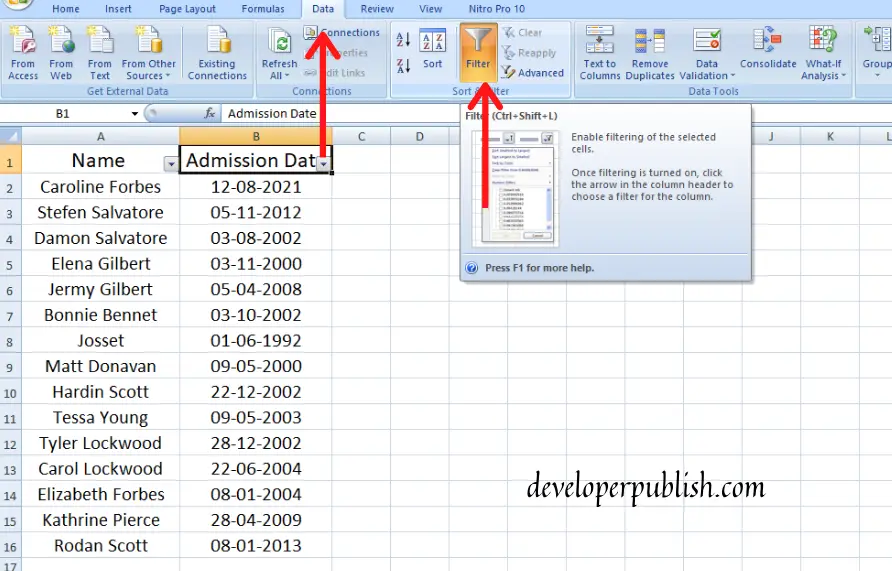
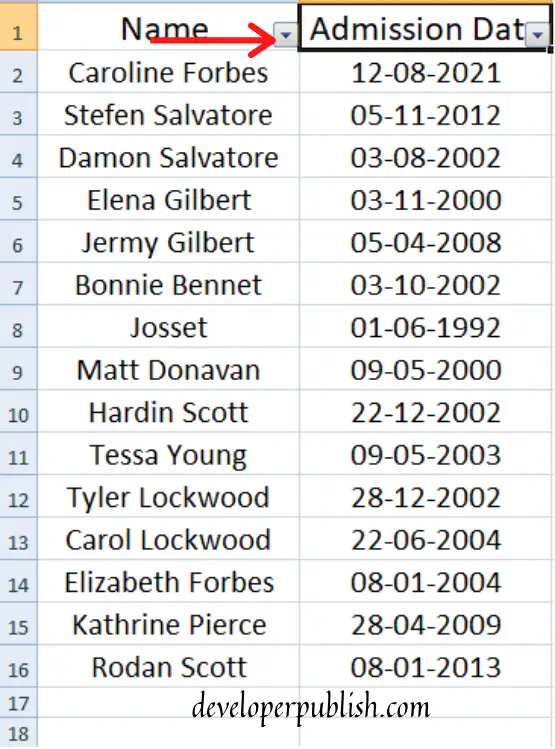
2. As seen in this picture, when you enable the Filter option the header arrow will be shown on the first cell of each column.
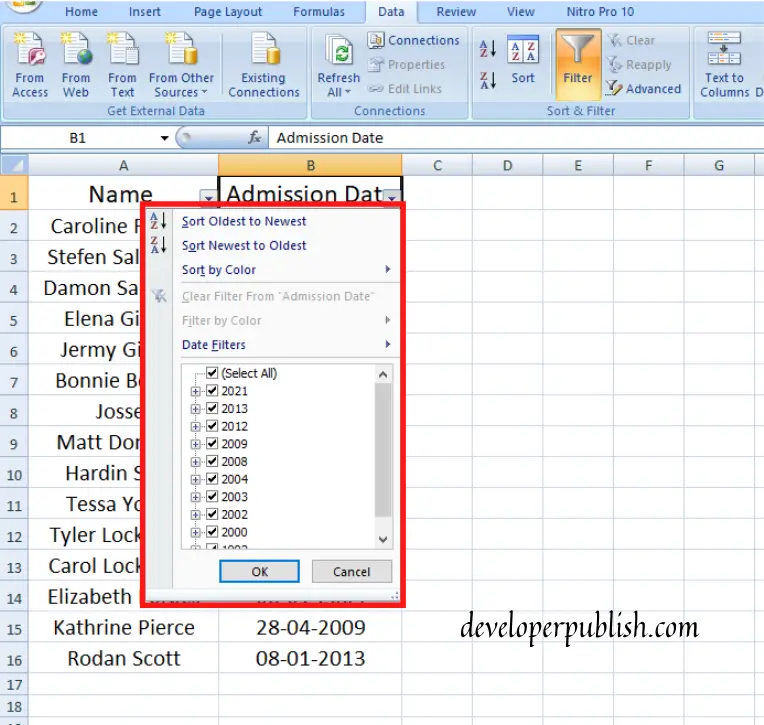
3. Click on the Header Arrow, you will receive a pop-up with a list of options.
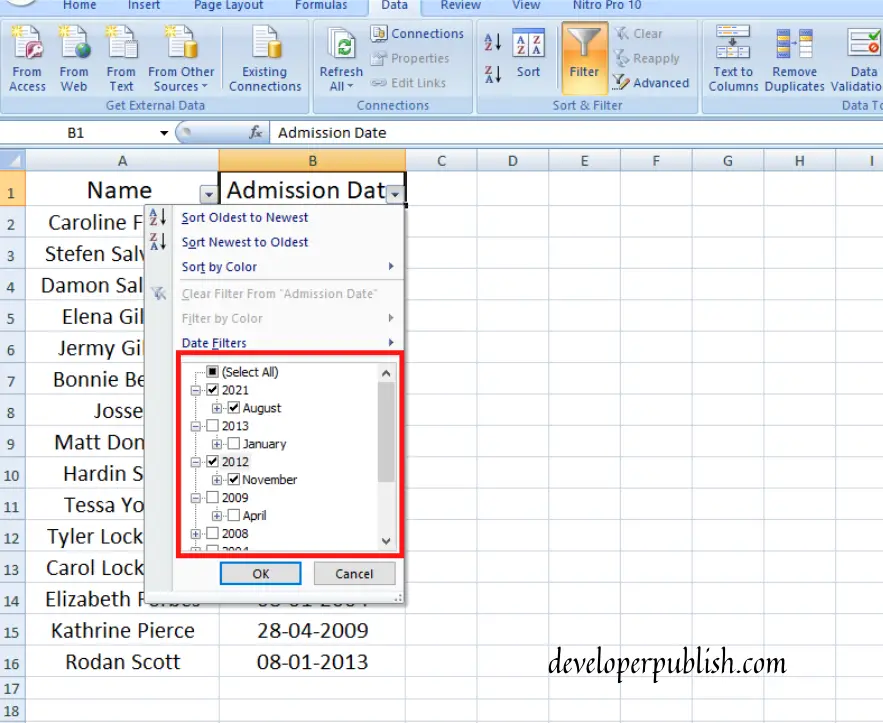
4. You can either uncheck the Select all option and click on the required year to show and hide the rest or you can click on the Date Filter.
Note: You can click on the plus sign to choose the month along with the year.
5. When you choose the Date filter option, a pop-up with a list of options will show up. From those, you can choose either of them to filter the data according to your requirement.
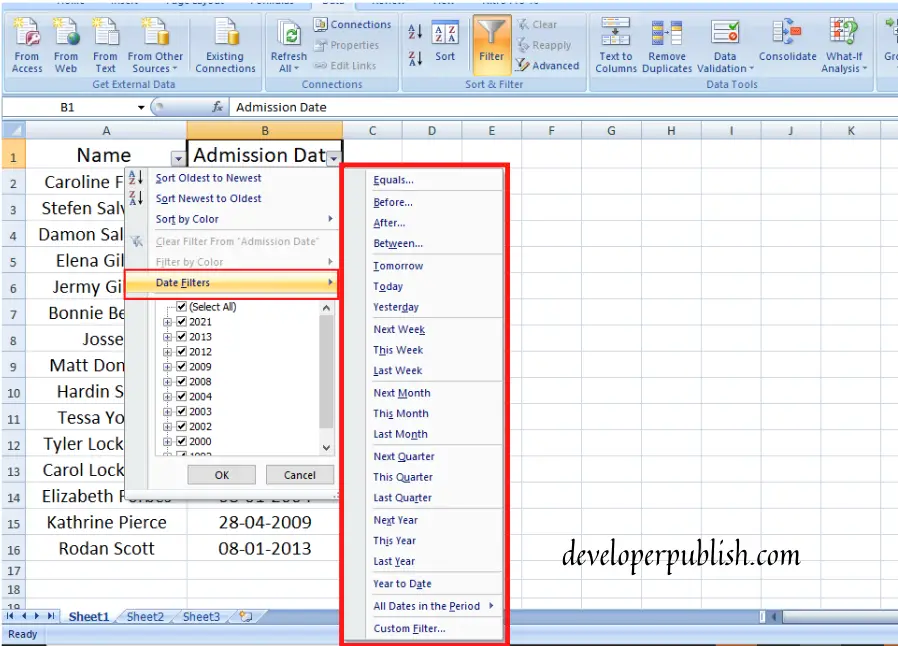
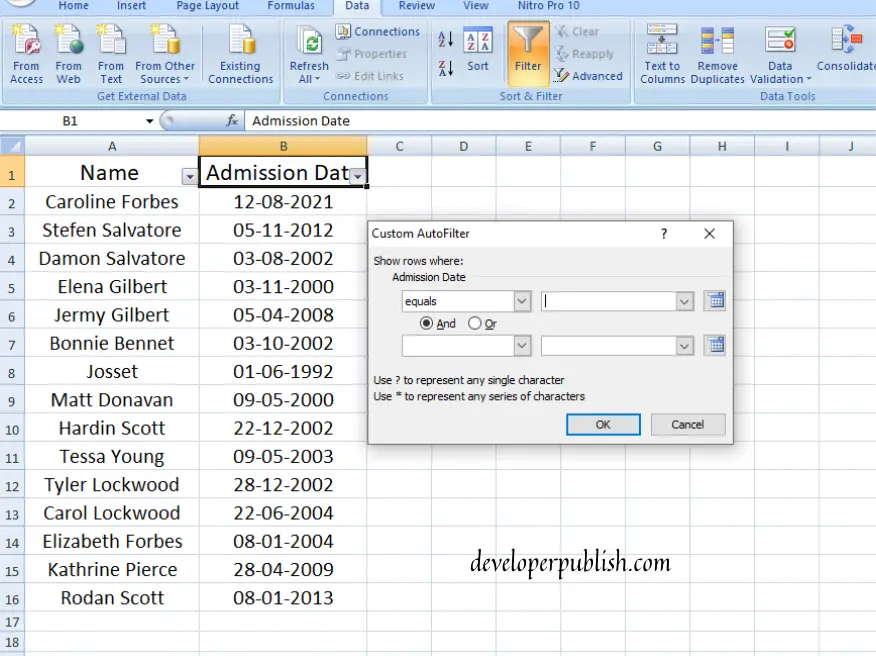
These options are used, and it displays the date according to the date when you enter the data. The Custom Filter option will take you to a dialogue box where you can filter the dates manually according to your requirements.
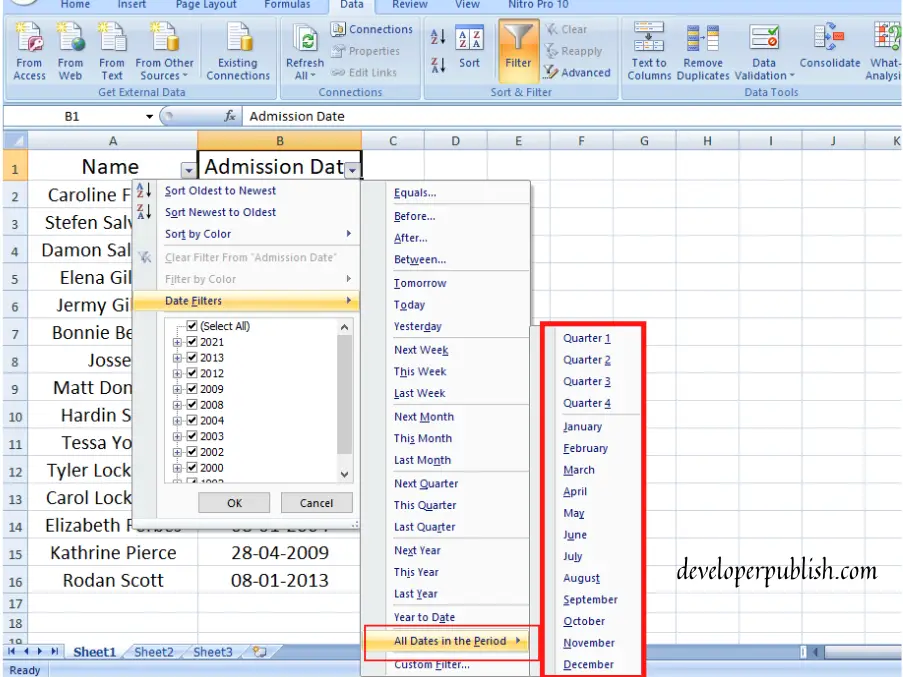
The All Dates in the Period option allows us to filter the dates according to the month and even quarterly.
Thisn is how a Date Filter works in Excel. Hope this post was useful and satisfing.


Leave a Review