In this post, you will learn how you to set print area in excel to fit one page that lets you to set the print area so that only the selected area will be printed.
The Print area is an option in Excel that allows you to print a specific area or a selected range of cells. When you press the print button in Excel, full worksheet is printed. In case you don’t need the entire content from the spreadsheet but just the parts of the worksheet for printing , this feature in excel is the one for you.
How to use Print area in Excel?
To use the print area feature in Excel, you can follow the below steps.
- Select the range of cells.
- Go to the Page Layout tab, under Page Setup group click on Print area, and then Set Print area.
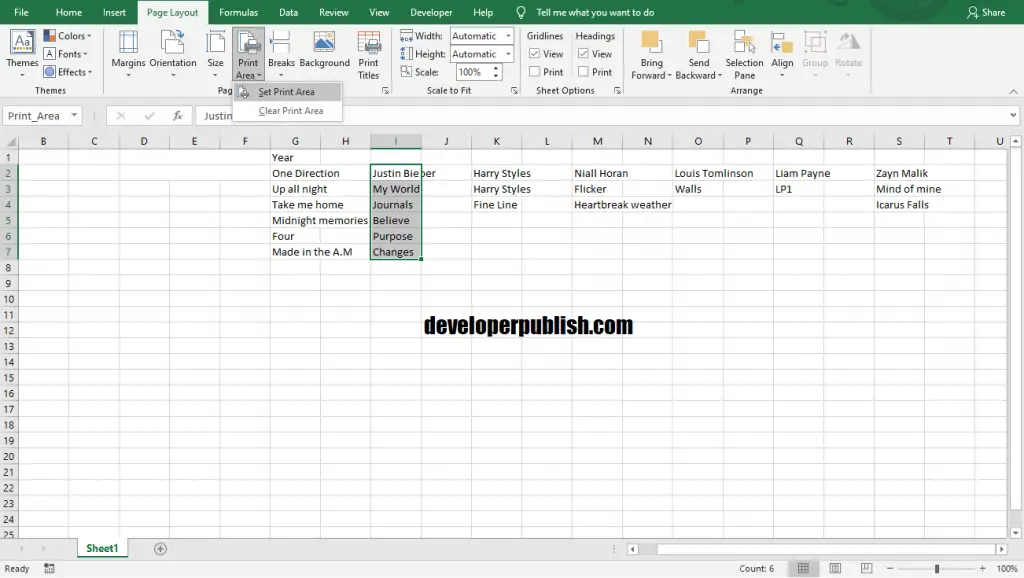
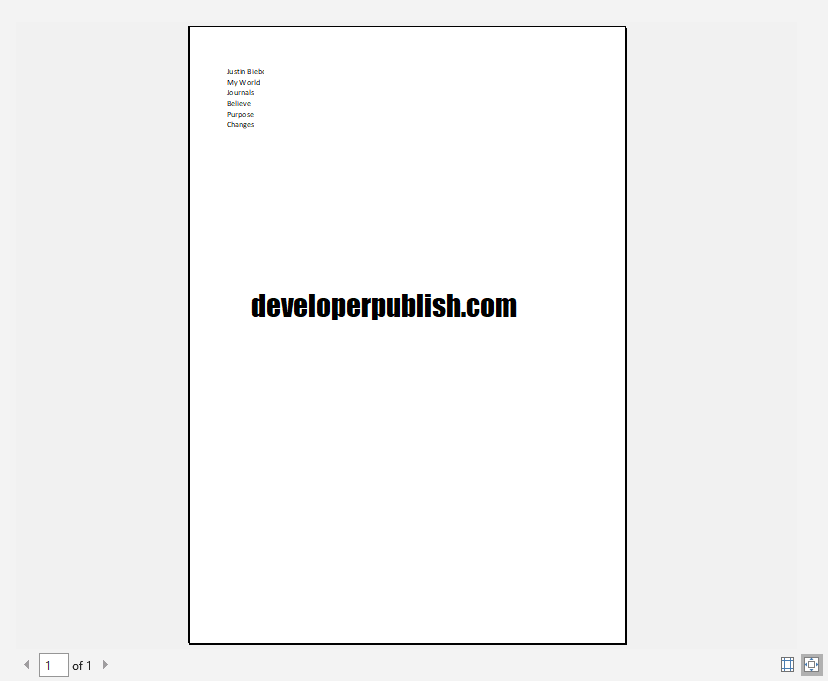
- Then you can preview the print in the Print>File.
If you want to edit and delete print areas in excel, you can use the Name Manager which is usually found in the Formulas tab -> Defined Names Group.
1 Comment
it facilitates learning about Excel’s How to Print Area.