How to skip disk checking in windows 11?
When you start up your computer, Windows 11 may automatically run a disk check to scan for errors or issues on your hard drive. While this can be a helpful diagnostic tool, it can also be time-consuming and may cause delays if you need to start using your computer quickly. If you want to skip disk checking in Windows 11, there are a few steps you can follow.
How to skip disk checking in windows 11?
In Windows 11, you can skip the disk-checking process by following these steps:
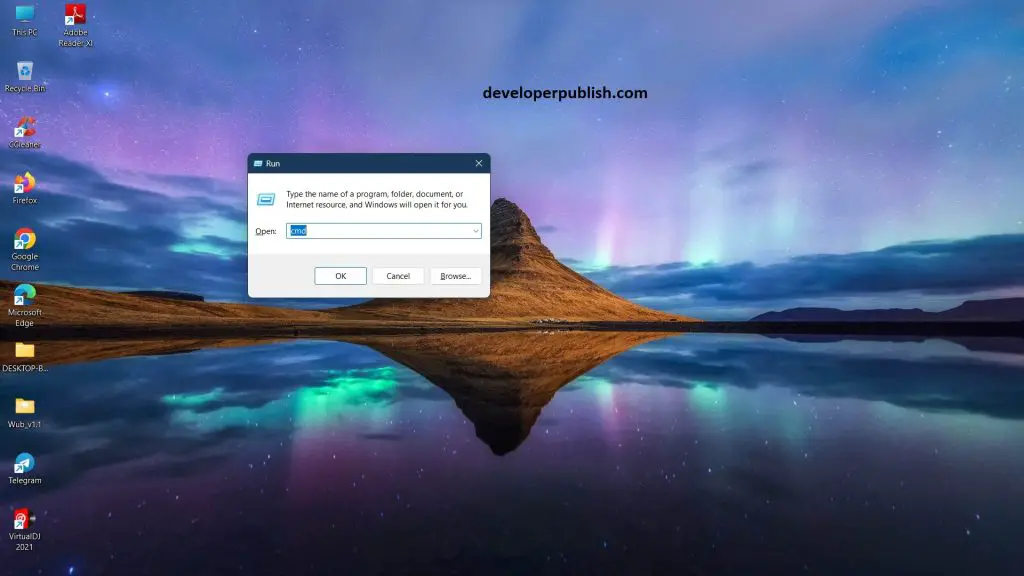
- Press the Windows key + R on your keyboard to open the Run dialog box.
- Type “cmd” in the Run dialog box and press Enter to open the Command Prompt.

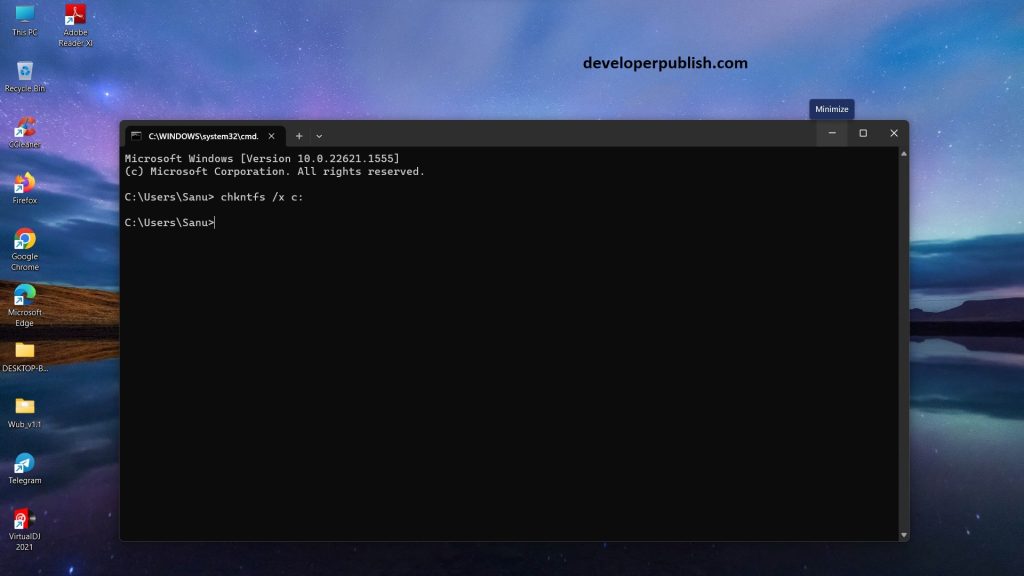
- In the Command Prompt window, type “chkntfs /x c:” (without the quotes) and press Enter. This command will exclude the C drive from the disk-checking process.

- You may need to restart your computer for the changes to take effect.
Note: Skipping disk checking may result in data loss or other issues if there are problems with your hard drive. It’s recommended to run disk checking periodically to ensure the health of your hard drive.
Skipping disk checking in Windows 11 can be a useful way to save time and avoid delays during startup. By following the steps above, you can exclude your hard drive from the automatic disk check process. However, it’s important to remember that disk checking can be an important diagnostic tool and skipping it may lead to missed errors or issues. Use this method with caution and always monitor your computer’s performance for any potential problems.


Leave a Review