In this post, you’ll learn about WordPress website and how do one start building a website using WordPress and host it on a Server and make them publicly accessible.
This tutorial is beneficial to users of all ages and skill levels. Even if are a beginner, you will be able to understand, learn and create a WordPress website after reading this tutorial.
- How much does a WordPress website cost?
- 1.Setting up the Website
- 2. How to Install WordPress?
- 3. Customizing Your Website with Themes in WordPress
- 4. Creating Content for your WordPress Website.
- 5. Change the Settings for your WordPress Website
- 6. Installing Plugins for your WordPress Website
- 7. Further Reading
You’ll need to complete the following steps if you want to create a WordPress website
- Register a Domain
- Choosing the Best Web Hosting to host your WordPress site
- Install WordPress Software
- Install and configure templates on your WordPress Site
- Creating Pages & Posts in WordPress site
- Installing Plugins and extensions
- Trying out some advanced features in WordPress.
How much does a WordPress website cost?
The response to this question mostly relies on the type of website you are attempting to create. A typical can cost between $0 – $100 per Year for a small personal website. For example, if you want to register and host the website yourself, you’ll incur the domain and hosting charges but if you want to create a website on the existing wordpress.com domain, you can do it freely but that comes with quite a lot of restriction.
We advise all of our users to start small and gradually add more features to their websites as their businesses grow. You will save money and minimise potential losses while avoiding overspending this way.
1.Setting up the Website
We will be looking at self-hosting solution for hosting the WordPress website. It provides you with much higher flexibility and huge number of templates and plugins to choose from.
Note: Anyone may download and use WordPress for free, with no limitations, to create any kind of website. The cost will usually come in to picture if you are registering and buying the domain and hosting it on the server.
What is a Domain Name?
Domain name is like your WordPress site or website address in the internet. For example, DeveloperPublish.com. It is what is usually been typed in by the users to access your website.
What is Hosting?
All websites in the public internet needs some kind of web hosting so that they can ne accesses. It can be Servers where all the files of the websites are stored and is accessed by the user.
There are plenty of popular Web Hosting companies that offers the users to register the domain and subscribe the hosting plans to start creating the WordPress website. These include.
- Bluehost
- Hostgator
- Hostinger
- ZnetLive
- Godaddy
You can choose any of the web hosting company, ensure that the subscription plan is all with-in your budget.
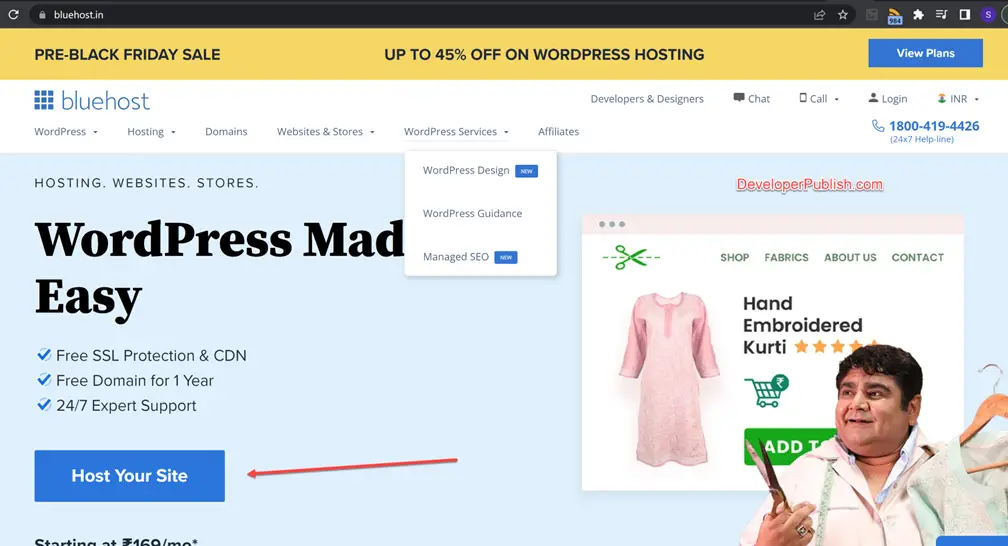
In this post, let’s choose Bluehost as an example and perform the below steps.
- Navigate to Bluehost website in a new browser window and then click on the Host Your Site link.
-
You will then be taken to a pricing page where you must select a hosting package for your website. The most popular options among our users are the basic plans.
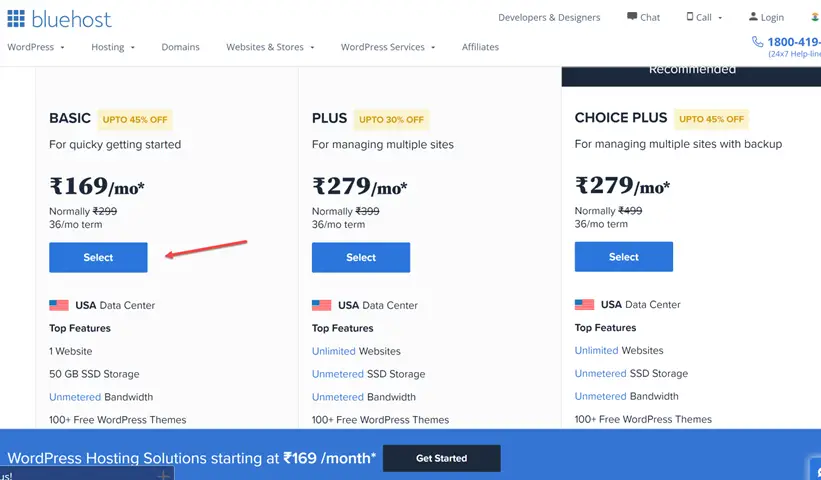
- You can click on the “Select” button to choose the plan that you like and wish to subscribe to. You’ll then be shown the option to select a new domain.
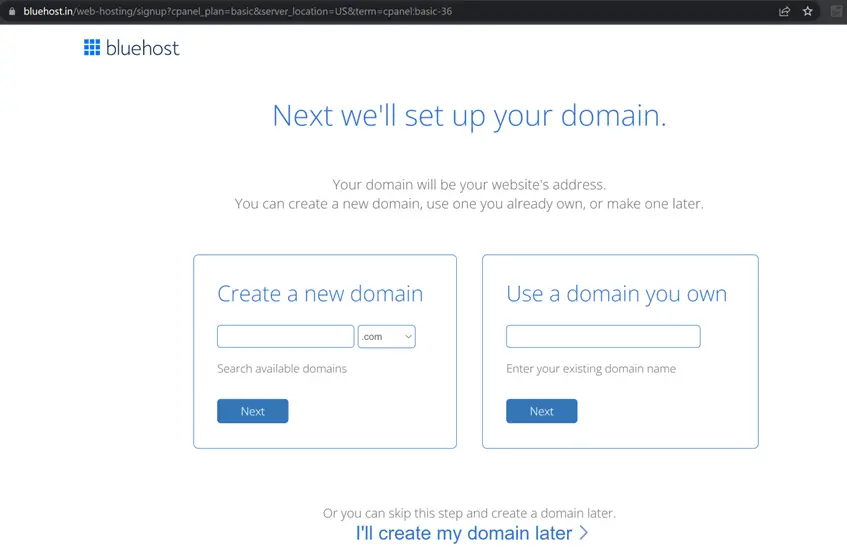
- Choose the name for your website and then the .com domain ideally and then click on the next button to continue with the next steps. You’ll then be asked to provide your account information like nae, address, email etc. You” also see some additional or extras for purchase. These can be done at a later stage so we recommend unchecking this information.
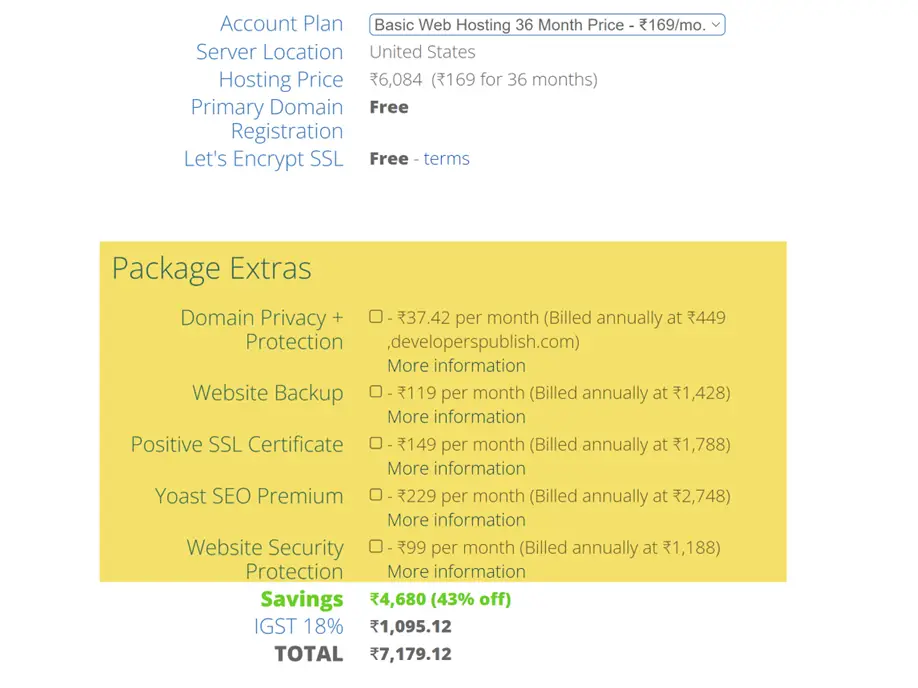
- If you scroll further down, you’ll be provided with the option to add your payment information to finish the purchase. Once you complete your purchase, you’ll receive an email with details about your login to the Web Hosting Panel called cPanel.
CPanel is your hosting panel or the account dashboard where you can manage everything related to your website. This is the where you can login and install WordPress.
2. How to Install WordPress?
If you have signed with the WordPress hosting plan with any of these hosting providers, they would have automatically installed the WordPress for you. They launched this one-click WordPress installer to make website creation easier for non-technical users.
You can also login to your WordPress site by visiting <yourdomain>/wp-admin and using the credentials that we sent to you via email or via your control panel.
Most of these CPanel dashboard comes with the softaculous application which lets you to install not just WordPress but almost most of the popular CMS on your website.
3. Customizing Your Website with Themes in WordPress
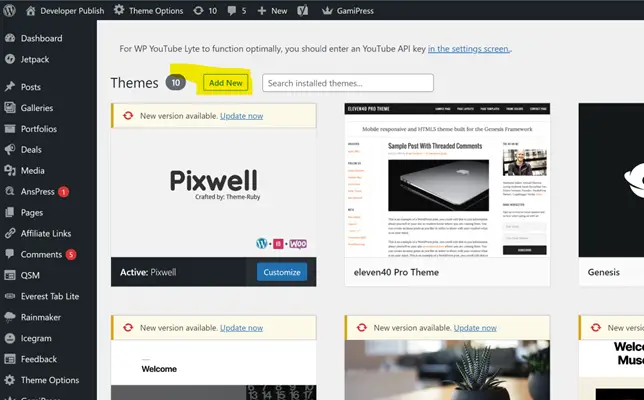
You can change the look and feel of your website using Themes in WordPress. By default, WordPress comes with default theme but then you can install a new theme and change the look and feel of your website from the Themes Section of our WordPress Dashboard.
The WordPress admin dashboard allows you to change your theme. Navigate to the Appearance » Themes page and click the ‘Add New’ button.
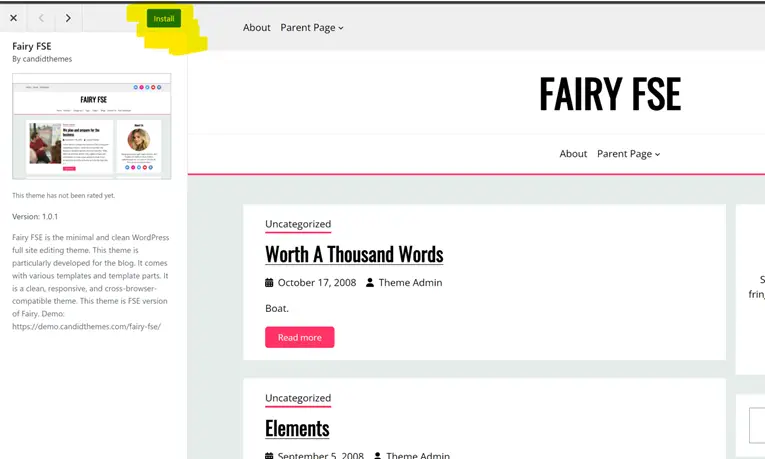
You can browse through 20206 free WordPress themes in the official WordPress.org themes directory on the following screen.

Just select one of the themes and click on the Install button to install the theme that you wish to have for your website.
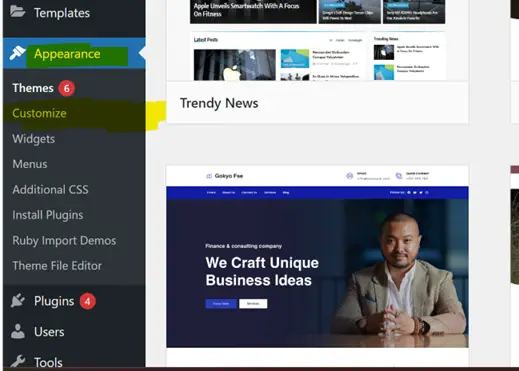
Once the theme is installed, you can then customize the them by clicking on the customize link which can be found under the Appearance Menu.
4. Creating Content for your WordPress Website.
The next step for your WordPress website is to add some content to the site. There are two options for you to add content.
- Posts
- Pages
Pages are like a static content. Examples of pages can be About Us, Contact Us etc
Posts are the blog posts and the latest ones always appear at the top when you access your website.
To create a new page, follow the below steps
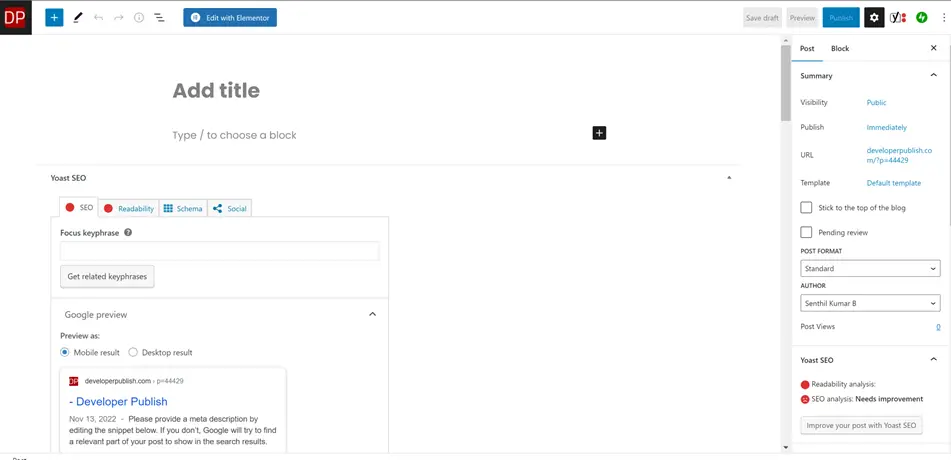
Navigate to the WordPress admin area’s Pages » Add New page. This will take you to the page editor screen, which, depending on your theme, will appear somewhat like this:
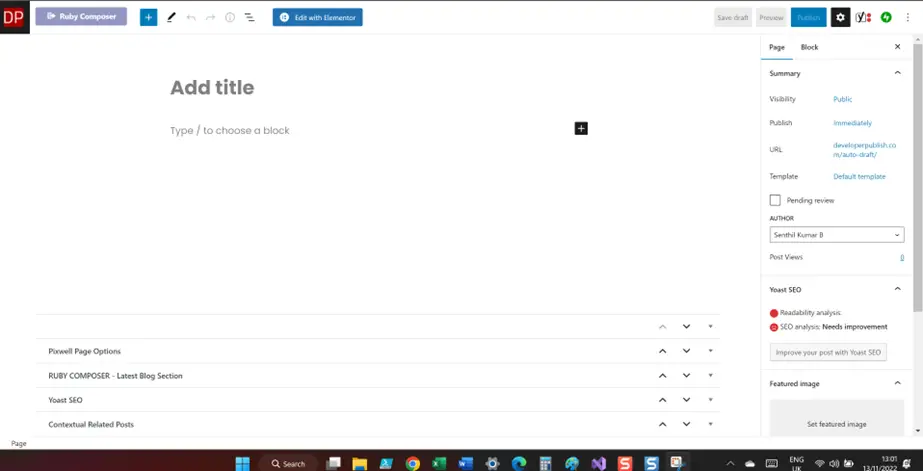
You will need to provide the title for your page. Once done, start adding the content for your page in the text editor below where it says “Type / to choose a block”. You will be able to add text, images or even embed video in to the pages.
Once the content is complete, click on the “Publish” button so that this page is visible to the public.
You can add as many pages as you like for your WordPress website.
To add a blog post, follow the below steps
Go to Posts » Add New in your WordPress admin area to see a screen similar to the one you saw when adding pages earlier.
In the visual post editor, you can first add a post title before adding content. In the sidebar, you’ll also see some other options including post types, categories, and tags. You can either click the publish button to make your post available on your site or the save button to preserve it as a draught.
5. Change the Settings for your WordPress Website
There are plenty of settings that the WordPress site provides by default to configure.
For example, if you want to change the Title and Tagline for your website, you can change them by navigating to Settings -> General from the Left Sidebar of your WordPress Dashboard.

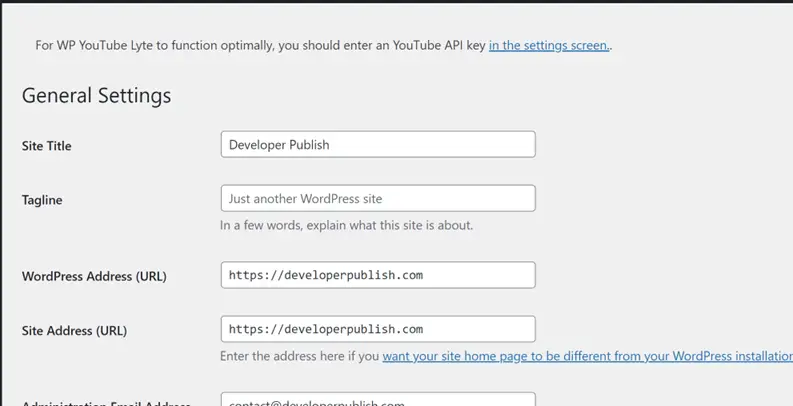
Click on the Save Changes button once you are done with your changes.
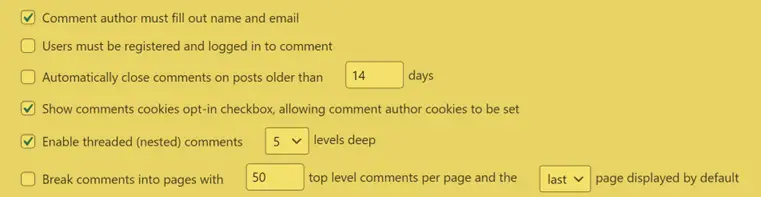
If you want to allow the users to comment on your posts or change the way how the comments section works for your WordPress site, you can navigate to Settings -> Discussions and the choose the desired settings.
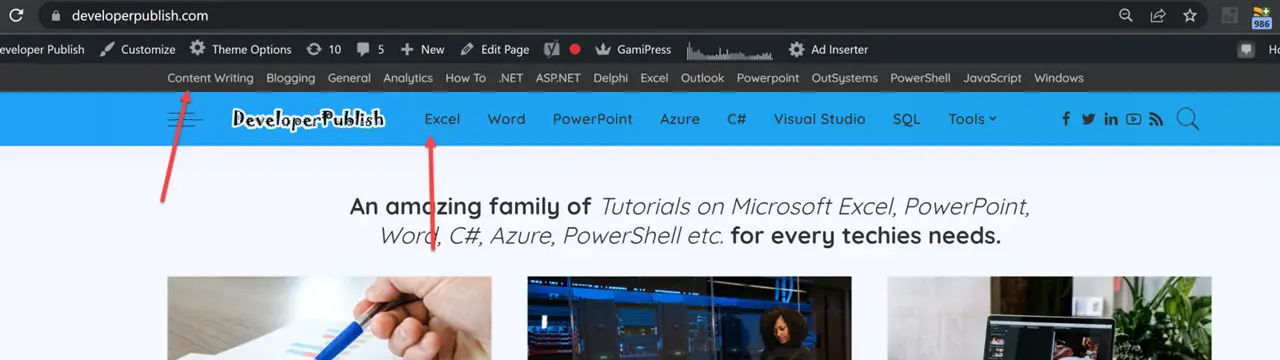
You can create the Navigation Menu in your Site that allows your users to browse different pages or sections on your WordPress website.
Navigate to the Menus page in Appearance. click the “create a menu” link or button.
Provide a name for the menu and then click on the Create Menu. Once this done, start selecting the sections or pages that you want to add to this menu and click on the Save Menu button.

You must also choose a display location. Your WordPress theme defines these locations. Most WordPress themes include a primary menu that appears at the top of your website’s header.
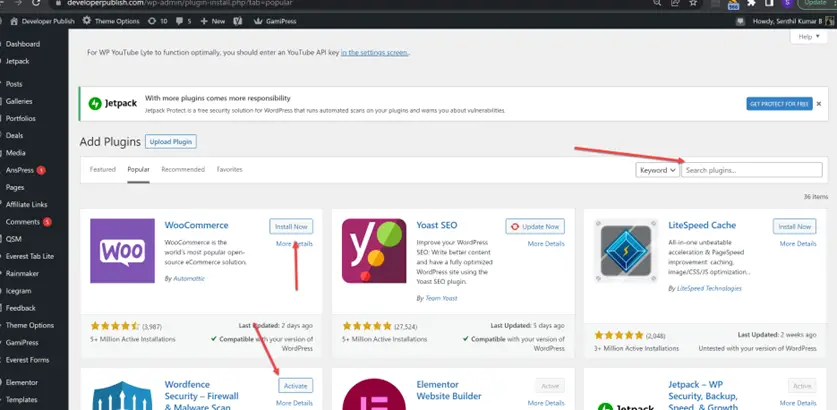
6. Installing Plugins for your WordPress Website
Plugins can be installed from your WordPress dashboard by going to the Plugins page.
There are plenty of free plugins that are available as well as the paid WordPress plugins. For a personal website, the free plugins should be more than enough.
Installing the plugin is as simple as installing themes. Navigate to Plugins -> Add New. Search for the plugins that you wish to install and click on the Install Now button and then Activate it.
7. Further Reading
Since WordPress is free and open source, there are plenty of free resources and learning that are available for one to learn and master WordPress.
WordPress.com Support Tutorials are a great source of resource if you want to get started.