How to Change User Account Control (UAC) Settings in Windows 11?
User Account Control (UAC) is a security feature in Windows 11 that helps prevent unauthorized changes to your computer. When UAC is turned on, Windows will ask for your permission before allowing any programs or processes to make changes that could potentially harm your system. This is important for keeping your computer secure, but it can also be a bit annoying at times. In this blog post, we’ll show you how to change the UAC settings in Windows 11 to suit your needs.
For better understanding, first let’s acknowledge the facts about What is User Account Control (UAC) mean?
What is User Account Control (UAC) mean?
User Account Control (UAC) is a security feature introduced in Windows operating systems to help prevent unauthorized changes to a computer by unauthorized users or malicious software. This helps to prevent malware from installing or making unauthorized changes to the system without the user’s knowledge or consent.
How to Change User Account Control (UAC) Settings in Windows 11?
You can change the User Account Control (UAC) settings in Windows 11 by following these steps:
- Open the Start menu and type “Control Panel” in the search bar.
- Click on the “Control Panel” app that appears.
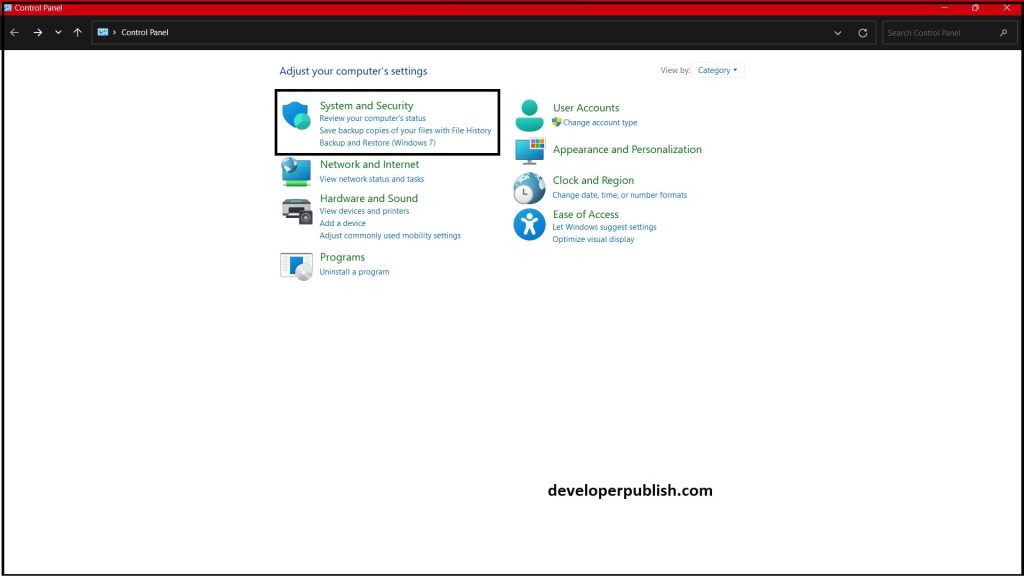
- In the Control Panel, click on the “System and Security” option.
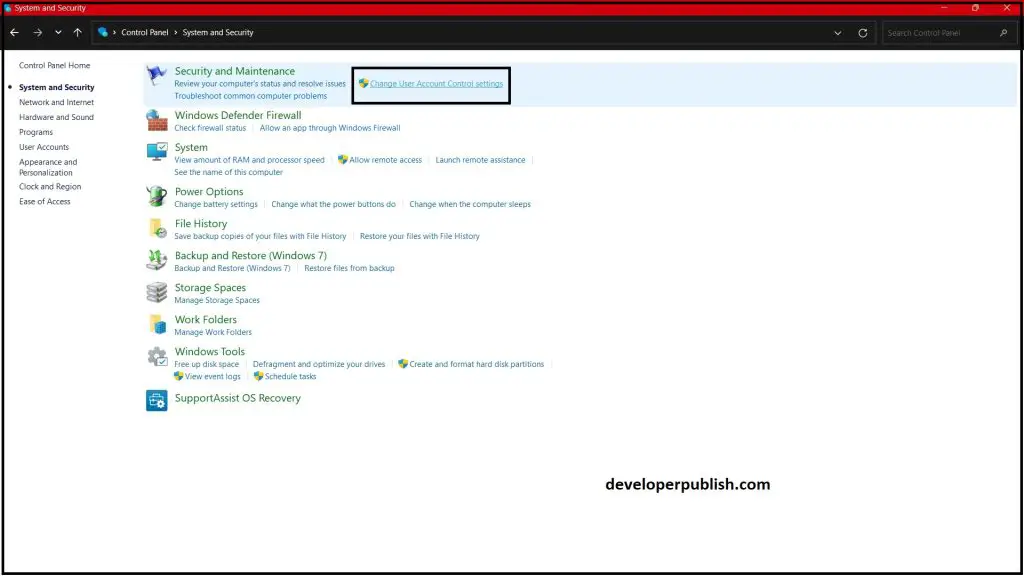
- Click on the “Change User Account Control settings” link.
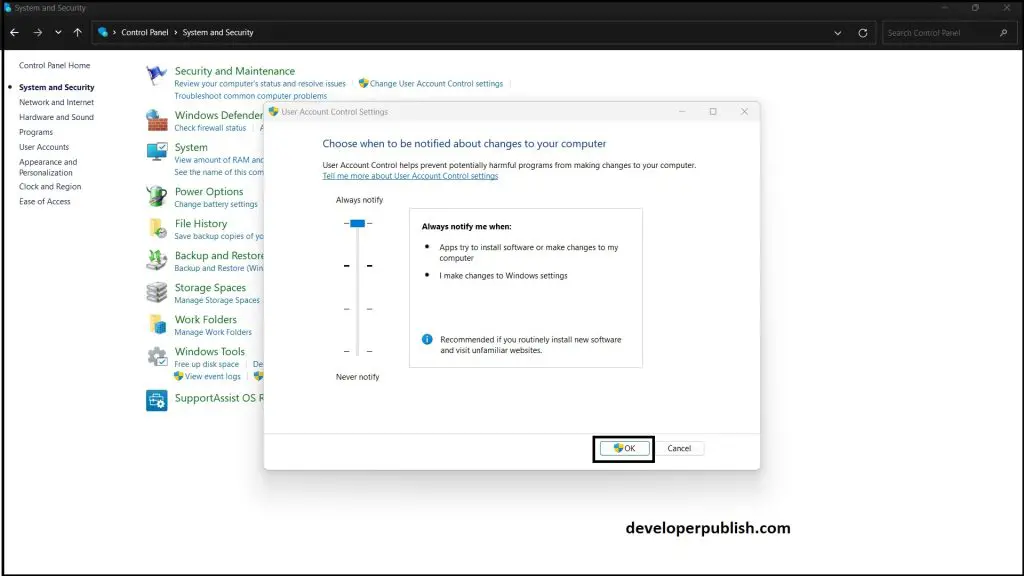
- To turn off UAC, move the slider to the bottom option, “Never notify.”
- To adjust the UAC settings, move the slider to the desired level of protection. The options are:
- Always notify me when:
- Apps try to make changes to my computer (default).
- Apps try to make changes to my computer (do not dim my desktop).
- Notify me only when apps try to make changes to my computer (recommended).
- Notify me only when apps try to make changes to my computer (do not dim my desktop).
- Click on the “OK” button to save the changes.
- That’s it! Your User Account Control settings have now been changed in Windows 11.



Leave a Review