Storage Sense in Windows 11
In this article, you will learn about storage sense in Windows 11 and how to enable or disable it.
What is Storage Sense?
Storage Sense is a built-in feature of Windows 11, which helps you in maintaining your storage space of your system effectively and making it more efficient. It may be configured by the default settings, but if you want you can configure them at any time. The main function of Storage Sense is to automatically free space by deleting unnecessary temporary files.
How to enable or disable storage sense in Windows 11?
To enable or disable this feature in Windows 11, follow these steps:
- Open the settings application from the taskbar or from the Windows start menu.
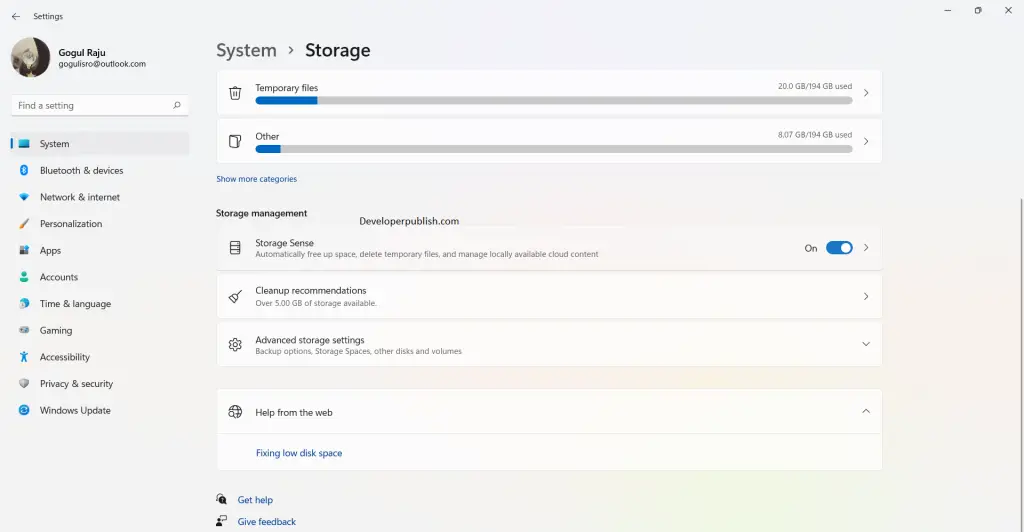
- Under the System settings, scroll down and click on the storage option.
- In the Storage management, toggle on or off the storage sense option.
- Turning on or off this option is how you enable or disable the storage sense option.
Note : The basic function of the Storage Sense is that by default it selects the C drive to work with. To free up space on other drives, go to More storage settings and then to View storage usage on other drives select your drives and you’re good to go.


Leave a Review