In this article, you will learn how to enable or disable snap windows in your Windows 11 PC.
How to Enable or Disable Snap windows in Windows 11?
The snap windows feature in Windows 11 is available from version 7 of Windows. This feature allows the user to view two windows simultaneously, side by side, without adjusting the windows frame.
This feature is enabled by default in Windows, if you want to disable it follow the below steps.
Disable Snap Assist via Settings
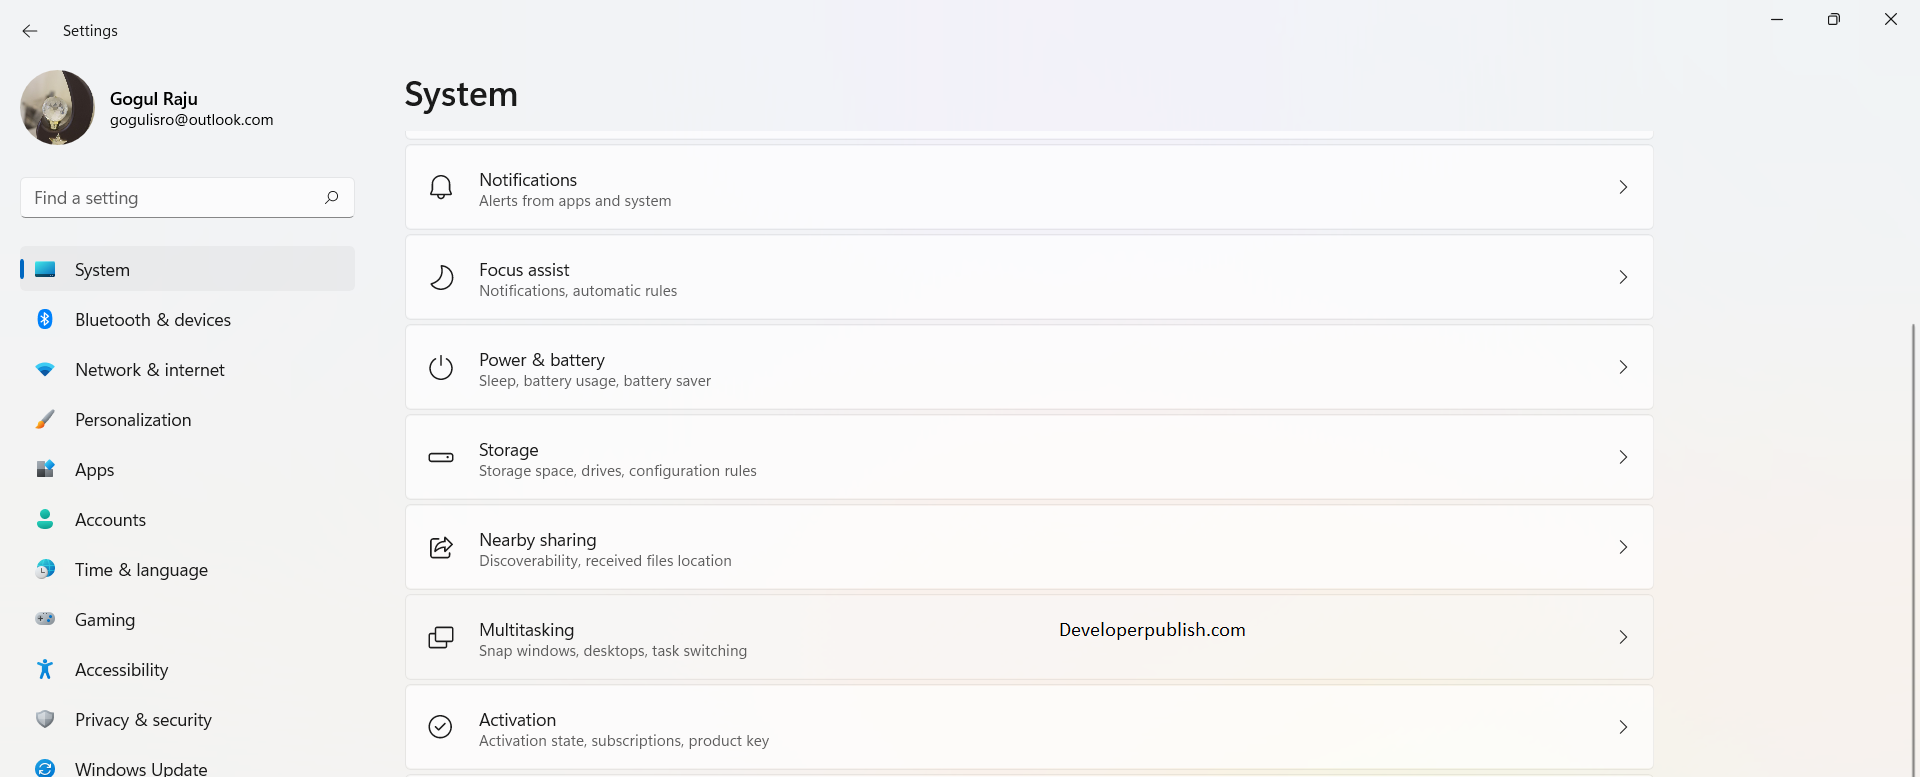
- Open the Settings application.
- On the left pane, click on the system settings.
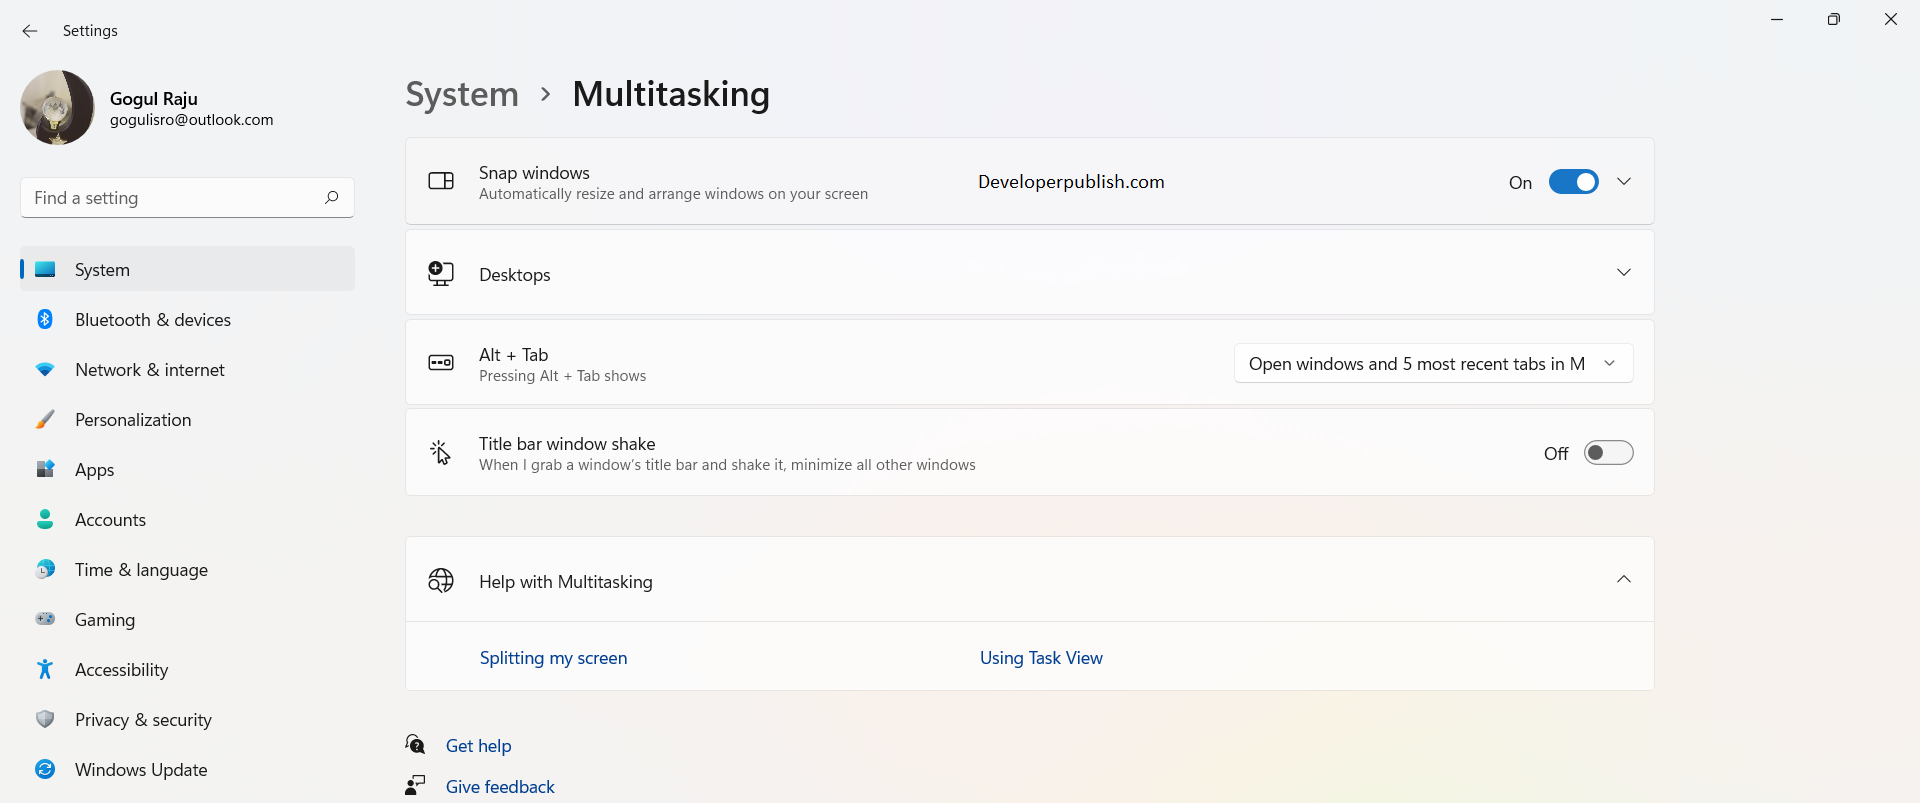
- Scroll down and click on the Multitasking to extend the multitasking window.
- Turn off the Snap Windows option.
Disable Windows Snap-in Control Panel
- Search for the Control Panel application in the search bar in the taskbar.
- Open the application and search for the Ease of Access Center in the Control Panel and open its menu.
- Scroll down and Click on Make the mouse easier to use.

- Look for the Make it easier to manage windows heading and check the Prevent windows from being automatically arranged option.

- Click Ok.