Modern Standby Mode in Windows 11
In this article, you will learn about Modern Standby Mode in Windows 11 and how to use it.
Modern Standby Mode in Windows 11
Modern standby mode in Windows 11 is the most efficient way of maintaining your battery life during standby mode. Unlike the previous standby modes (until Windows 8) which put the hardware to sleep while on standby mode, the modern standby mode has efficient power management and an instant ON feature. It is much similar to our modern smartphones, you can turn it on instantly. Even the internet connection is kept alive in modern standby mode. Now, let’s learn how to enable or disable this feature.
· Enable or Disable Modern Standby
· Commands to Disable Modern Standby
Enable or Disable Modern Standby in Windows 11
To disable Modern Standby in Windows 11 and Windows 10, do the following.
- Open the run menu by pressing the Windows + R key on the keyboard.
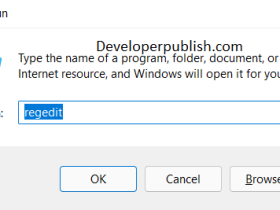
- Enter the command “regedit” to open the Registry Editor.
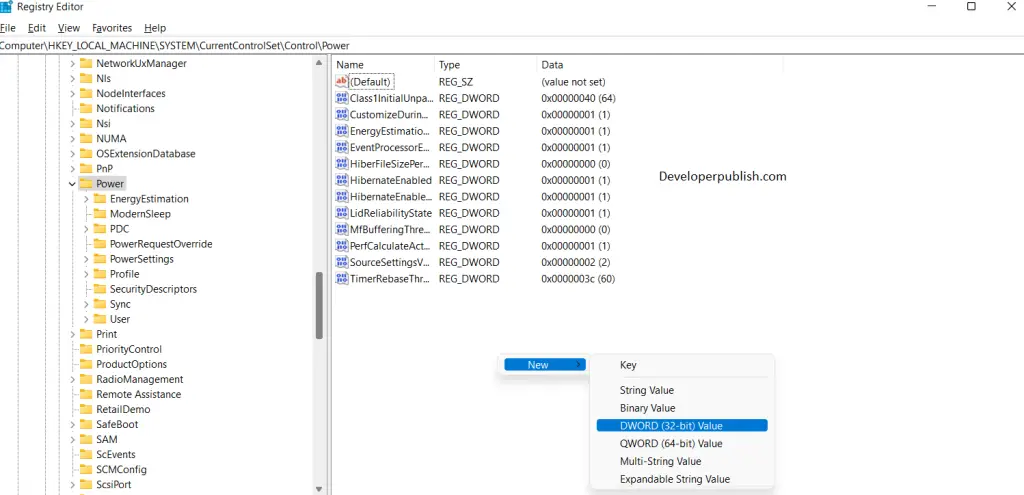
- Search for the following address in the registry editor:
HKEY_LOCAL_MACHINE\SYSTEM\CurrentControlSet\Control\Power
- Now, in the right pane, right-click select New and then DWORD.
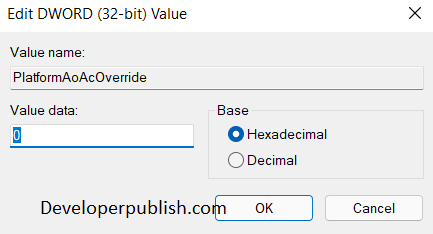
- Name the new file as PlatformAoAcOverride and enter the data value as 0 to disable and 1 to enable the modern standby.
- Save it and exit the registry.
- Now restart your system to apply the change.
Enable or disable modern standby through Command mode
- Open the command prompt from the start menu or open the Windows Terminal(Admin).
- Press Windows + X key and click on the Windows Terminal(Admin).
- Now press CTRL+Shift+2 to open the command prompt.
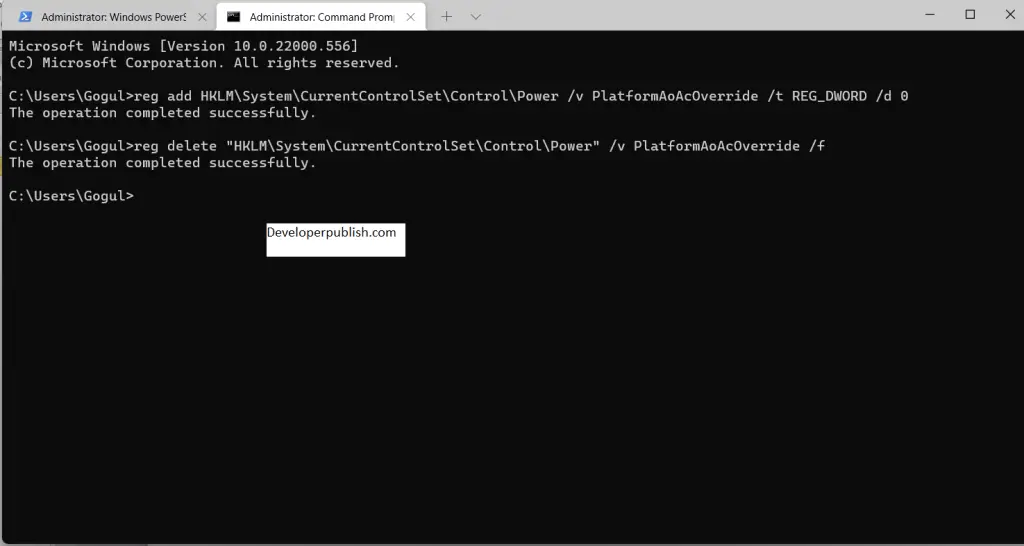
- Enter the following command
To Disable: reg add HKLM\System\CurrentControlSet\Control\Power /v PlatformAoAcOverride /t REG_DWORD /d 0.
To Enable: reg delete "HKLM\System\CurrentControlSet\Control\Power" /v PlatformAoAcOverride /f.
That’s how you enable/ disable the modern standby using the command prompt.



Leave a Review