How to Optimize and Defrag Storage Drives in Windows 11?
In this article, you will learn how to optimize and defrag storage devices in your Windows 11 PC.
How to Optimize and Defrag Storage Drives in Windows 11?
Optimizing your storage facilities will make your PC run smoother and boot up faster. Defrag is the process of locating and consolidating fragmented files on local HDD drives. To optimize and defrag storage devices device in Windows 11, sign in as the administrator.
In windows 11, optimisation and defrag can be done in the following methods :
- Using Settings
- Through the File Explorer
- Using PowerShell
Using Settings
- Open the settings application.
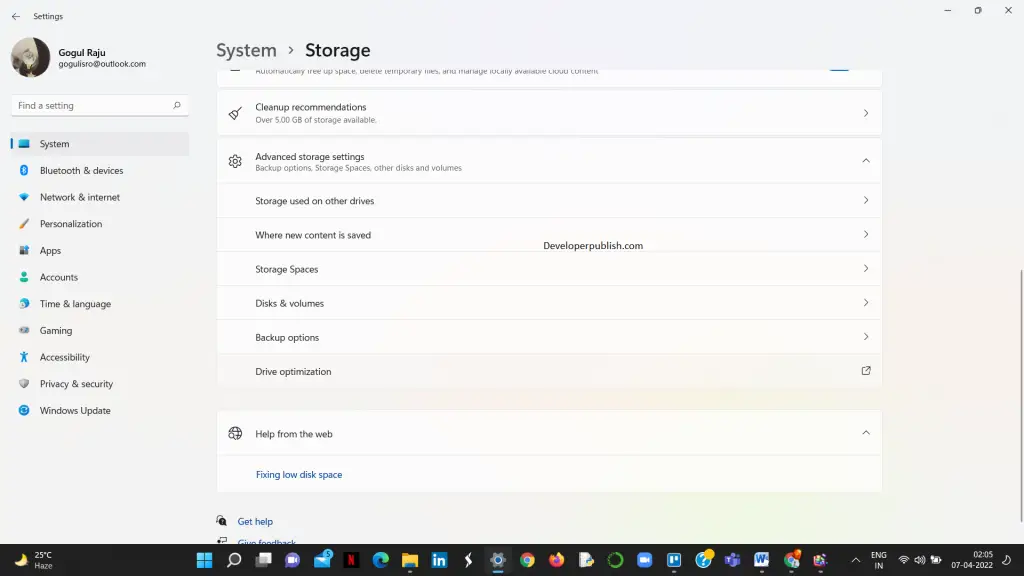
- Under the system settings, click on the Storage option.
- Now click on Advanced storage settings to expand it, and then click on Drive optimization.
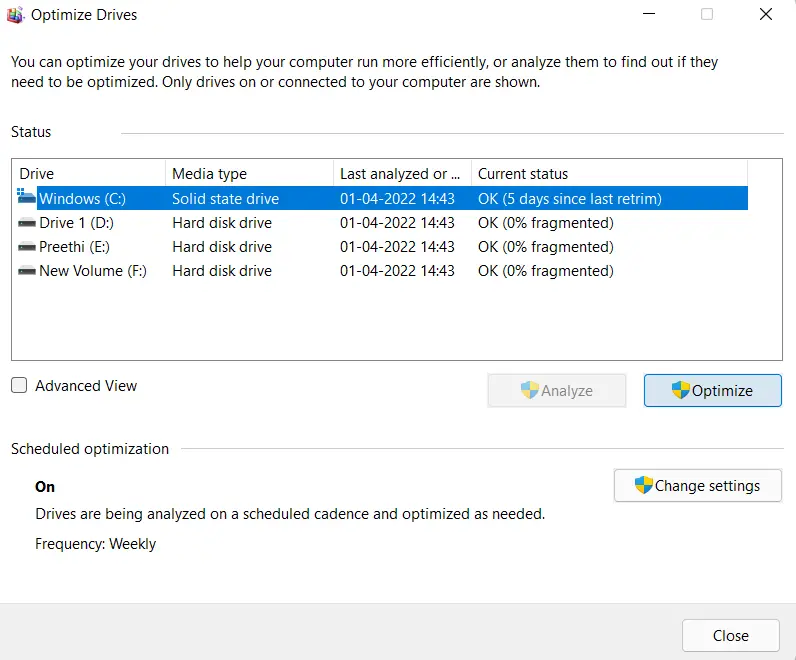
- In the Optimize Drives section, select the required drive.
- Click on the Optimize button.
- Checking Advanced View will list all volumes including hidden volumes.
- If you want to analyse the drive, click on the Analyze button.
Through the File Explorer
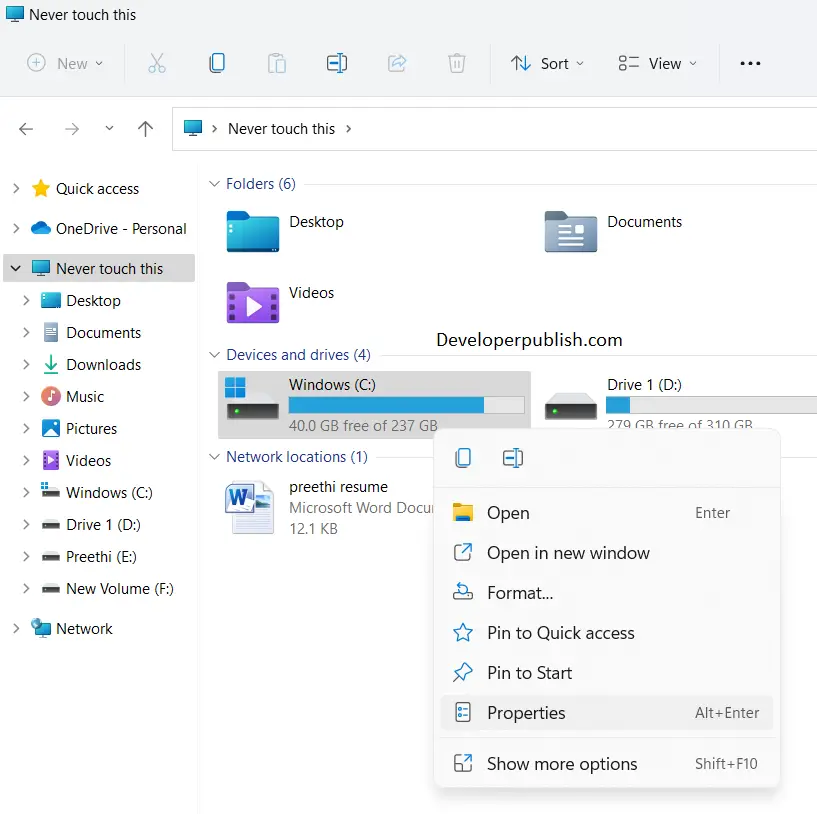
- Open the File Explorer or press the Windows + E key on the keyboard.
- Move to the This Pc section and right-click on a drive.
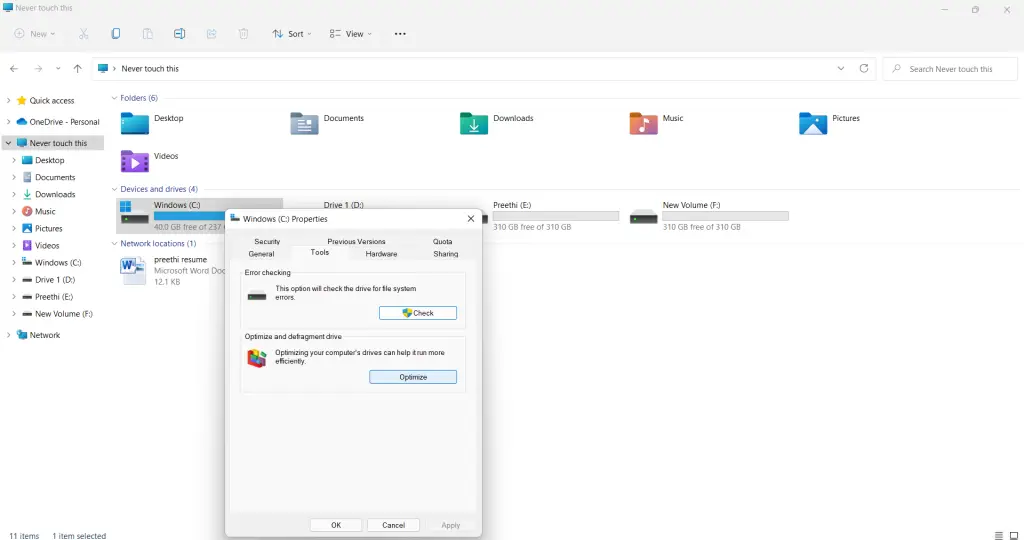
- Click on Properties and then on the Tools tab.
- Now, click on the Optimize option, and click OK.
Using PowerShell
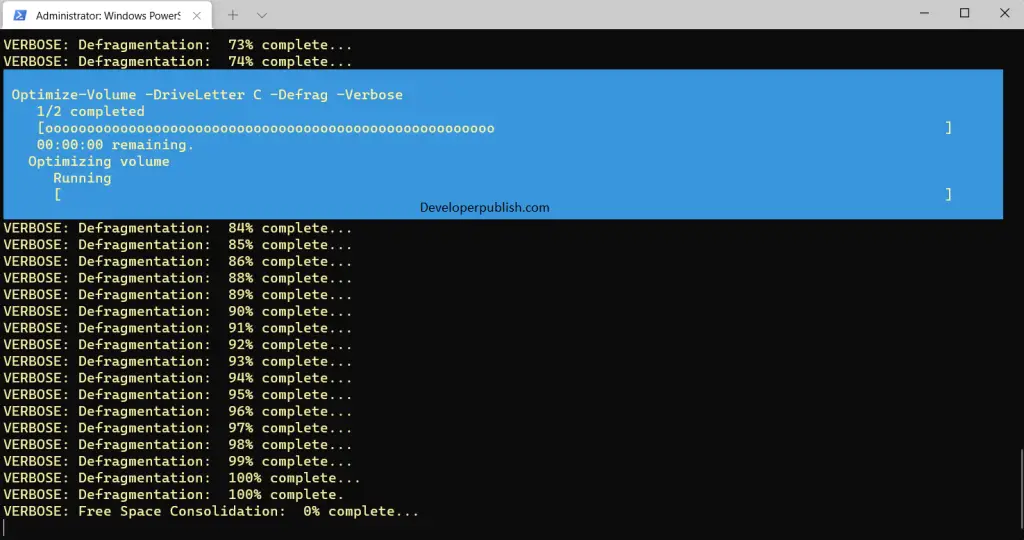
- Search for the Windows PowerShell terminal (admin) by right-clicking on the Start menu.
- Type the following command and press Enter.
- Optimize-Volume -DriveLetter <required drive letter> -Verbose
- For example, if you are defragging drive c, enter
- Optimize-Volume -DriveLetter C -Defrag -Verbose
- Once finished, close the Windows power shell and exit the application.



Leave a Review