Connecting to Wi-Fi is essential to access the internet and stay connected. With Windows 11, the process of connecting to Wi-Fi has been made more user-friendly and efficient. In this blog post, we’ll discuss how to connect to new Wi-Fi in Windows 11.
How to connect to new Wi-Fi in Windows 11?
To connect to a new Wi-Fi network in Windows 11, follow these steps:
- Click on the “Wi-Fi” icon in the taskbar on the right side of the screen.

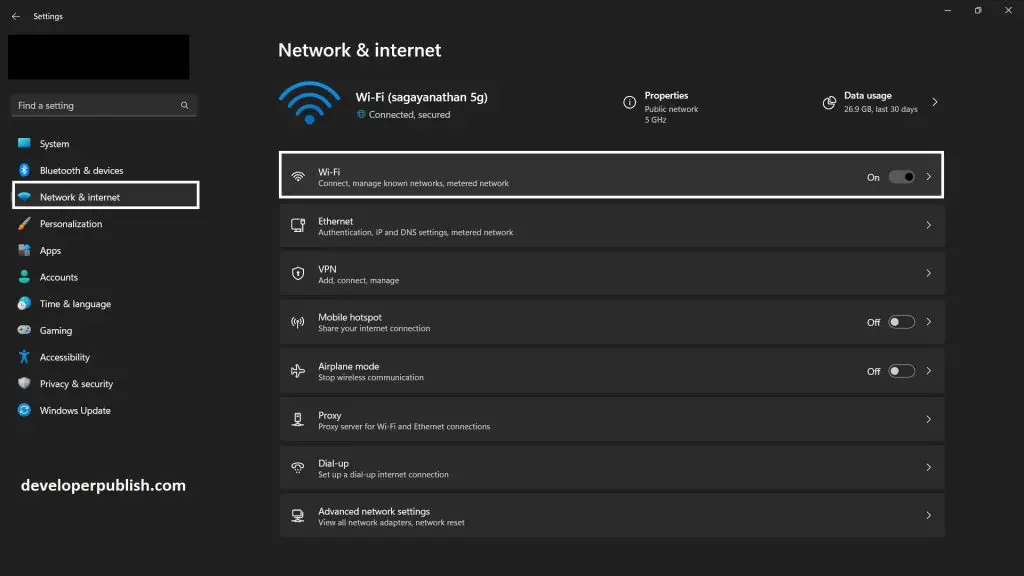
- Click on “Network & Internet settings” on the left-hand side.
- In the Network & Internet settings, select “Wi-Fi”.
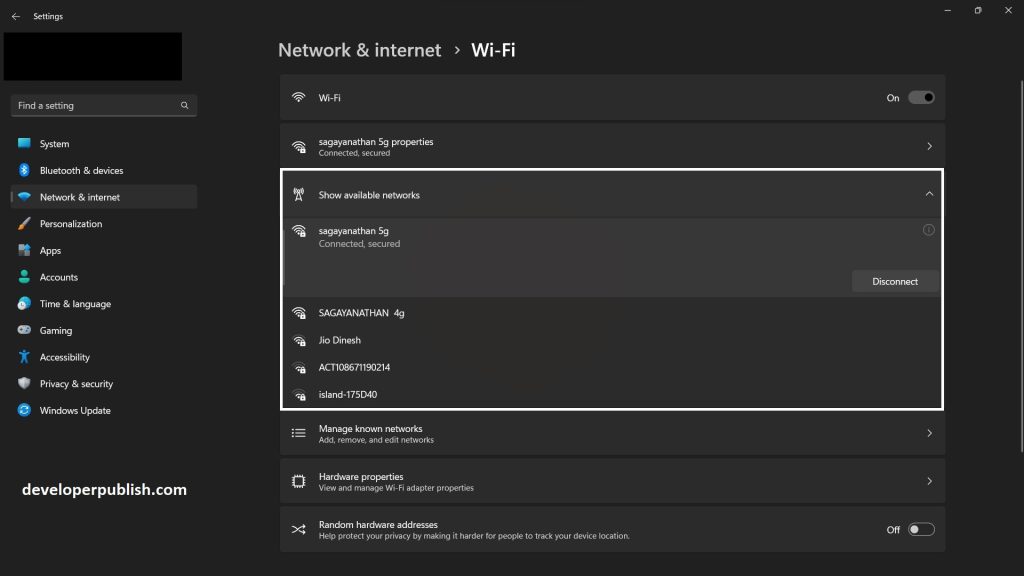
- Click on “Show available networks” to see a list of Wi-Fi networks in range.
- Select the Wi-Fi network you want to connect to and click “Connect.”
- If the network is secured with a password, enter the password when prompted and click “Next.”
- Windows 11 will now connect to the Wi-Fi network.
- Once connected, you should see the Wi-Fi icon in the taskbar change from an empty icon to a solid icon indicating a connection.
That’s it! You’re now connected to the new Wi-Fi network in Windows 11.
Connecting to Wi-Fi in Windows 11 is a simple process that can be done in a few clicks. Whether you prefer using the Wi-Fi icon in the taskbar, the Settings app, or the Control Panel, all three methods are effective in connecting to Wi-Fi. We hope this article has helped you learn how to connect to new Wi-Fi in Windows 11.