How to Change Network Location to Private, Public, or Domain in Windows 11?
Windows 11 comes with a powerful set of features that can be configured to fit your network preferences. One such feature is the ability to change the network location to either private, public, or domain. By default, Windows 11 detects the type of network you are connected to and sets it to public or private, depending on the configuration. In some cases, you may want to change the network location to meet your specific needs. In this blog post, we will show you how to change network location in Windows 11.
How to Change Network Location to Private, Public, or Domain in Windows 11?
To change the network location in Windows 11, follow these steps:
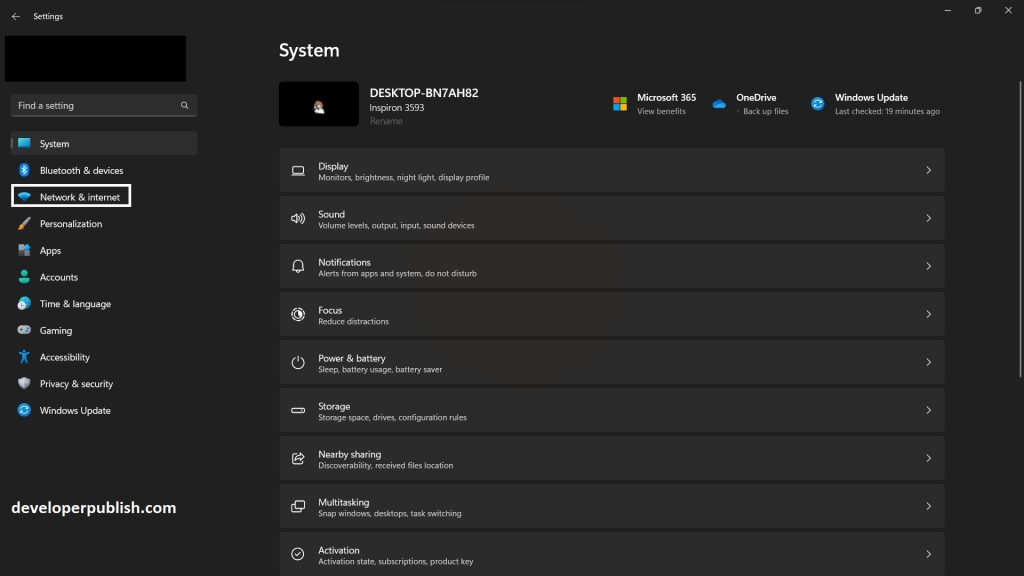
- Click on the Start menu and then click on the “Settings” icon (gear icon).
- In the Settings window, click on “Network & internet”.
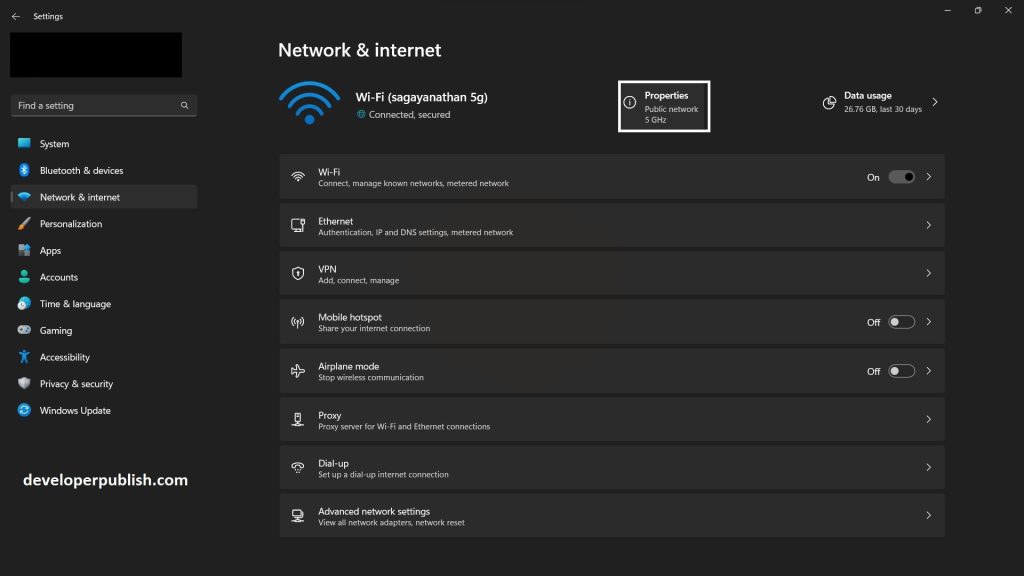
- Click on the “Properties” option from the page.
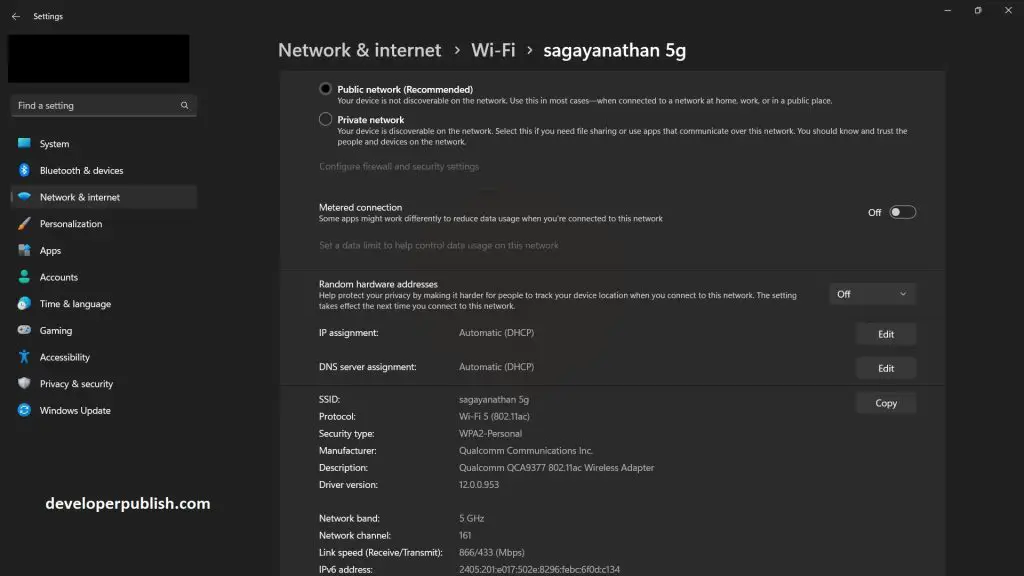
- Under Network profile, select on network location as “Public” or “Private”.
- Once you’ve made your selection, close the Settings window.
Note: Changing the network location may affect the level of security and sharing options available on your computer. Choose the appropriate network location based on your needs and the security policies in place on your network.
Changing the network location in Windows 11 is a simple process that can be done in a few steps. By changing the network location to private, public, or domain, you can ensure your device is secure, access network resources, and configure applications to work correctly. Remember that changing the network location can affect how your device interacts with the network, so choosing the right place based on your needs is essential.



Leave a Review