How to Change Mouse Pointer Style, Color, and Size in Windows 11?
The mouse pointer is an essential component of your computer’s user interface. Windows 11 offers a range of options to customize the appearance of your mouse pointer, including style, color, and size. In this blog post, we’ll show you how to change the mouse pointer style, color, and size in Windows 11.
How to Change Mouse Pointer Style, Color, and Size in Windows 11?
To change the mouse pointer style, color, and size in Windows 11, follow these steps:
- Open the Settings app by pressing the Windows key + I or clicking on the Start menu and selecting “Settings.”

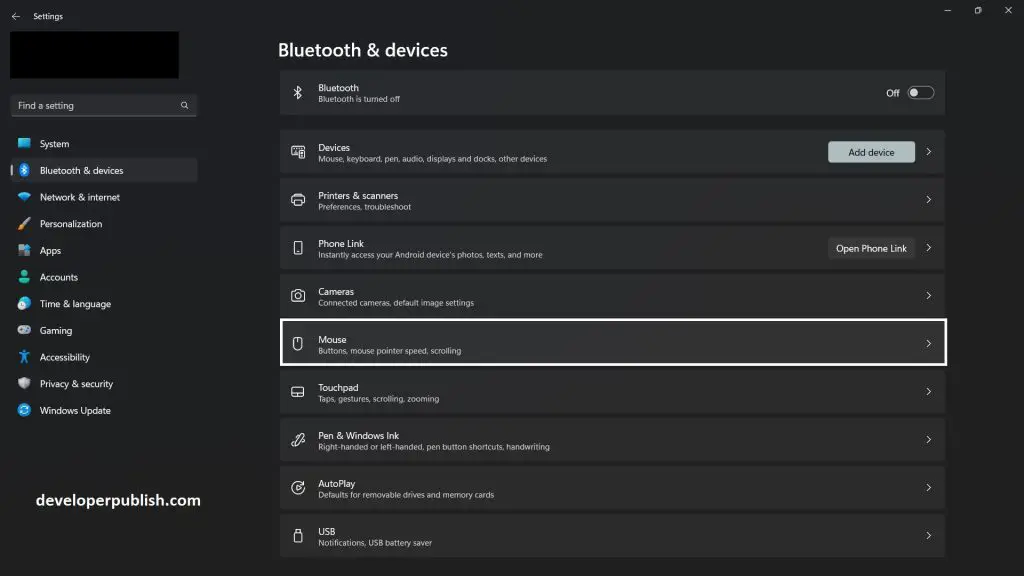
- Click on “Bluetooth & Devices” and then “Mouse.”

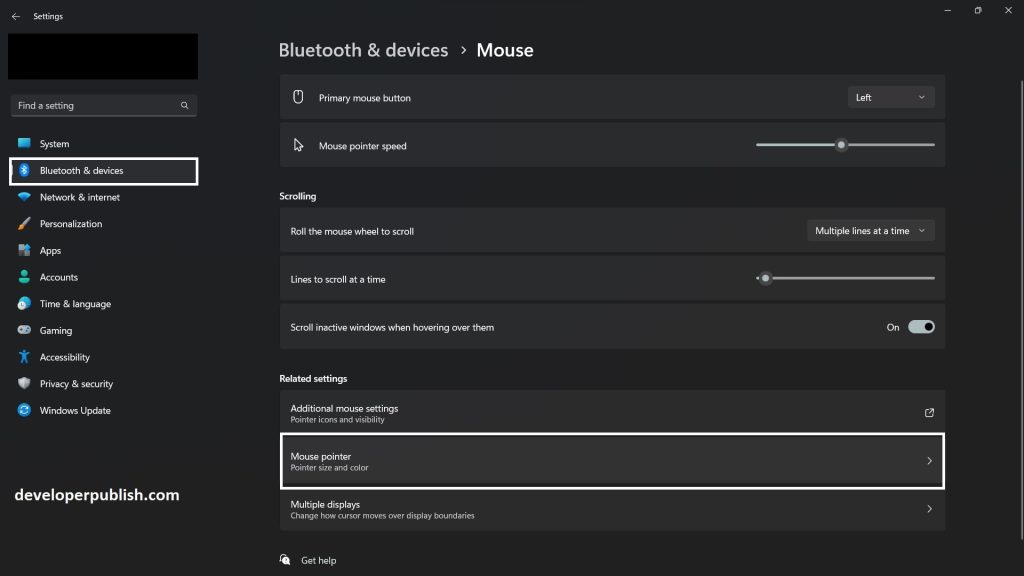
- Press on “Mouse Pointer”, to adjust the size, color and style.

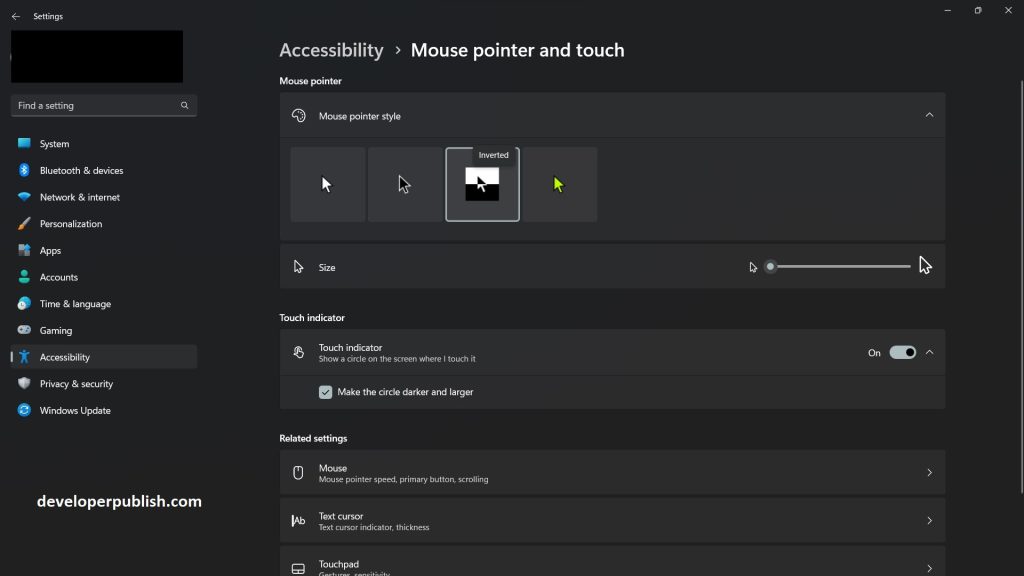
- Under “Mouse Pointer,” use the slider to adjust the size of the mouse pointer.
- Under “Pointer color,” choose a color for your mouse pointer by selecting one of the available colors.
- Under “Pointer style,” choose a new mouse pointer style by selecting one of the available options.

- Once you have made your changes, close the Settings app, and your new mouse pointer settings will take effect.
Note that some mouse pointers may not be compatible with all applications, and some applications may override your settings with their custom mouse pointer.
Customizing the appearance of your mouse pointer in Windows 11 is a quick and easy process that can be done in just a few clicks. By following the steps above, you can change the mouse pointer style, color, and size to make it more visible and easier to use. With a range of options available, you can find one that matches your preferences and needs. Give it a try and see how you can enhance your Windows 11 experience!


Leave a Review