This post demonstrates how to change the margins of your document in Microsoft Word.
Margins are the area between the content and edges of the page. It helps to identify the beginning and end of the text on a page.
How to Change Margins in Word document?
Word automatically sets the margins as 1 inch on your page on all the sides.
If you want to change the margins then do the following steps,
- Click the Margins button in the page setup group on the Layout tab.
- The pop-down menu list of predefined margins will display in your window as shown below

3. You can select the one from the list or you can select the Custom Margins.
Customizing Margins:
You can customize the margins according to your requirements using Margins Tab in the Page Setup dialogue box.
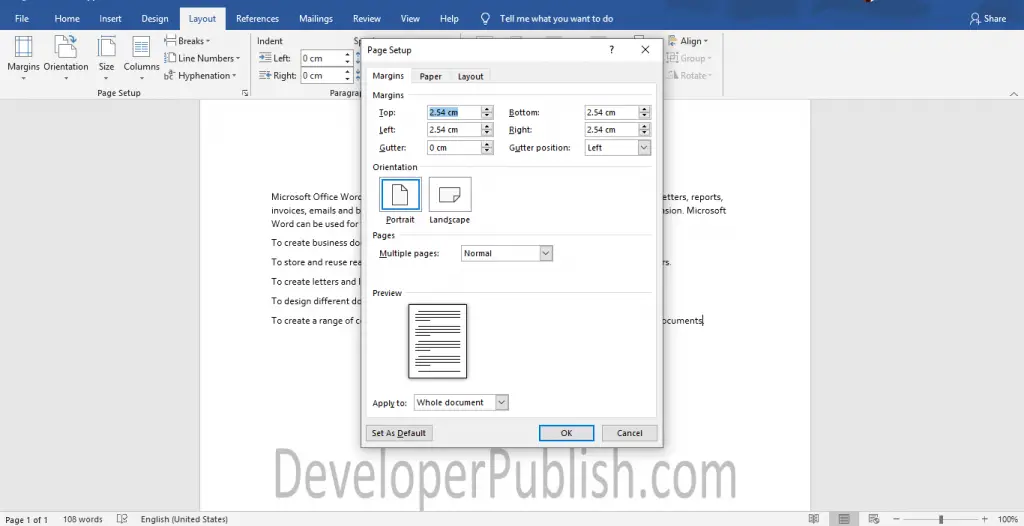
- Now, You can change the top, bottom, left, and right margins by entering the values or using the up and down arrows to the corresponding boxes in the dialog box.
- You can able to set these margins as your default margins by selecting the Set As Default button on the bottom of the dialogue box.
If you want to bind your pages or you need extra spaces on the edges, then use the Gutter box and Gutter position box.