Different ways to Turn On/Off Network Discovery in Windows 11
In this article you’ll learn Different ways to Turn On/Off Network Discovery in Windows 11. First, let’s get a better understanding on What is the use of Network Discovery in Windows 11
What is the use of Network Discovery in Windows 11?
Network discovery in Windows 11 is a feature that allows your computer to find and communicate with other devices on the network. It can be useful in a home or office network environment where you want to share files, printers, or other resources. However, there may be times when you need to turn off network discovery for security or privacy reasons.
Different ways to Turn On/Off Network Discovery in Windows 11
Here are the different ways to turn on/off network discovery in Windows 11:
Method 1: Using the Settings App
- Open the Settings app by pressing Windows key + I on your keyboard.
- Click on the “Network & internet” option.
- Now click on Advanced network settings for further process.
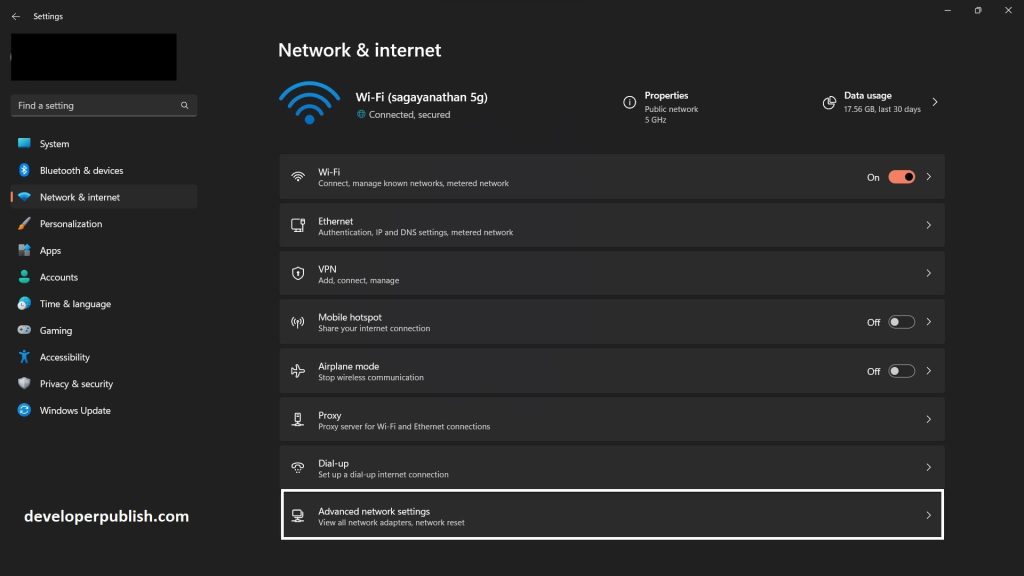
- After opening the Network & Internet page, then go to Advanced sharing settings under More settings option.
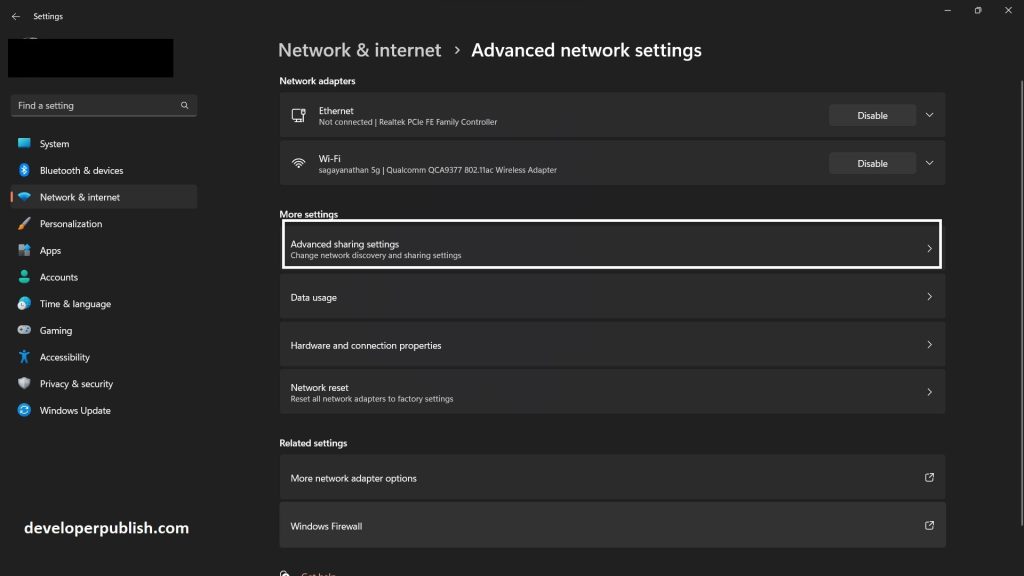
- Click on the “Network profile” section.
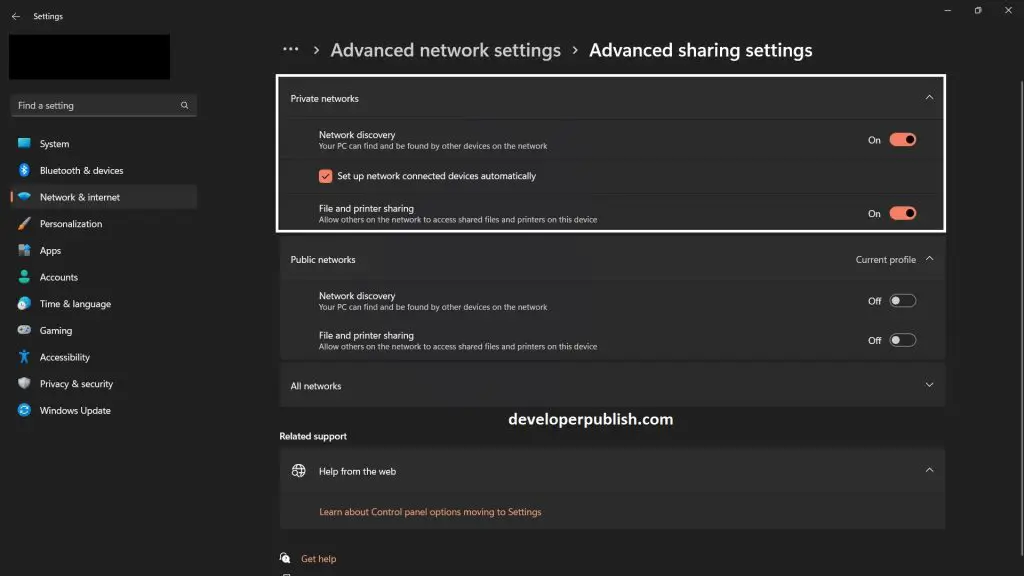
- Under “Network discovery,” toggle the switch to turn it on or off.
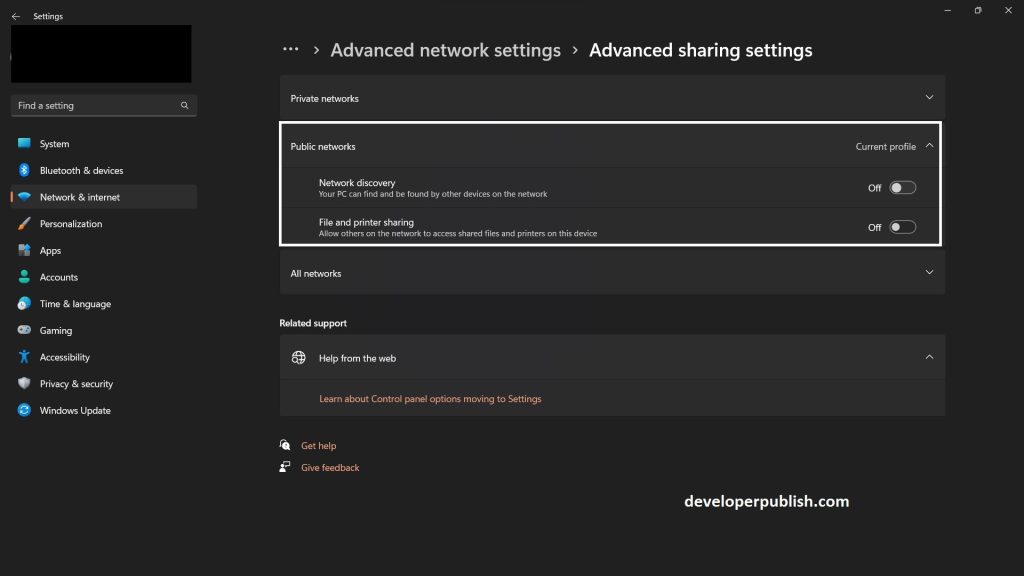
- Or you can also do the same as mentioned above by going to Private networks under the Advanced sharing settings, and enable the network discovery.
Method 2: Using the Control Panel
- Press F9 on your keyboard or use the search bar to look for control panel.
- Click on “Control Panel” from the pop-up menu.
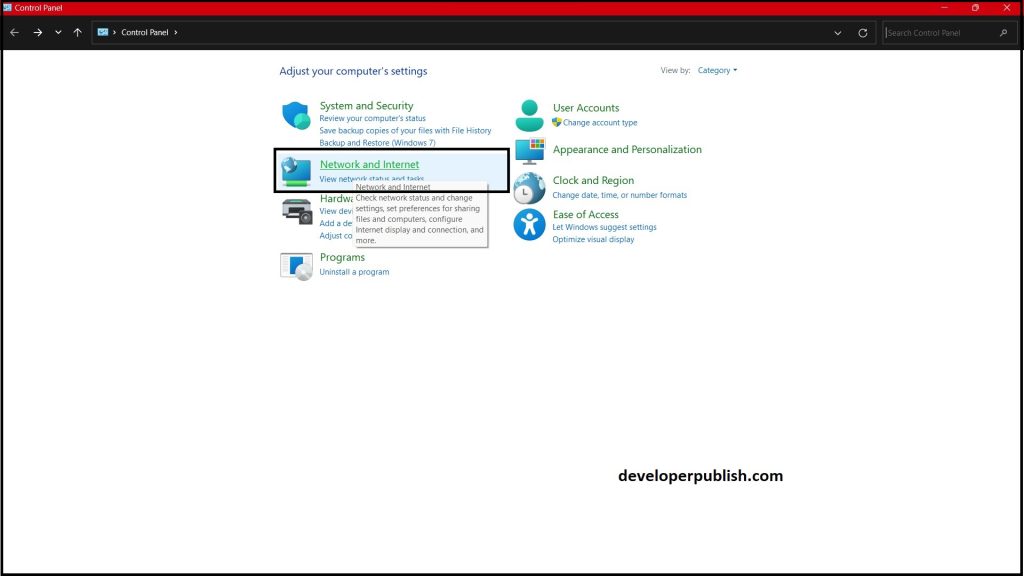
- Click on “Network and Sharing Center.”
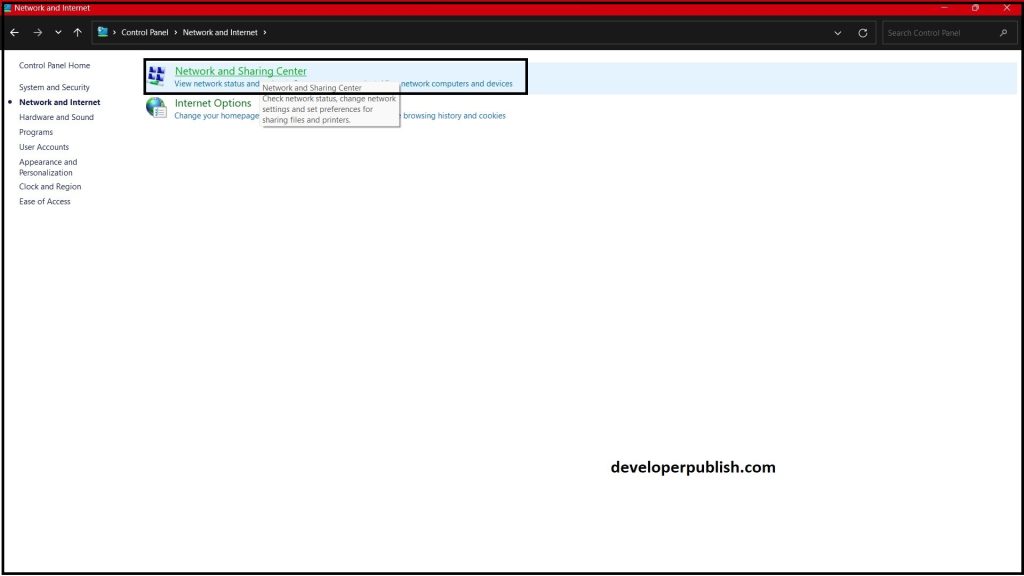
- Click on “Change advanced sharing settings” in the left-hand menu.
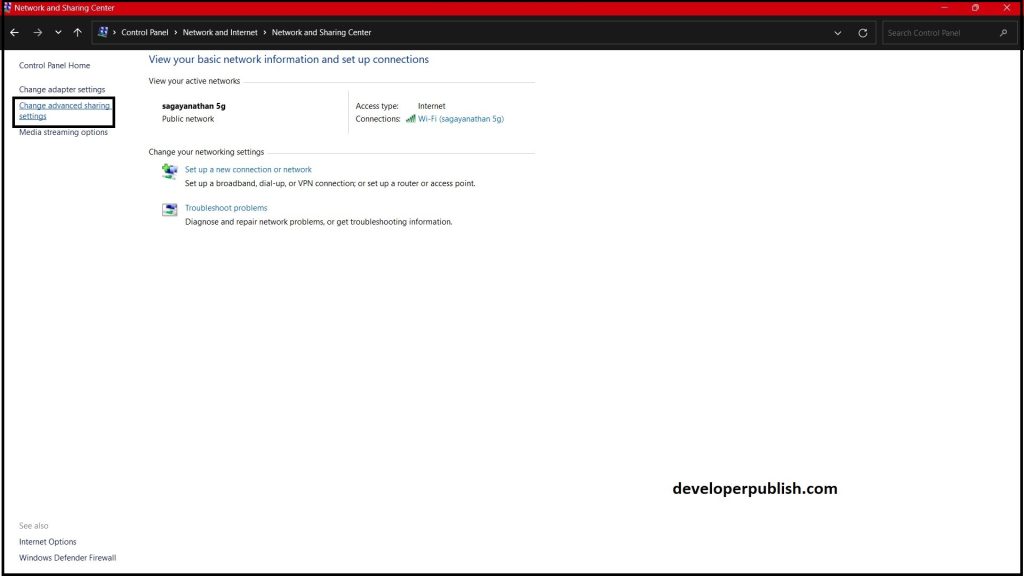
- Expand the “Private” network profile section.
- Under “Network discovery,” select “Turn on network discovery” or “Turn off network discovery.”
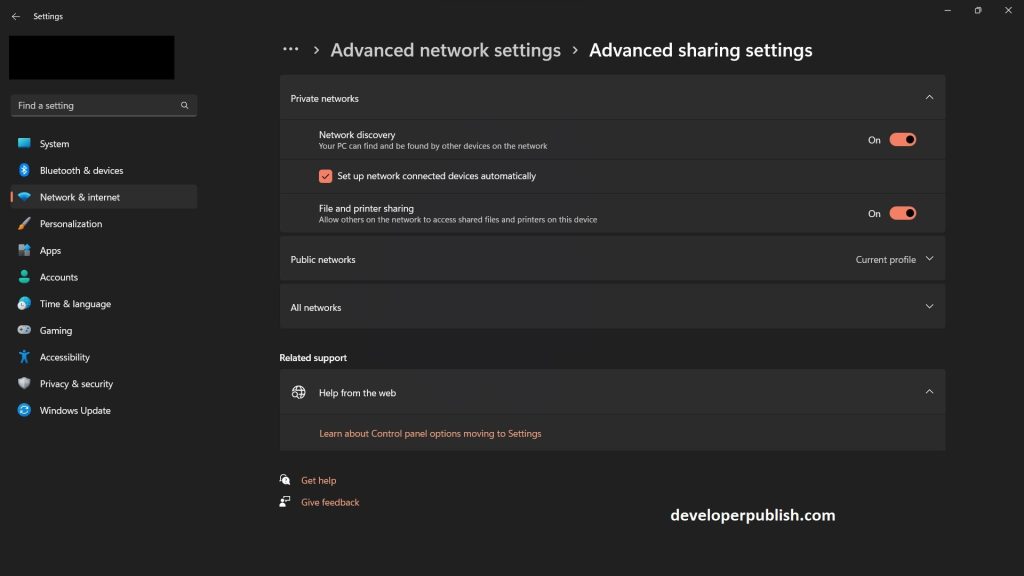
- Now you can enable or disable the Network Discovery in Windows 11.
Note: The above methods require administrator access to your computer. If you’re on a shared computer or don’t have administrative access, you may not be able to perform these steps.




Leave a Review