Different Ways to Change Power Button Action in Windows 11
The power button on your Windows 11 device is an essential feature that allows you to control the power settings of your device. By default, pressing the power button will put your device into a sleep state. However, you can change this action to suit your preferences. Here are some different ways you can change the power button action in Windows 11.
Different Ways to Change Power Button Action in Windows 11
In Windows 11, there are several ways to change the power button action, depending on your preferences and needs. Here are a few options:
Using Control Panel:
- Open Control Panel by typing “Control Panel” in the search bar and clicking on the app.
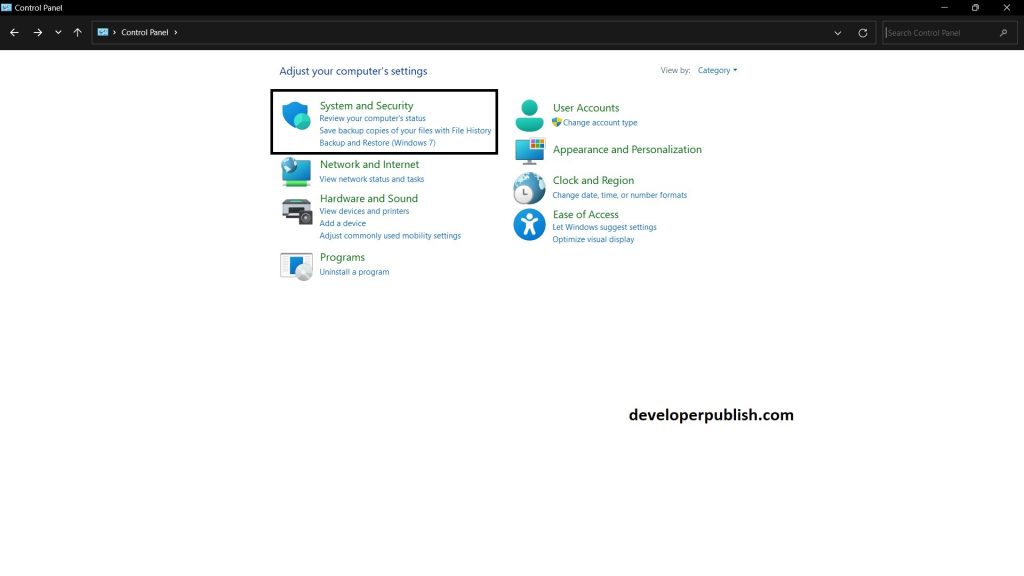
- Click on “System and Security” option.
- Click on “Power Options.”
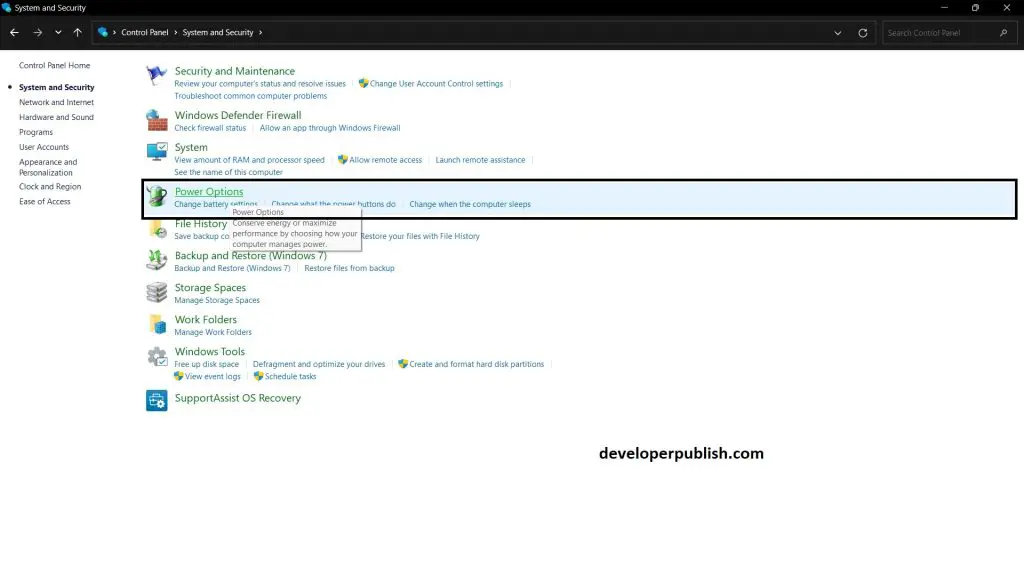
- In the Power Options window, click on “Choose what the power buttons do”.
- Select your desired action from the drop-down menus next to “When I press the power button” and “When I press the sleep button.”
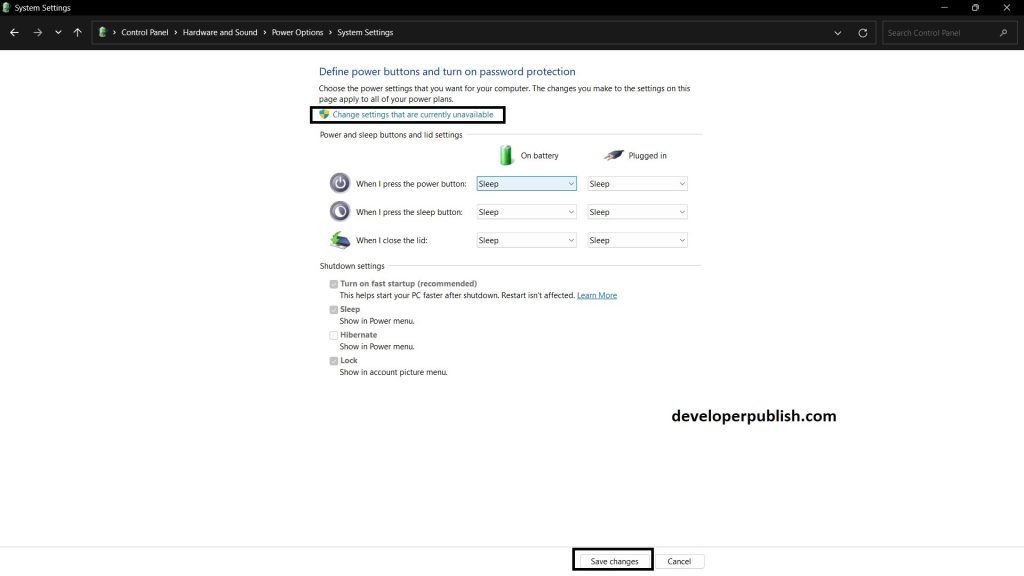
- Click on “Save changes” to apply your settings.
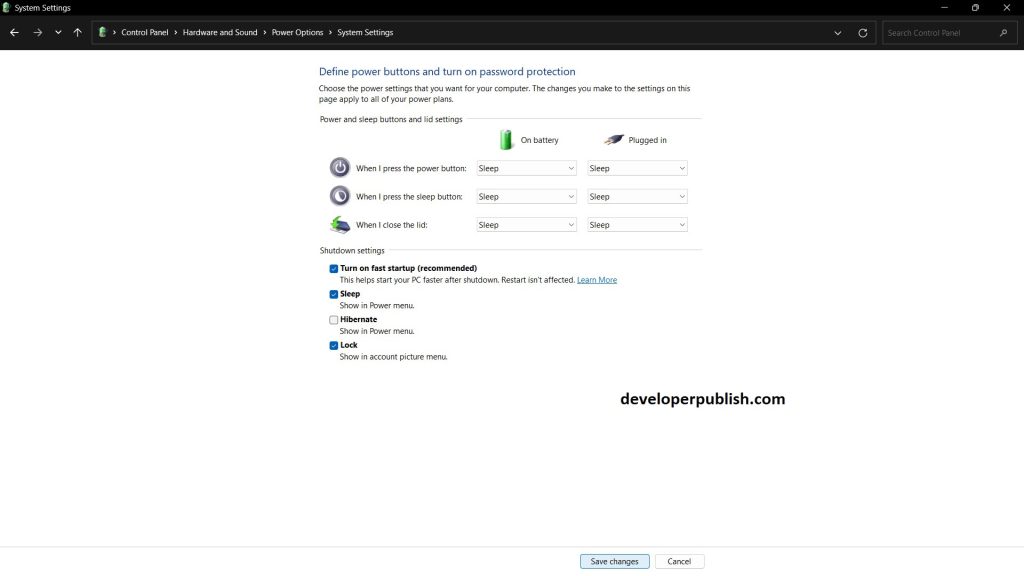
- That’s now you can Change Power Button Action in Windows 11.
Using Registry Editor:
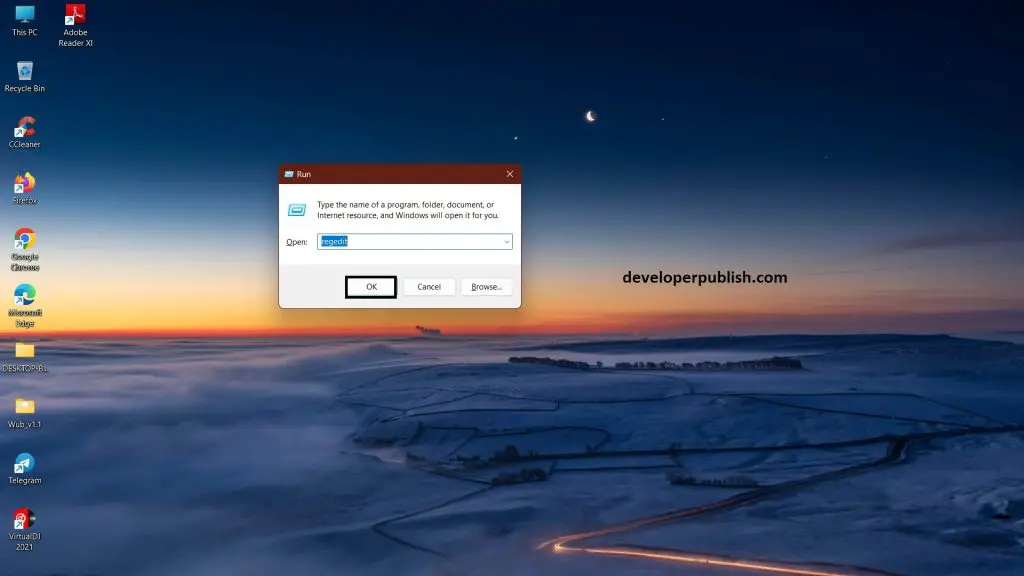
- Press the Windows key + R to open the Run dialog box.
- Type “regedit” and press Enter.
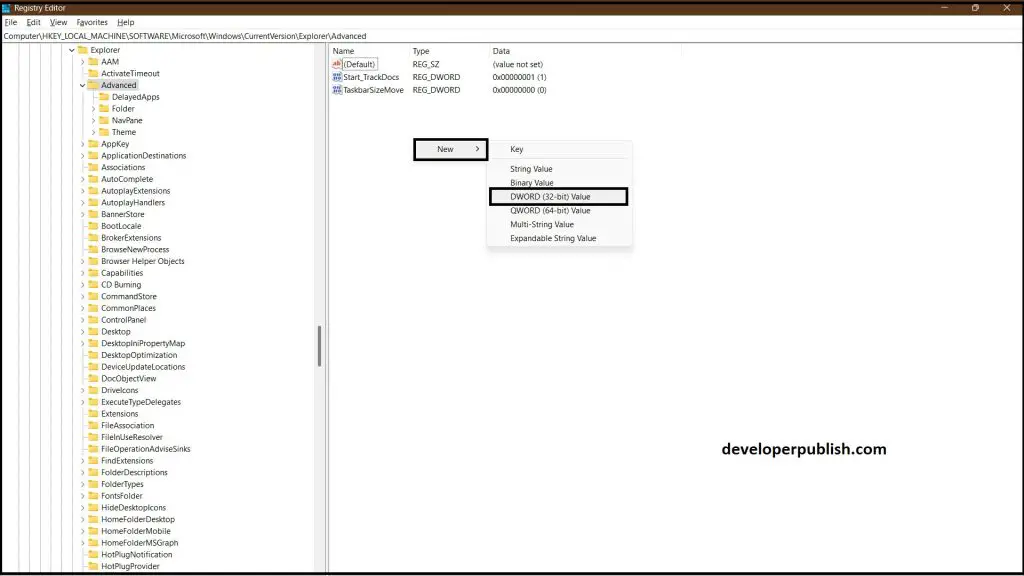
- Navigate to the following key: HKEY_LOCAL_MACHINE\SOFTWARE\Microsoft\Windows\CurrentVersion\Explorer\Advanced.
- Right-click on a space in the right-hand pane and select New > DWORD (32-bit) Value.
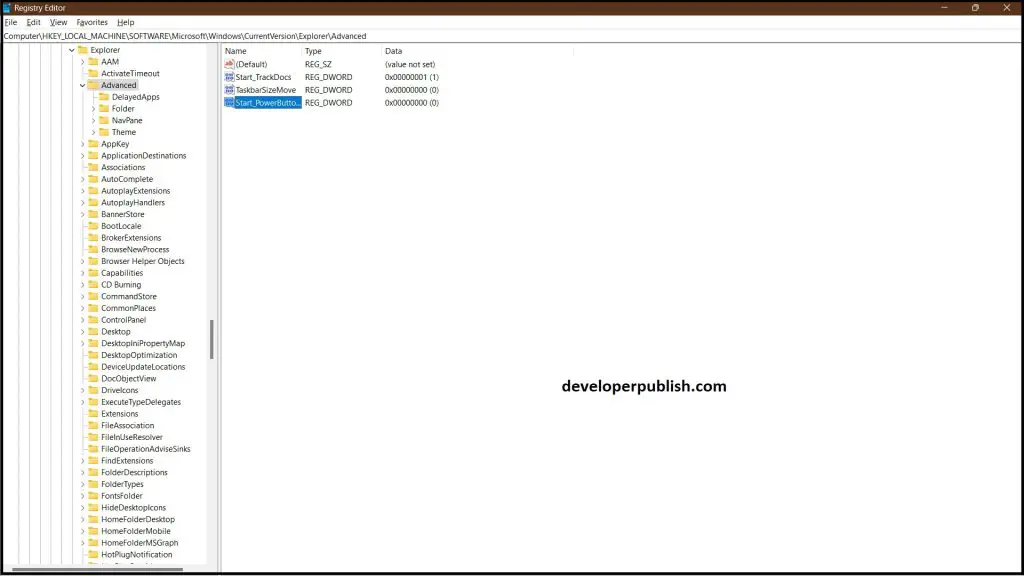
- Name the new value “Start_PowerButtonAction” (without the quotes).
- Double-click on the new value and enter one of the following values in the Value data field, depending on the action you want:
- 0 = Do nothing
- 1 = Sleep
- 2 = Hibernate
- 3 = Shut down
- Click OK and close the Registry Editor.
In conclusion, changing the power button action in Windows 11 can be done in several ways, depending on your preferences and level of expertise. Whether you choose to use the Power & Sleep settings, Control Panel, Group Policy Editor, or Registry Editor, it’s essential to select the action that works best for you and your device.



Leave a Review