Converting Text to Speech with Speak Cells in Microsoft Excel
Text to Speech and Speech to Text are one of the innovative ways to interact with your computer and perform certain things. Did you know that the this functionality existed in Microsoft Excel ?.
This blog post will explain the how the users can use this functionality. Note that this blog post covers Excel 2013 but the same feature is available in Excel 2016 and Excel 2019 too.
Converting text to speech with Speak Cells in Microsoft Excel 2013
To use the this feature, the Speak buttons has to be enabled in Excel. This is by default not shown in excel. Follow the below steps to enable it.
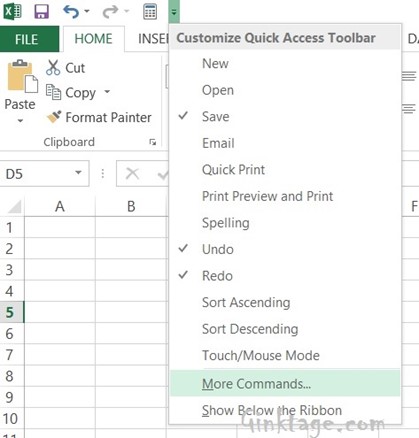
1. Click the “Quick Access Toolbar” and select “Customize Quick Access Toolbar” and then click more commands.
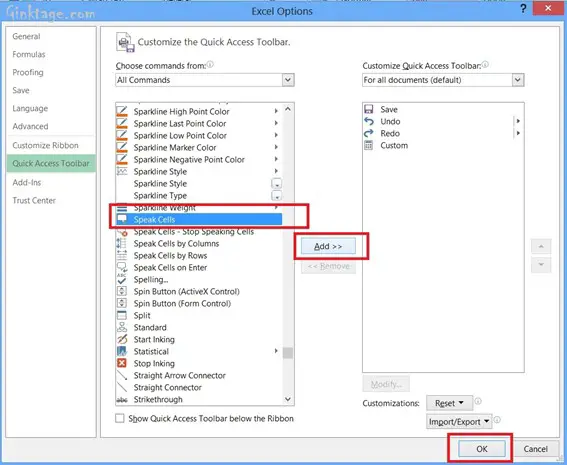
2. In the Customize the Quick Access Toolbar, select “All Commands” in the “Choose commands from” DropDownList.
3. Scroll down and then select “Speak Cells” command and click “Add” button and then click “OK” button.
4. This will add the speech icon in the “Quick Access Toolbar”.
5. Now, type a text in a cell, select the cell and click the speech icon. You should hear the system speaking the content of the selected cell.


Leave a Review