Protect Workbook with Password in Excel
This post explains the Protect Workbook feature in Microsoft Excel and how you can use it to lock an entire workbook.
How to Protect Workbook with Password in Microsoft Excel?
Microsoft Excel allows the user to lock the entire workbook to protect the data in the sheets while sharing.
To do so follow the below steps:
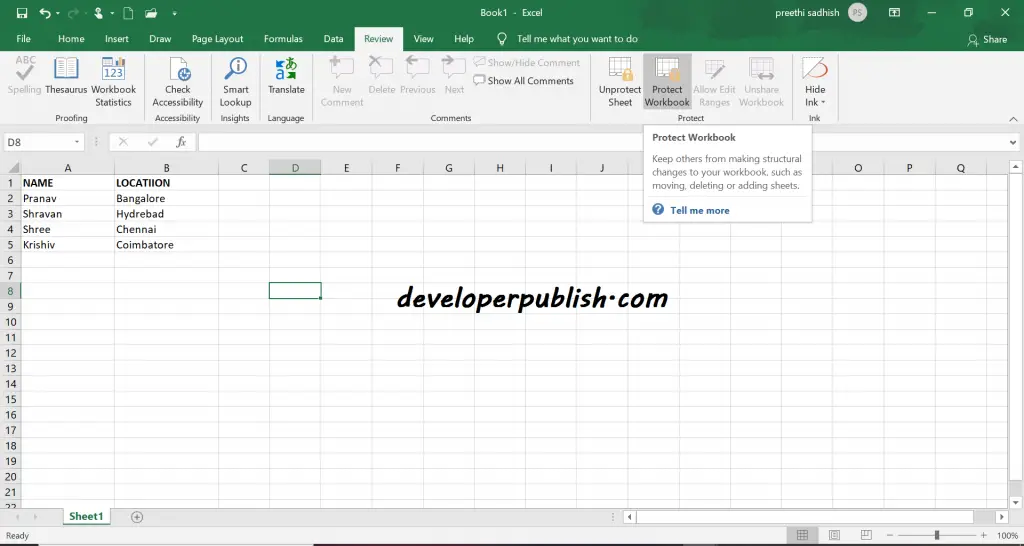
- Select on the Review tab and then select Protect Workbook.
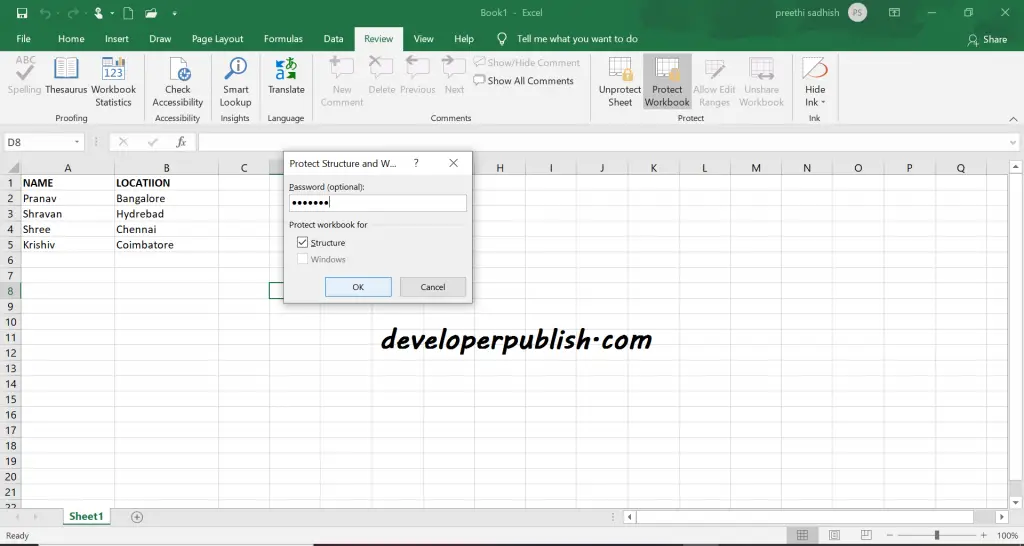
- A dialog box appears asking for a password, enter the password of your choice.
- Check Structure
- Click OK.
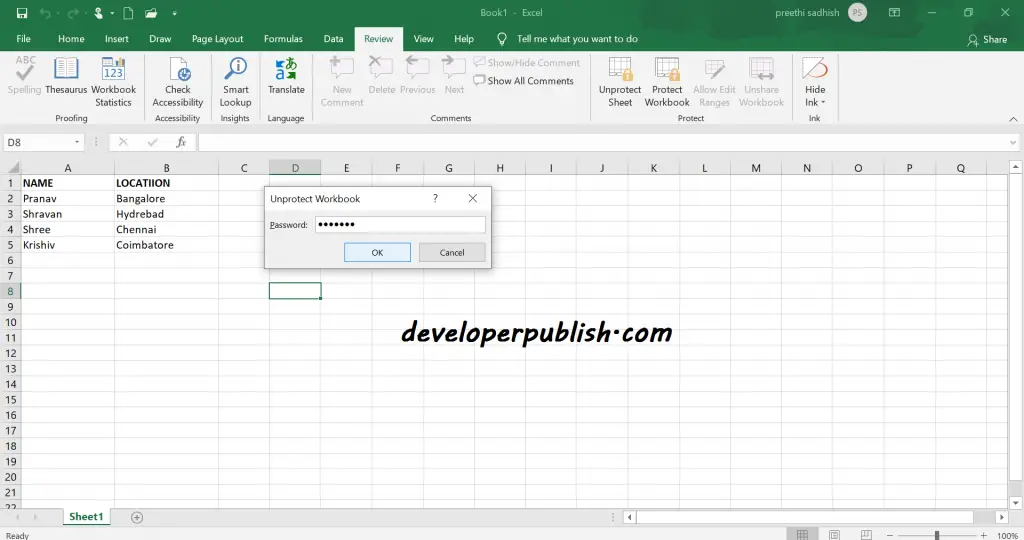
- Reenter password for confirmation and click OK.
Now the workbook is protected and the users cannot copy, insert, delete, rename, move, hide or unhide worksheets anymore.
How to Unprotect Workbook in Excel ?
To unprotect the workbook click on Protect Workbook and give the password and it will be unlocked.



Leave a Review