How to Record and Insert Audio to Presentation in Microsoft PowerPoint 2013?
This article will explain how to record and then insert audio to the presentation in Microsoft PowerPoint 2013.
Not just the exiting audio file, you can also record the audio and then insert it to your presentation easily. Follow the below steps.
How to Record and Insert Audio to Presentation in Microsoft PowerPoint 2013?
1. Open the presentation in Microsoft PowerPoint 2013.
2. Navigate to the slide where you want the audio to be played.
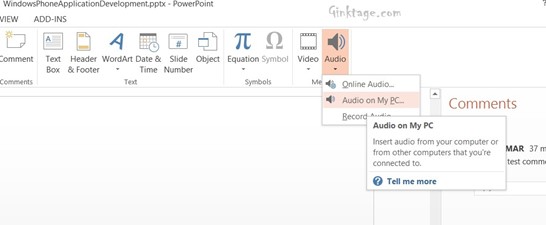
3. Click the “INSERT” tab and then click “Audio” DropDownList and select “Record Audio” from the list.
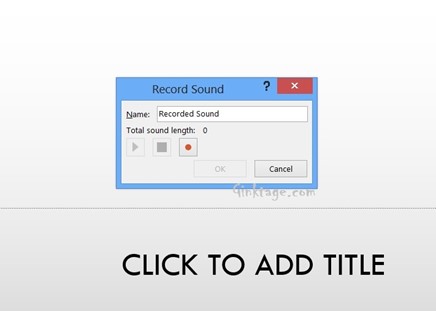
4. This will display the “Record Sound” Dialog where you can start recording the sound by click the “Play” button. Once done with the recording of the sound, click “OK” button.
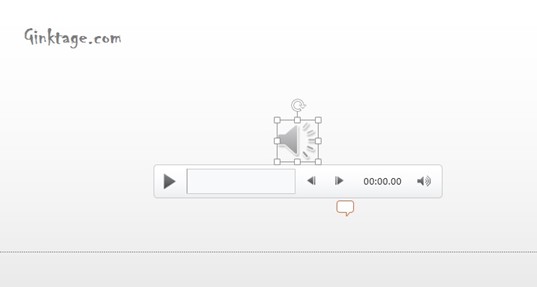
5. This will paste the audio bar to your presentation. This audio bar includes Play, Pause button and with few other settings.
5. Select the Audio bar and then Navigate to the “PLAYBACK” tab in the “Audio Tools”. You can then set the start mode on when the audio to be played like “OnClick” etc.
6. Save the presentation file and you are done with recording and inserting the audio file to your presentation.


Leave a Review