How to Insert Watermark in Microsoft Word?
This post helps you in inserting a watermark to your document in Microsoft Word.
Watermark is a graphic image or text that appears as the background in your Word document. Inserting Watermark in your Word document denotes the ownership so that you can able to prevent your content from theft.
How to Insert Watermark in Microsoft Word?
Let’s see, how to insert the watermarks in your Word document using the following steps:
- Go to the Design tab.
- Click the Watermark button in the Page Background group.
- A Pop-down menu will appear on your screen as in the below image.

- Select a Built-in watermark for your document by clicking on it.
Customizing Watermark:
- You can also able to customize the Watermark for your requirements.
- Select the Custom Watermark from the menu.
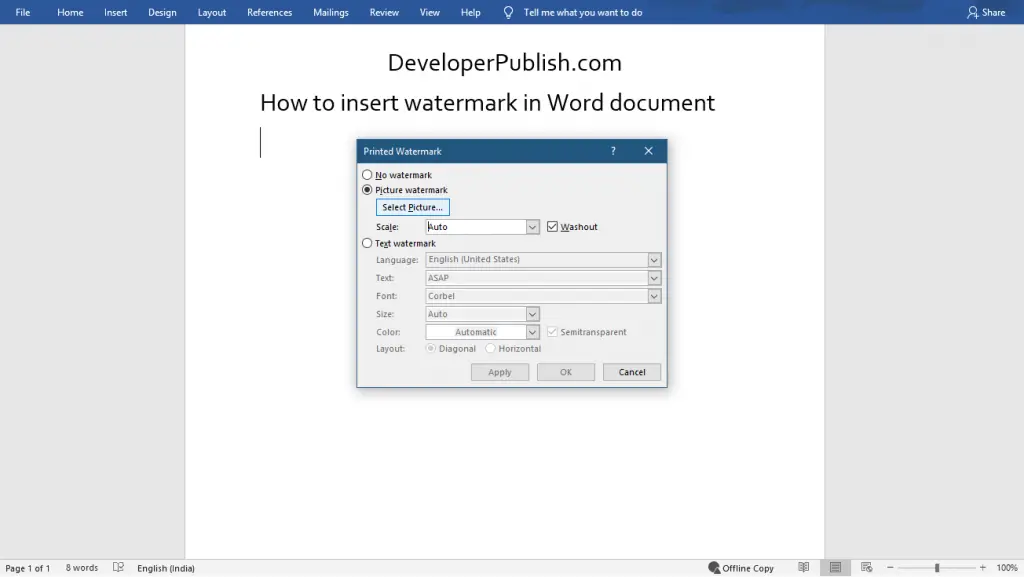
- The Printed Watermark dialogue box will appear on your screen as in the below picture.

- Now, select the Picture watermark option to insert the picture as your watermark.
- Select your desired picture from the file or drive or Bing.
- Select the Text Watermark option to insert a text as your watermark.
- Select the desired language, text, font, size, color, and layout.
- Click the Apply button for a preview or click the Ok button to insert the watermark.


In the above images, you can able to see that the Watermarks are applied in the Word document.
To remove the watermark, select the Remove Watermark option from the watermark drop-down list.


Leave a Review