How to Enable or Disable Search Indexing in Windows 11?
Search indexing is a feature in Windows 11 that helps users quickly search for files and folders on their computer. It works by creating an index of all the files and folders on your computer and storing this information in a database. While search indexing can be useful, it can also slow down your computer’s performance. In this blog post, we’ll show you how to enable or disable search indexing in Windows 11.
How to Enable or Disable Search Indexing in Windows 11?
To enable or disable search indexing in Windows 11, follow these steps:
- Press the Windows key + R to open the Run dialog box.
- Type “services.msc” in the Run box and press Enter.

- In the Services window, scroll down and look for “Windows Search.”
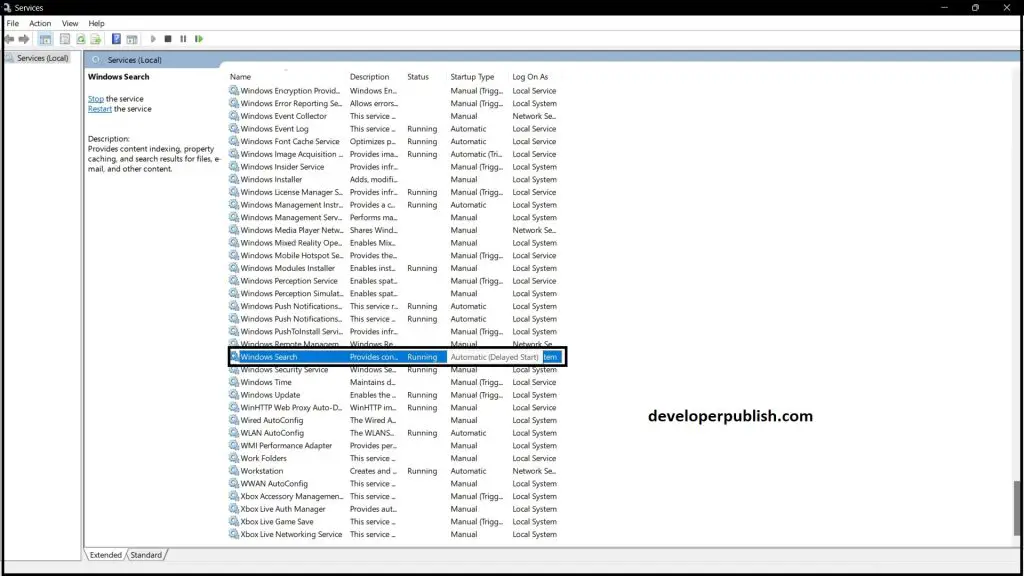
- Right-click on “Windows Search” and select “Properties” from the context menu.
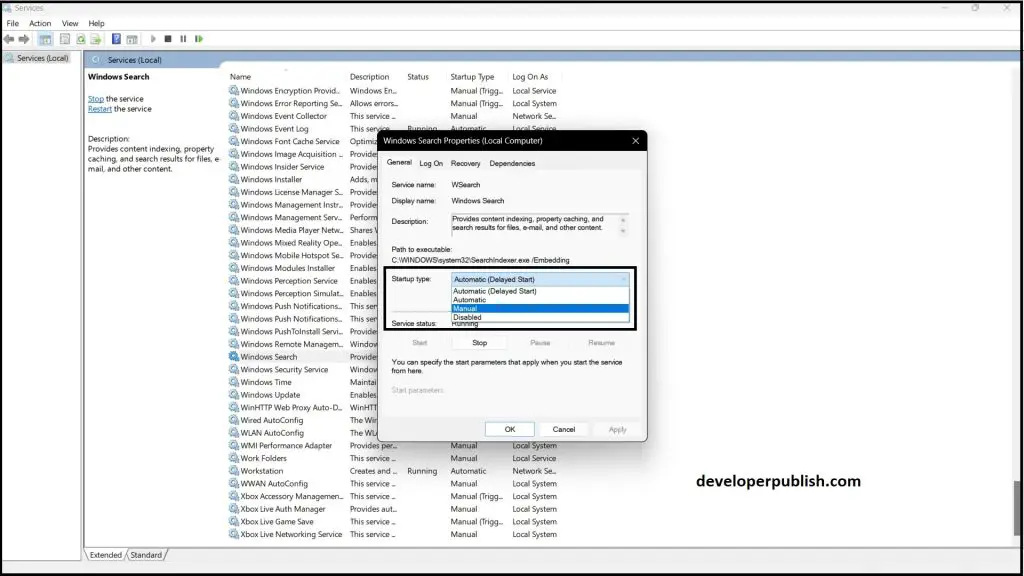
- In the Properties window, under the “General” tab, look for the “Startup type” option.
- To disable search indexing, select “Disabled” from the dropdown menu.
- To enable search indexing, select “Automatic” or “Automatic (Delayed Start)” from the dropdown menu.
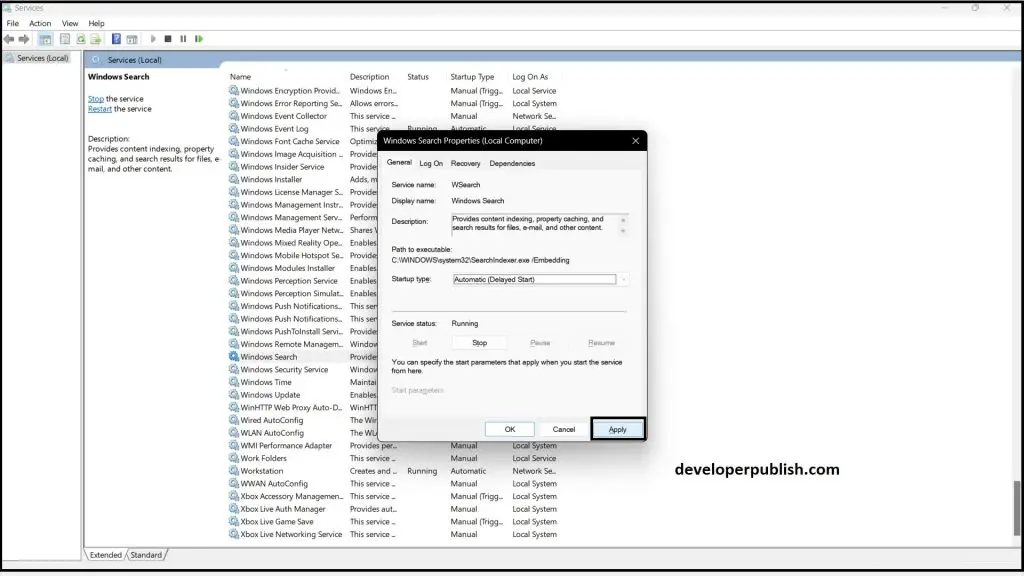
- Click on the “Apply” button, and then click on the “OK” button.
- Restart your computer for the changes to take effect.
Note: Disabling search indexing may affect the search results and performance of your system. It is recommended to keep the search indexing enabled for optimal performance.
Enabling or disabling search indexing in Windows 11 is a quick and easy process that can be done in just a few steps. If you want to improve your computer’s performance, disabling search indexing can be a good option. However, if you rely heavily on the search feature, enabling search indexing can be useful. By following the steps above, you can easily enable or disable search indexing on your Windows 11 computer.



Leave a Review