How to Disable Java Automatic Updates in Windows 8?
This article will explain how to disable Java Automatic updates in Windows 8.
If you have installed Java runtime or software in Windows 8, you will notice that the Java Automatic Updates would have been enabled on installation which is shown in the taskbar.
How to Disable Java Automatic Updates in Windows 8?
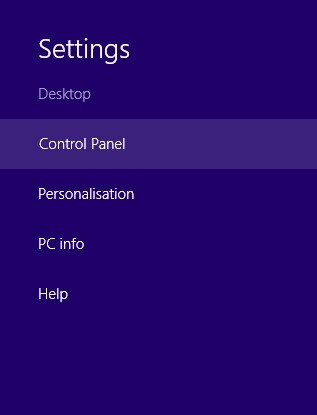
1. Open Control Panel from the Windows 8 Charms Menu.
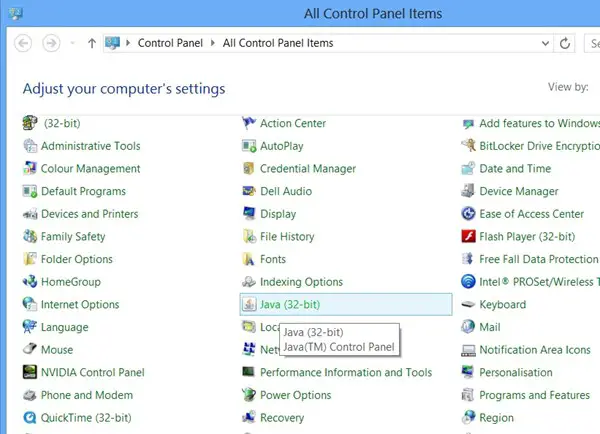
2. Click Java from the control panel.
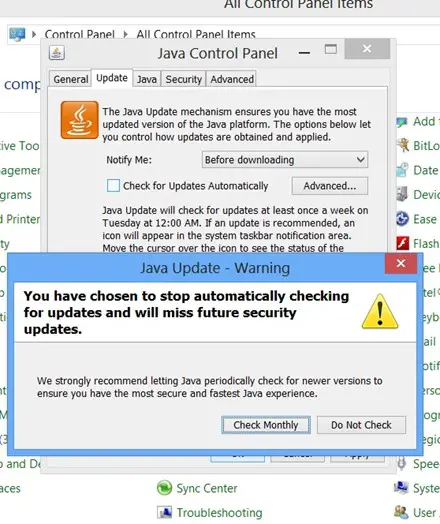
3. In the Java Control Panel, navigate to the Update tab and then uncheck the option “Check for Updates Automatically”. This will display a Java Update Warning. Click “Do Not Check” button.
4. Click Ok in the Java Control Panel Dialog.
Now, the Java Automatic Updates is disabled on your Windows 8 system.



Leave a Review