Clipboard History Data in Windows 11
Clipboard History is a useful feature in Windows 11 that enables you to save numerous items that you have copied to your clipboard. This feature allows you to easily access and reuse commonly copied items like text, images, and links without having to copy and paste them again and again. We’ll go over how to enable and use Clipboard History in Windows 11 in this blog post.
Clipboard History Data in Windows 11
Windows 11 has a built-in feature called “Clipboard History” that allows you to keep a history of everything you copy to the clipboard, including text, images, and files. To access the Clipboard History, you can follow these steps:
- Press the Windows key + V on your keyboard to open the Clipboard History panel.
- If you haven’t already enabled Clipboard History, you’ll be prompted to turn it on. Click the “Turn on” button to enable Clipboard History.
- Once Clipboard History is enabled, you can start copying items to the clipboard as you normally would.
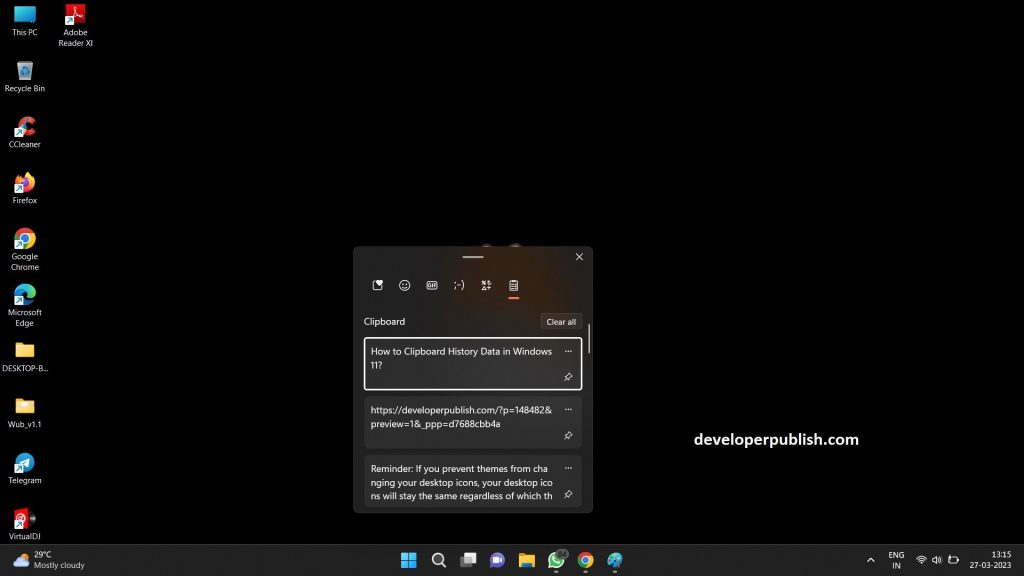
- If you want to save a specific item from your clipboard history, click on the three dots icon next to the item and select “Pin” from the dropdown menu. This will keep the item at the top of your clipboard history, even if you copy other items.

- To clear your clipboard history, click the “Clear all” button at the top of the Clipboard History panel.

- That’s it! With Clipboard History in Windows 11, you can keep a record of all the items you copy to the clipboard and easily access them whenever you need to paste them.
Clipboard History in Windows 11 is a useful tool that can help you save time and reuse commonly copied items. You can enable this feature and begin reaping its advantages with just a few clicks.



Leave a Review