How to Change Theme in Windows 11?
Windows 11 comes with a range of themes that allow users to personalize their desktop experience. A theme includes a combination of desktop background, color scheme, and sound effects. In this blog post, we’ll show you how to change the theme in Windows 11.
How to Change Theme in Windows 11?
To change the theme in Windows 11, follow these steps:
- Click on the “Start” menu icon on the taskbar.
- Click on the “Settings” icon (gear icon) in the left sidebar of the Start menu.
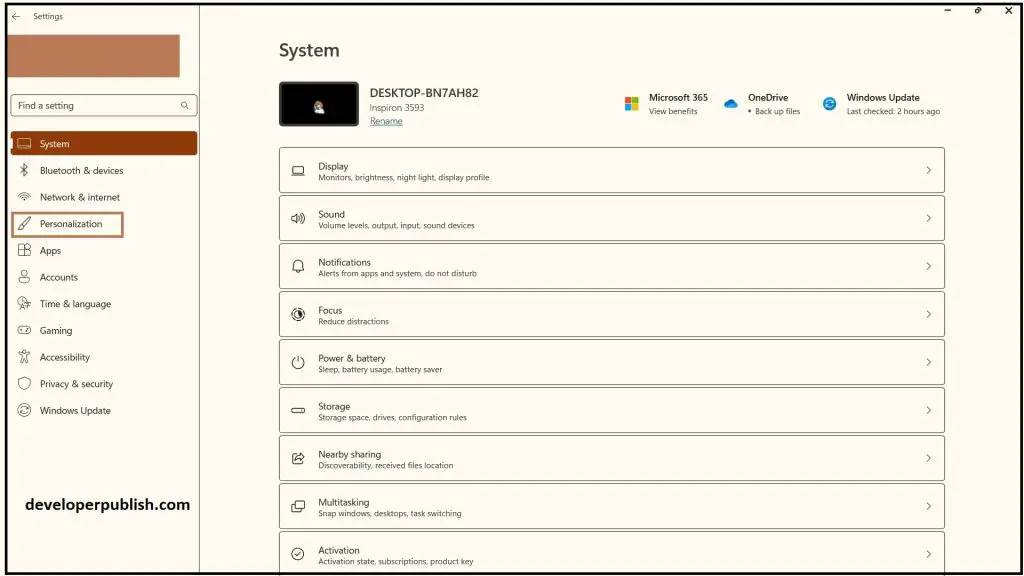
- In the Settings window, click on the “Personalization” option in the left sidebar.
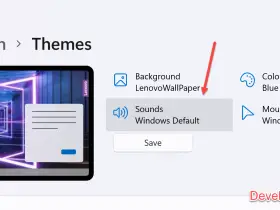
- Click on “Themes” in the left sidebar.
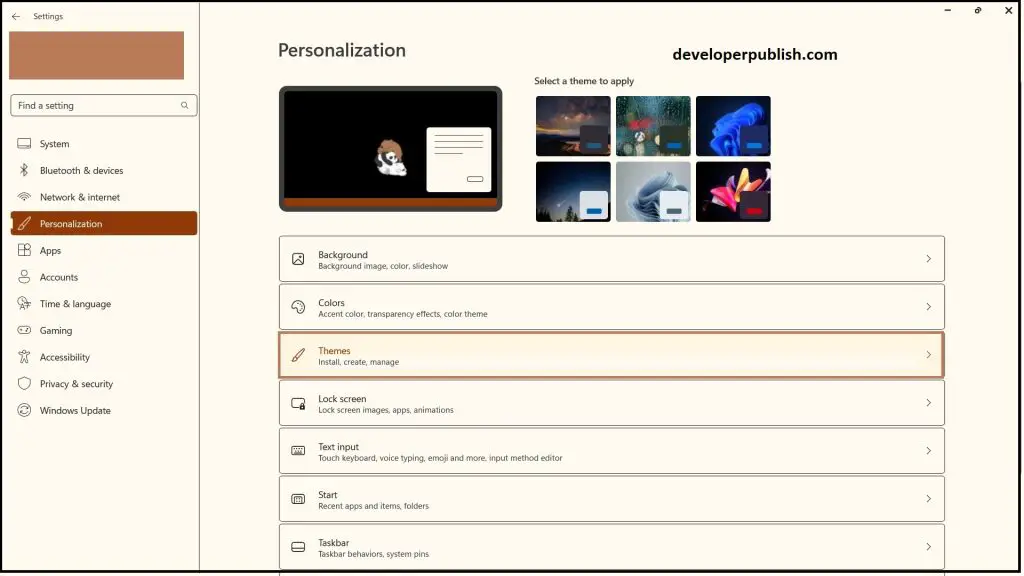
- In the “Themes” section, you can select one of the pre-installed themes or click on “Browse themes” to download and install new themes from the Microsoft Store.
- Click on a theme to preview it, and click on the “Apply” button to set it as your current theme.
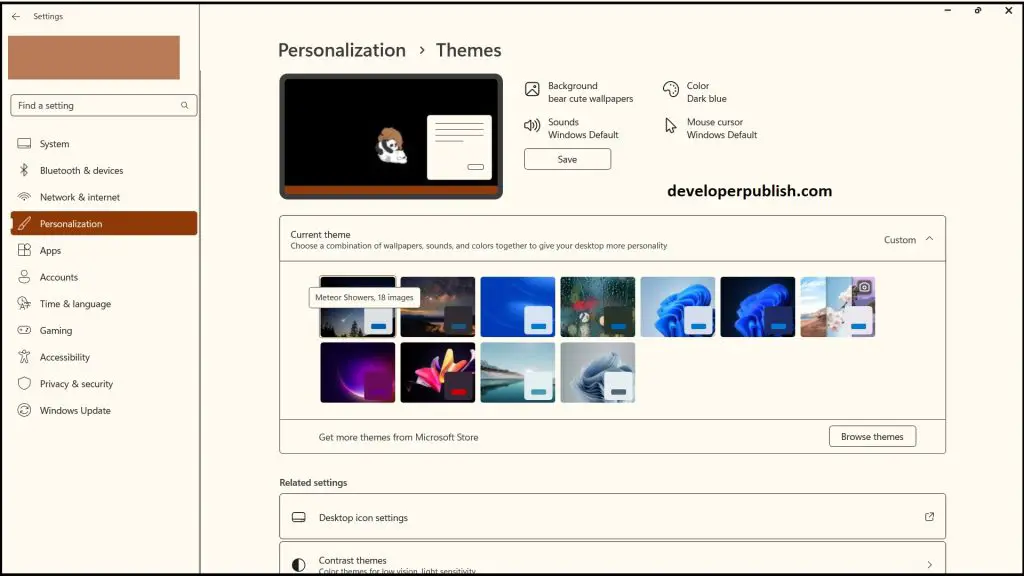
- That’s it now you can change the themes in windows 11.
Note: You can also customize your theme further by changing your desktop background, accent color, and other settings. Simply click on the relevant options in the “Personalization” section of the Settings window to make these changes.
Changing the theme in Windows 11 is a simple process that can be done in just a few clicks. By following the steps above, you can quickly change the look and feel of your desktop and personalize it to your liking. With a range of themes, you can find one that matches your style and preferences. So try it and see how to make your desktop experience more enjoyable!



Leave a Review