Insert Pictures in Word
This post shows you how you can insert pictures in the document in Microsoft Word.
Inserting pictures in your document conveys your idea better than words and helps to reach the content quickly.
How to Insert Pictures in Microsoft Word?
Let’s see, how to insert pictures in Word using the following steps given below.
- Bring the cursor where you want to insert the picture in the Word document.
- Go to Insert Tab in the menu bar.
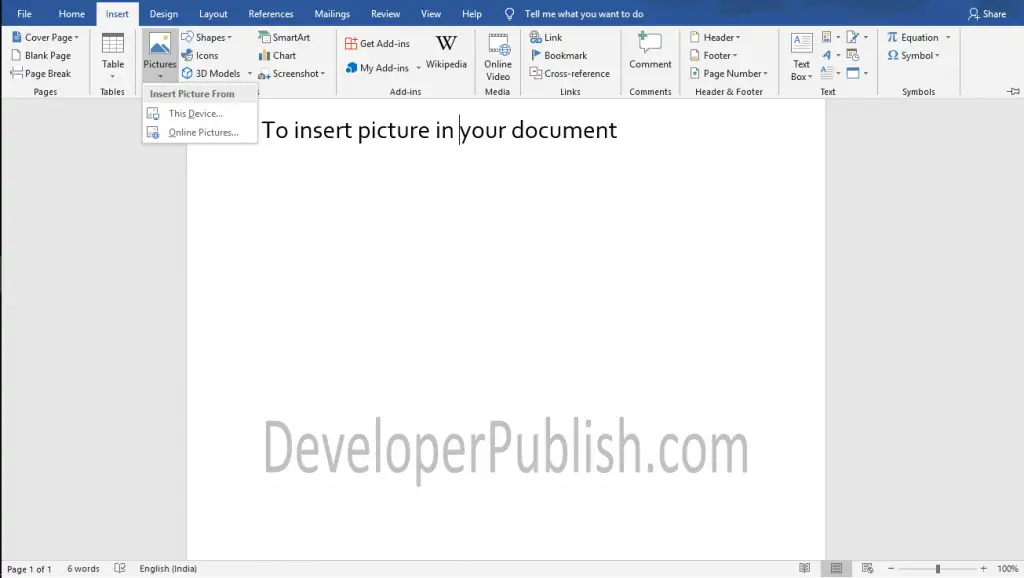
- Now, click the Pictures button from the insert tab.
Inserting Pictures from Your Devices
- After clicking the Pictures Button, the Insert Picture From drop-down list will appear as in the above image.
- Select the This Device option to insert pictures from your device.

- Now, select the desired image from your device and click the Insert button.
Inserting Picture through Online
- Select the Online Pictures option from the “Insert Picture From’ drop-down menu.
- Now, browse and select the image you want to insert in the document.
- Click the Insert button.
You can resize the image by dragging the corners of handles.
Use the Text Wrap feature by right-clicking on the image and selecting the desired option so that you can move and place the picture wherever you want in your document.
You can also use the Layout option which appears near to the handle to wrap the text.
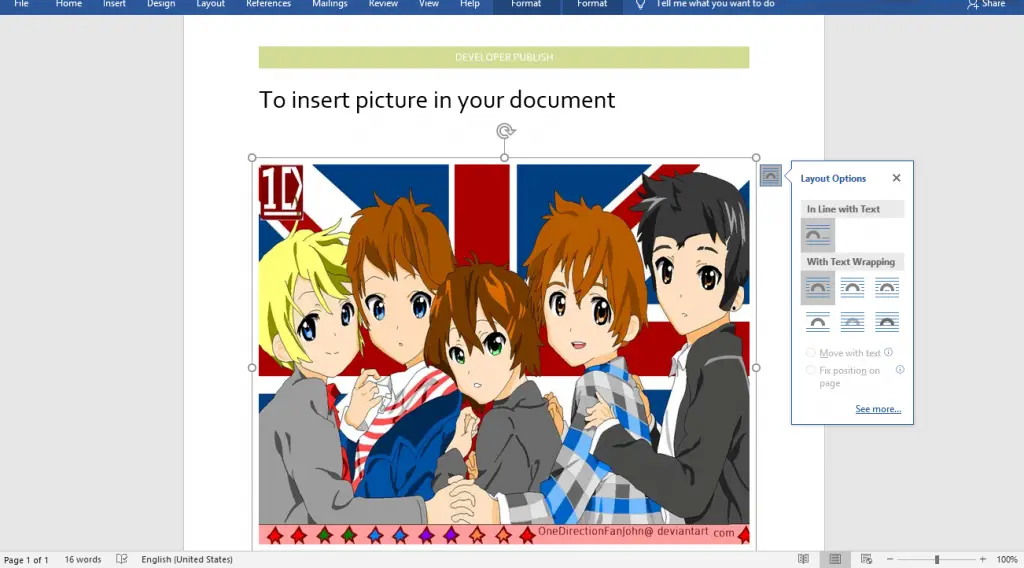
Choose your well-liked text wrapping format from the list as shown in the above image.
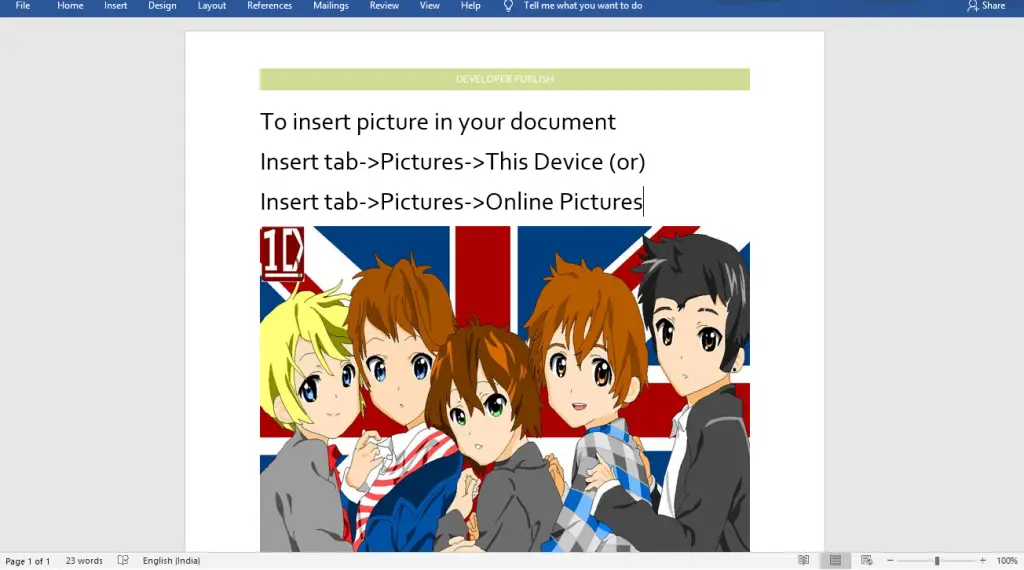
The picture is inserted in the Word document. Now, your document will look great.



Leave a Review