How to Protect Sheet in Microsoft Excel?
Protect sheet in Microsoft Excel
This post explains about the Protect Sheet feature in Microsoft Excel and how it can be used to lock the sheet in the workbook.
How to Protect Sheet in Microsoft Excel?
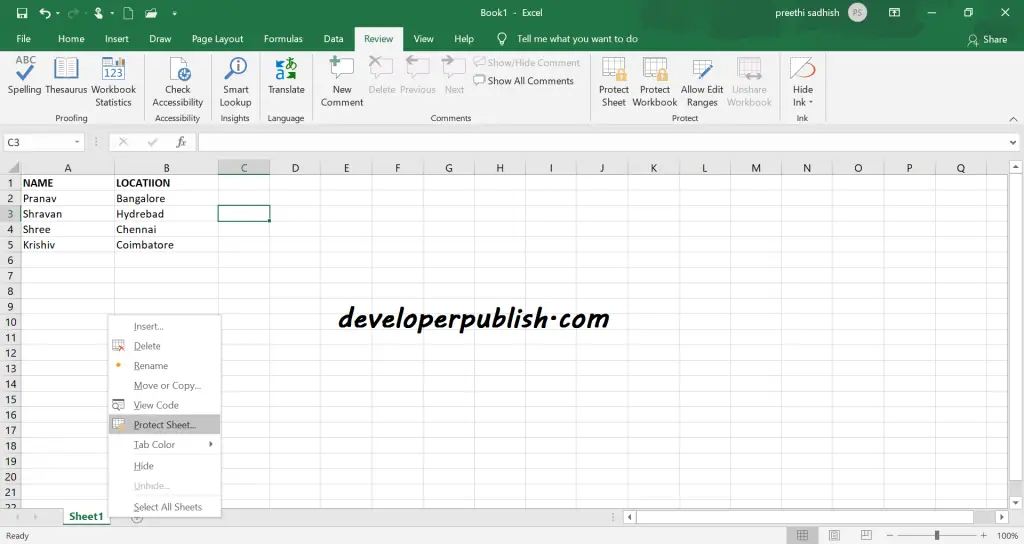
Microsoft Excel allows the user to lock the sheets in the workbook so that the data is protected while sharing. This can be done through the following steps:
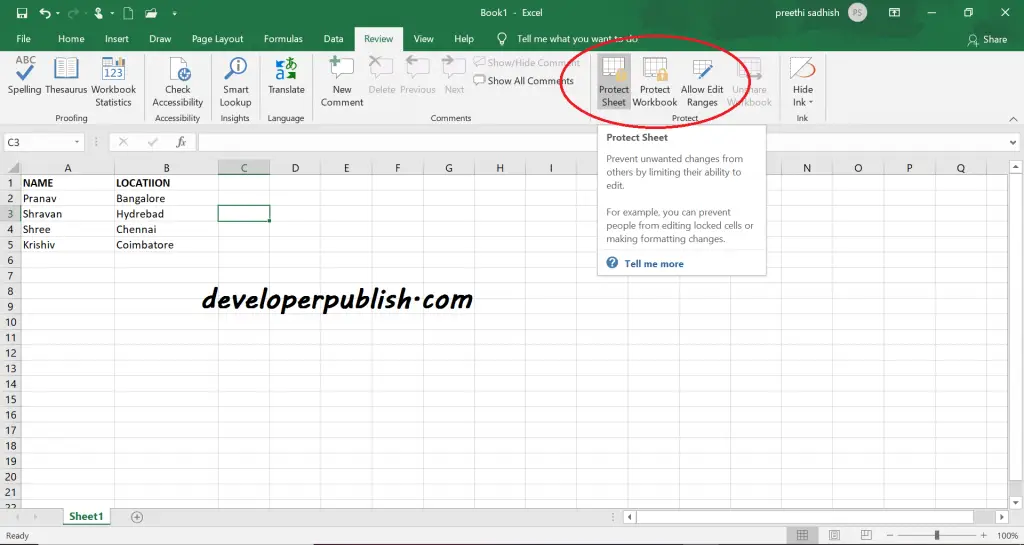
- Right click on the sheet tab found below and select Protect Sheet (or) you can also find the protect sheet option from the review tab.
- A dialog box appears asking for a password, enter the password of your choice. Below, check the actions that you allow for the other users to perform in the worksheet.
- Click OK.
- Give the password again for confirmation and click OK.
Now your worksheet is protected.
How to Make a range of cells editable in the sheet you protected in Excel?
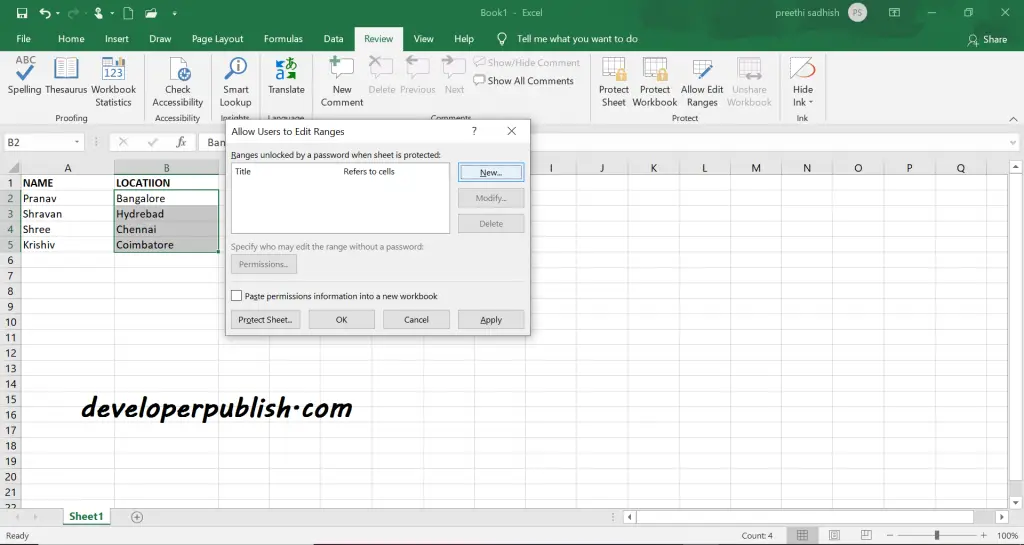
- Select the range of cells to which you need to allow permission.
- Select Review tab -> Allow Edit Ranges -> New -> Ok.
- Click OK.
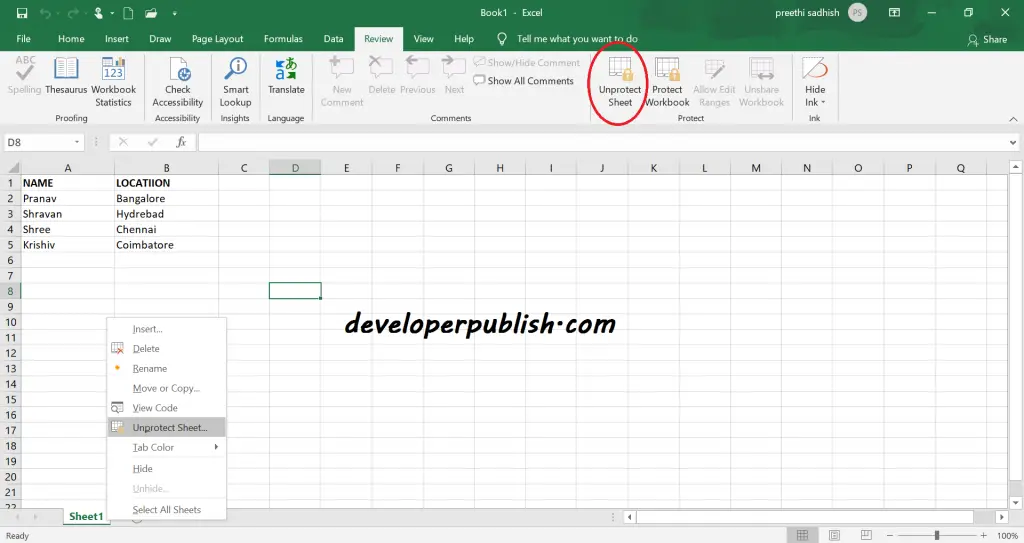
To unprotect the worksheet right click on the sheet tab and select unprotect or select it from the review tab and give the password and it will be unlocked.



Well this technic was very useful
Thanks for sharing this content now I get to know how to hide my Excel from others.