How to Print Labels for your mailing list in Word?
This post demonstrates you how to Print Labels for your mailing list in Microsoft Word.
Microsoft Word provides the best feature to create and print labels for your mailing list so that you can save your time.
How to Print Labels for your mailing list in Word?
Let’s do this process with the following step by step procedure:
- Open a blank Microsoft Word document using File -> New command.
- Go to the Mailings tab. in the ribbon.
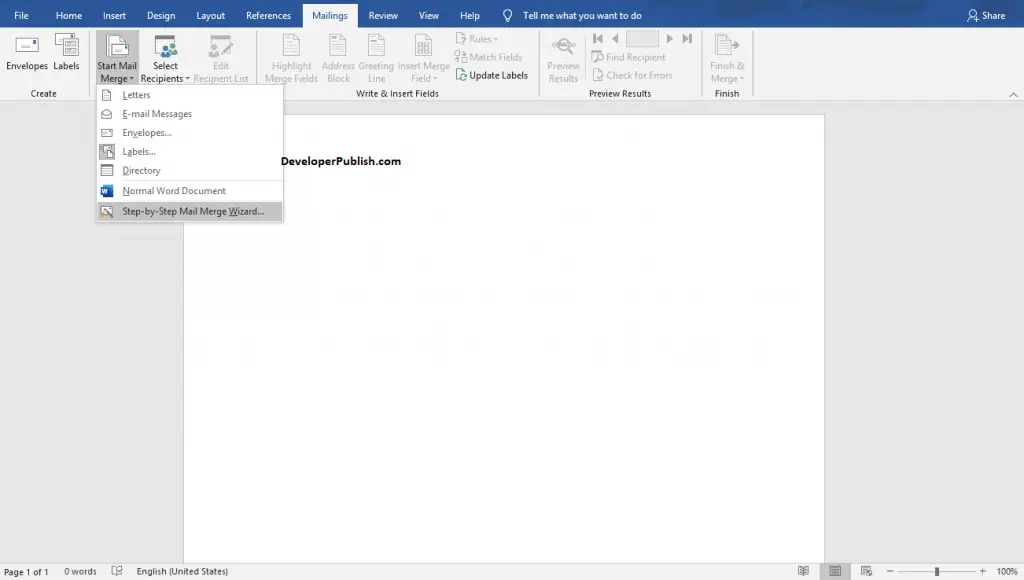
- Now, click the Start Mail Merge command and select the Step-by-Step Mail Merge wizard.
- Now in your step 1 of the Mail Merge, select the Labels options from the Select Document Type.
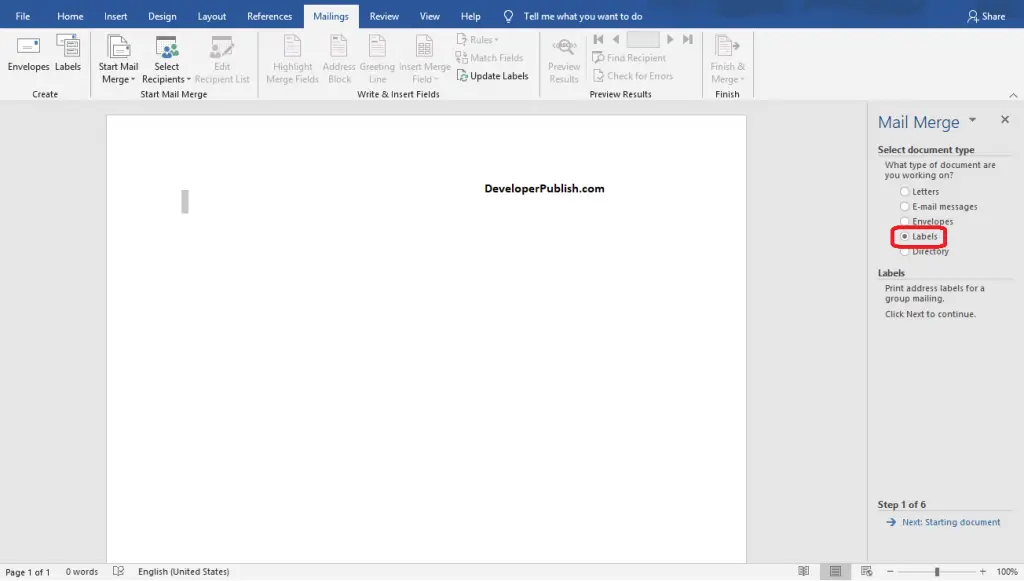
- Now, Go to step 2 by clicking the Next wizard step.
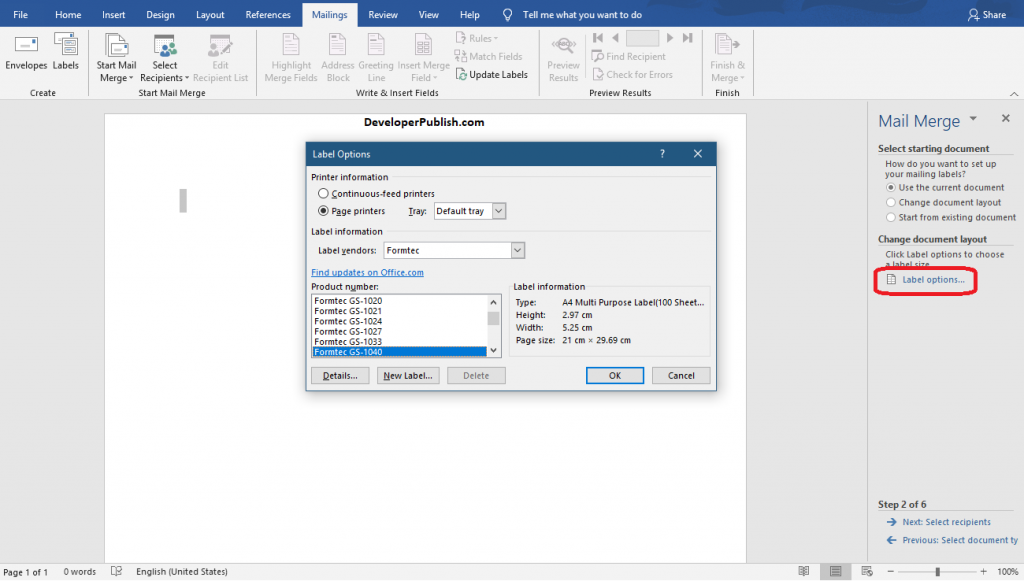
- In step 2, select the Label Options to get the Label options dialogue box.
- Select your Label vendor and Product Number from the dialogue box.
- Click the Ok button.
- Now, Go to step 3 by clicking the Next step wizard.
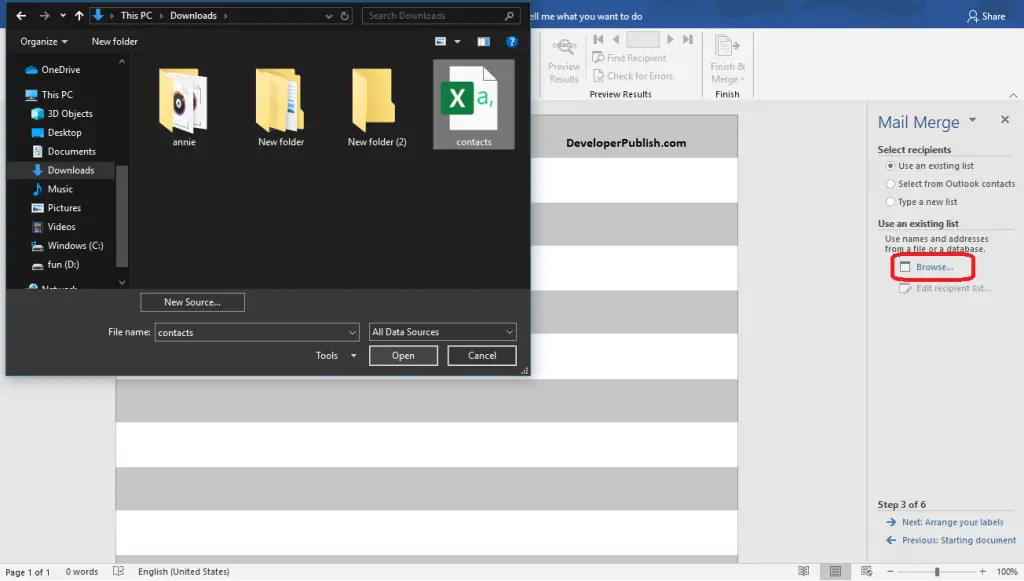
- In step 3, Click the Browse option.
- Select your Mailing list file and click the Open button.
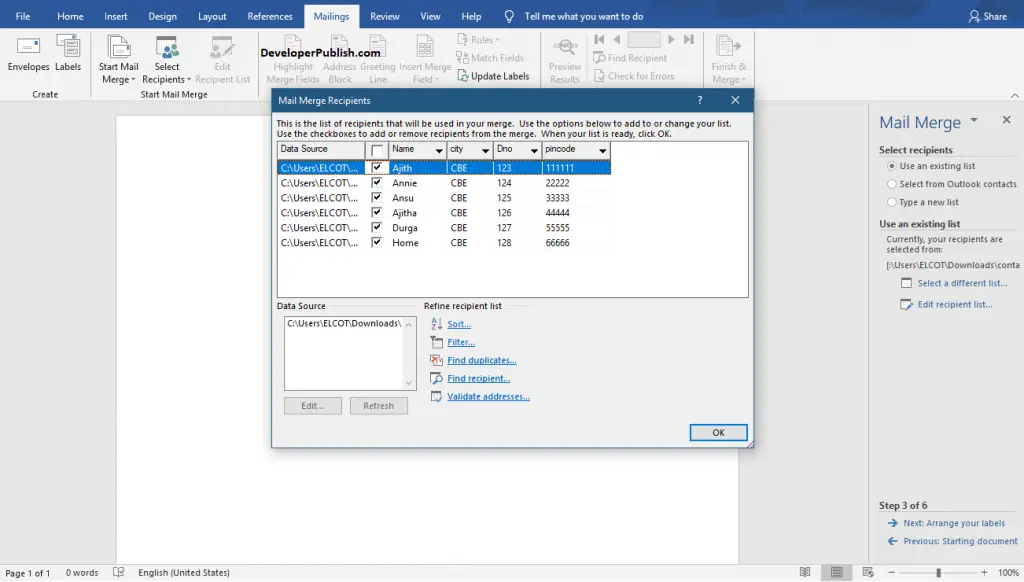
- The Mail Merge Recipients window will appear on your screen, select an option.
- Then click the Ok button.
- If you want to include the Address line in your labels then, select the Address Block, select a format, and click the Ok button.
- you can also include the greetings by selecting the Greeting line options.
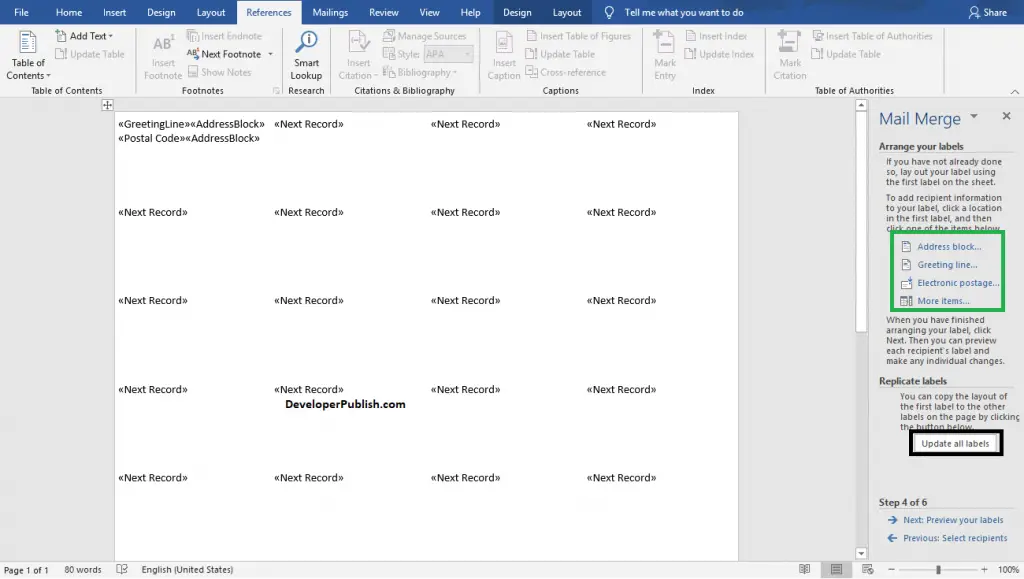
- Click the Update all labels, to apply the same format to all of the labels.
- Now, Go to step 5 by clicking on the Next step wizard.
- Preview your labels and edit the recipients if you need any changes.
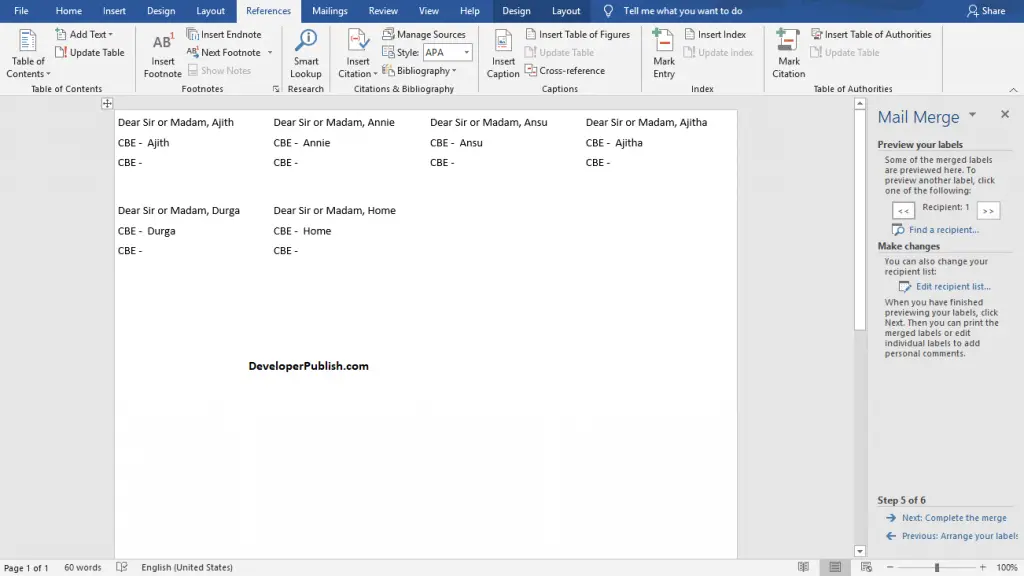
- If you are okay with the labels, then go to the next step.
- In step 6, finally, you can print the labels for your mailing list successfully by click on the Print option.
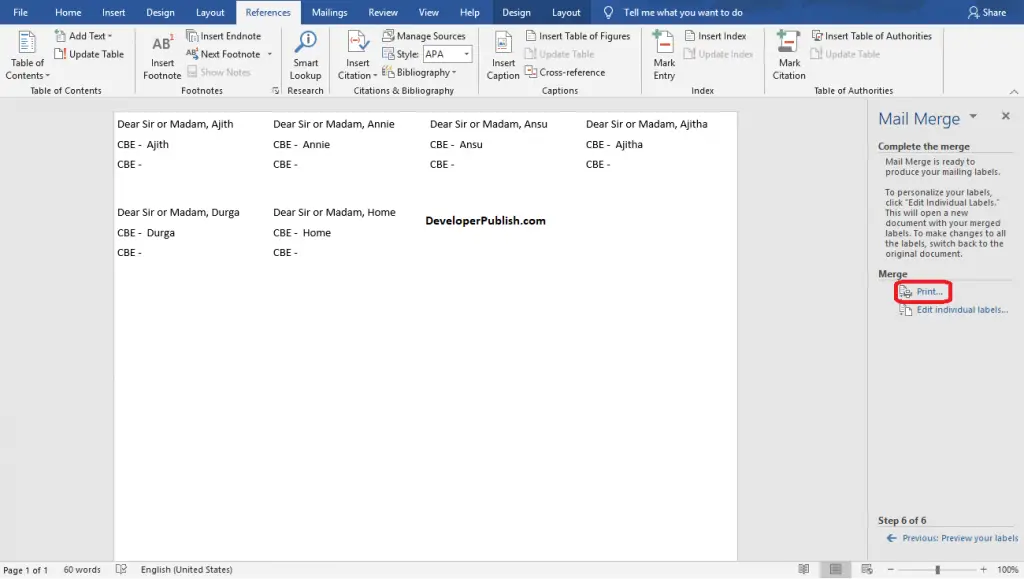
- Now, click the OK button.
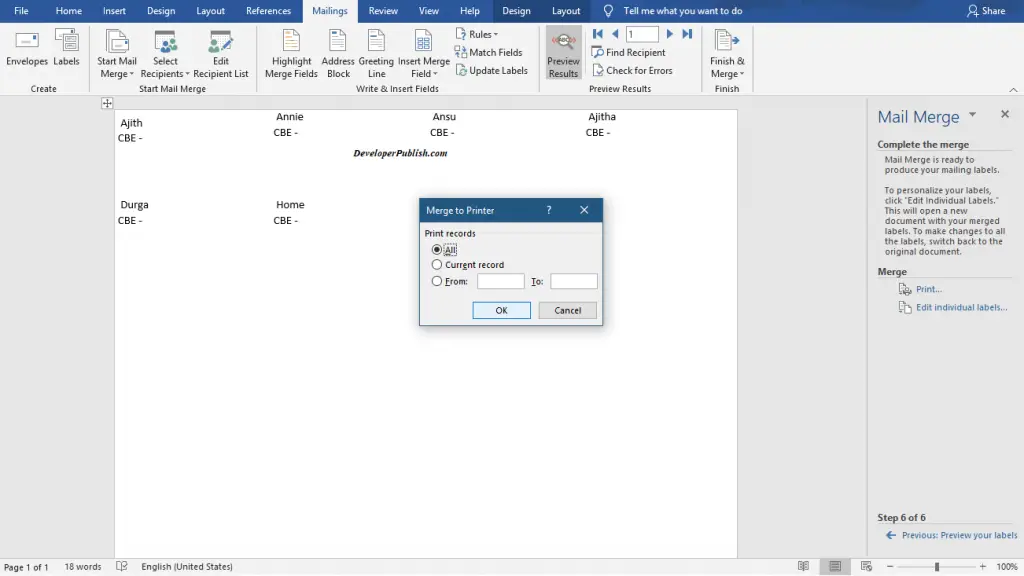
Now, your labels for the mailing list is ready.

Leave a Review