How to Pause Updates in Windows 11?
In this tutorial, you’ll learn how to pause Windows updates on your Windows 11 laptop.
One of the features in Windows 11 is that the updates to Windows 11 gets downloaded automatically and installed. These updates include driver updates, hotfixes etc.
If you are running the non-insider build version of Windows 11, you have an option of pausing the windows updates for up to 5 Weeks before the updates automatically resume. In this tutorial, you’ll be learning how do pause the updates.
How to Pause Updates in Windows 11?
Follow the below steps to pause updates in Windows 11.
- Open the Settings app in Windows 11.
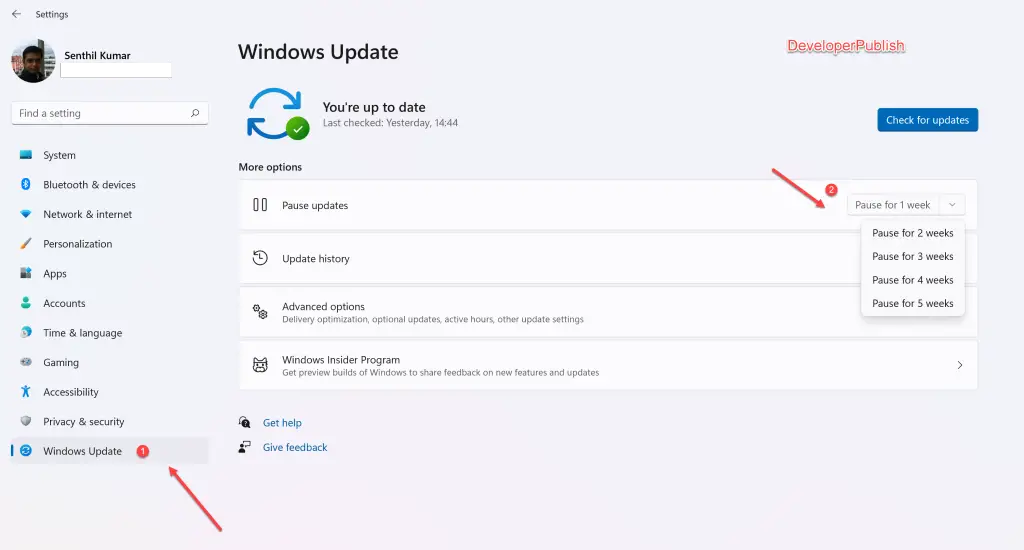
- Click on Windows Update in the left sidebar. In the Windows Update screen, click on the “Pause for 1 week” button which will show you additional options
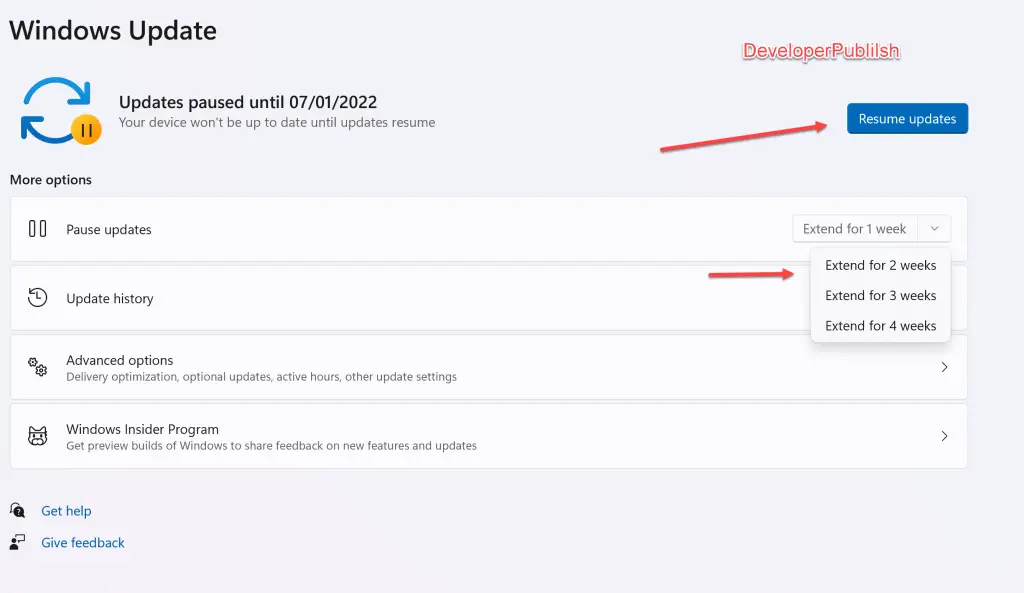
- Once you choose “Pause for X weeks”, you’ll immediately see that the Windows updates get paused and you will be provided with options to extend.


Leave a Review