This post explains how to lock the cells in the worksheet in Microsoft Excel and how you can protect your cells from being edited.
How to Lock All Cells in Excel ?
- Select all cells by drag and drop or press Ctrl+A.
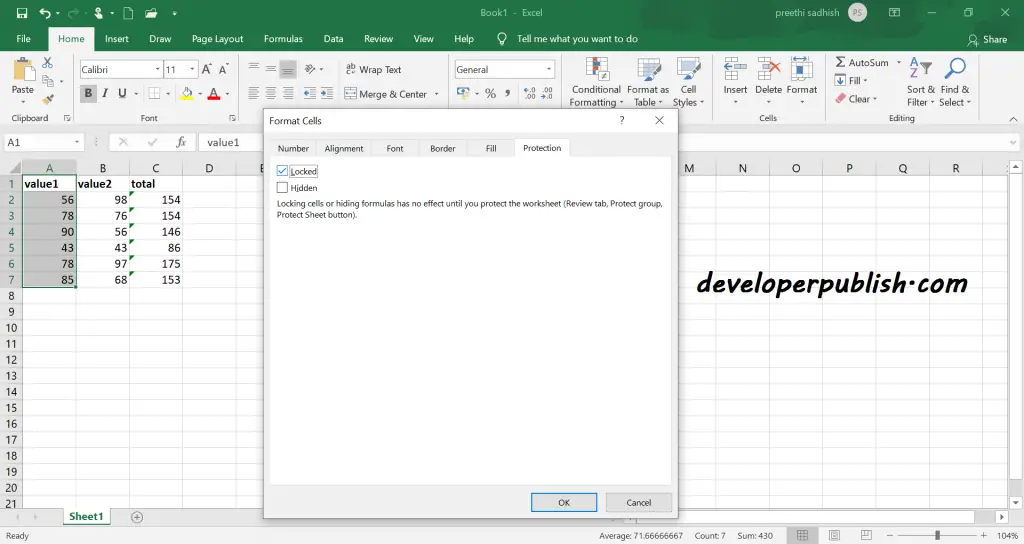
- Right-click and select Format Cells or press CTRL + 1.
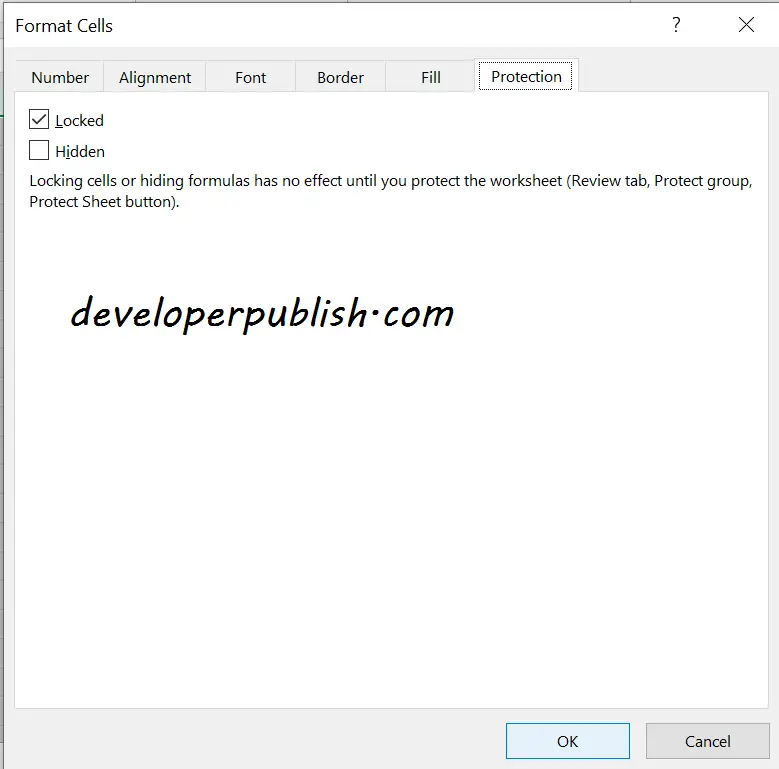
- Click on the Protection tab, by default the cells are locked.
But Locking cells has no effect until you protect the worksheet.
- Click OK or Cancel.
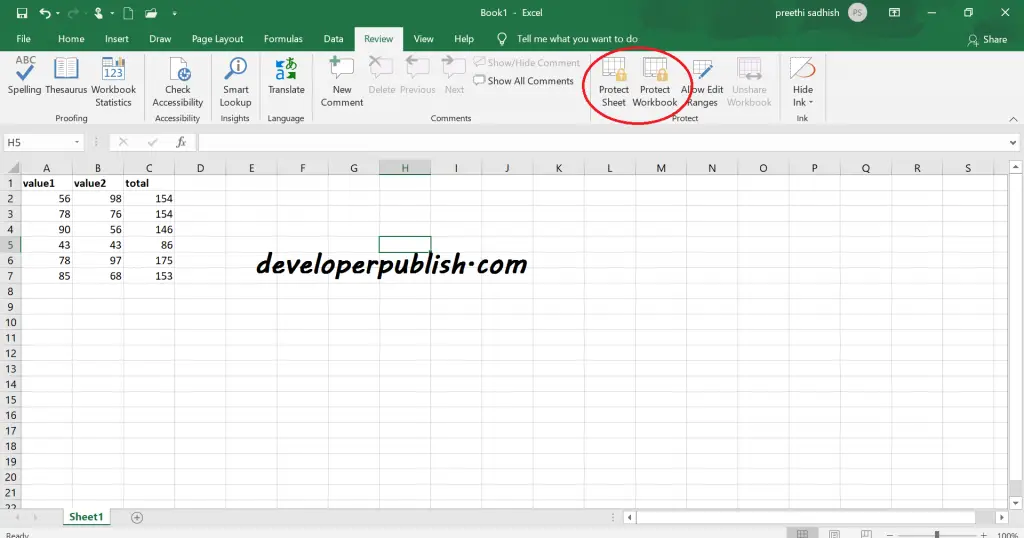
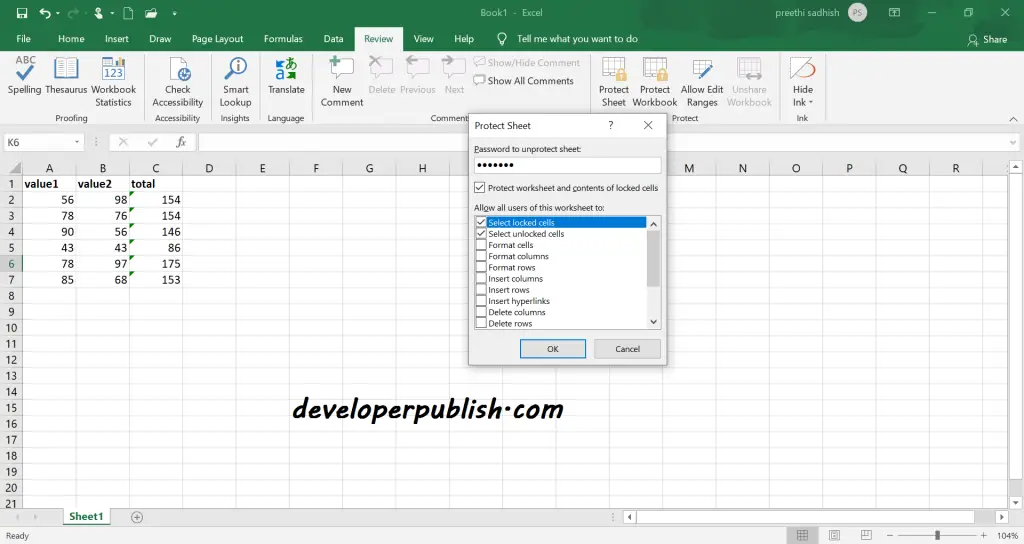
- Protect the worksheet by selecting the Protect Sheet option from the Review tab.
Now all cells are locked.
Lock Specific Cells in Excel
To lock a specific range of cells in Excel, you need to unlock all cells first.
- Select all cells by drag and drop or press Ctrl+A.
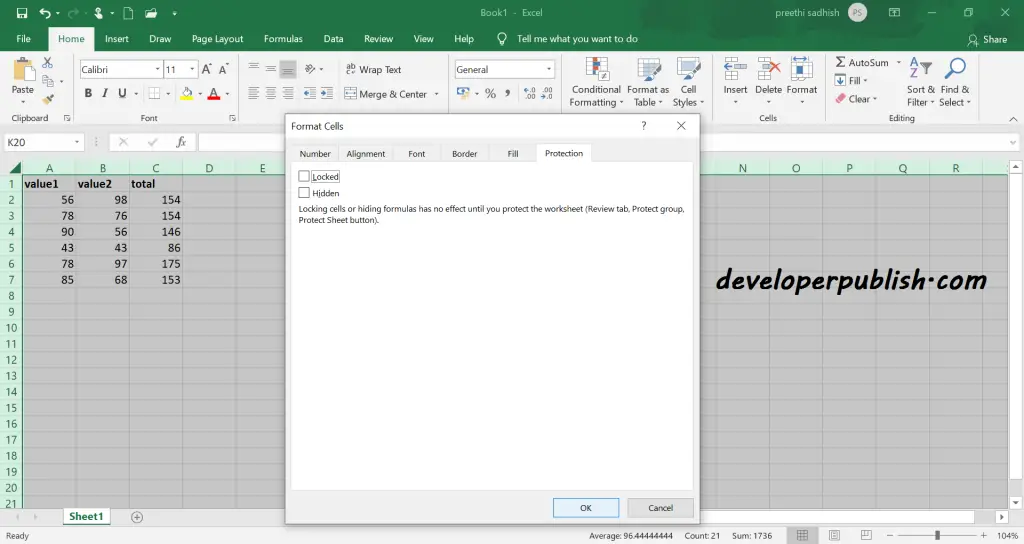
- Right-click, and then select Format Cells or press CTRL + 1.
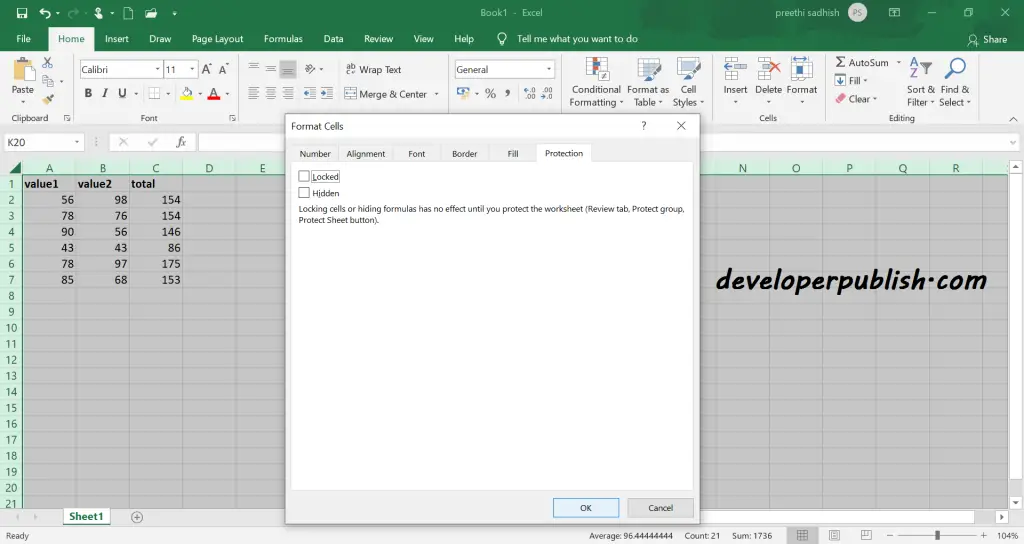
- Click on the Protection tab, uncheck the Locked check box and click OK.
Now you can lock specific cells you want.
- For example, Select cell A1 to cell A7.
- Right-click, and then select Format Cells or press CTRL + 1.
- On the Protection tab, check the Locked check box and click OK.
But locking cells has no effect until you protect the worksheet.
- Protect the worksheet by selecting the Protect Sheet option from the Review tab.
Now the selected cells are locked.
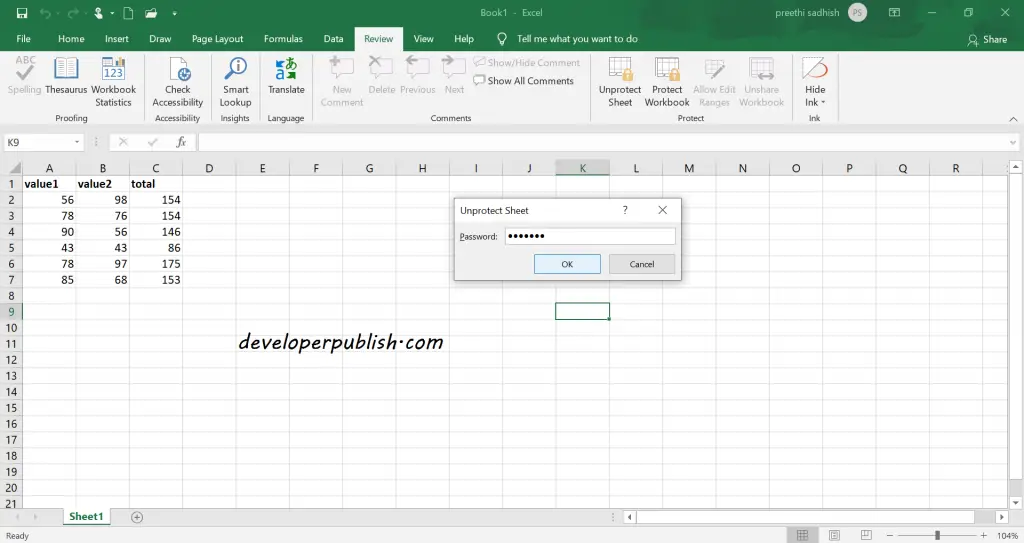
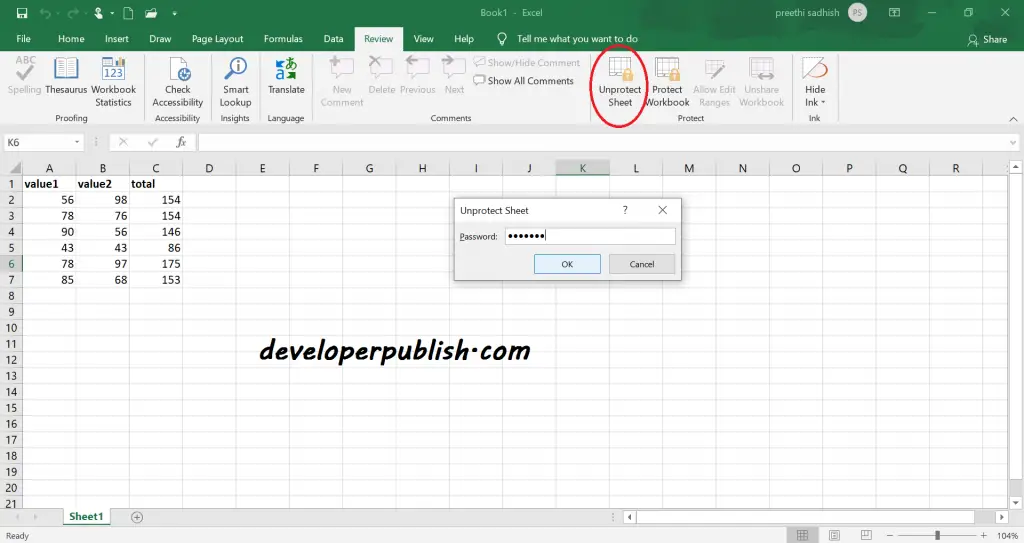
To unlock the cells select the unprotect sheet and uncheck the locked check box from format cells.
Lock Formula Cells in Excel
To lock all cells containing formulas, you need to unlock all cells.
- Select all cells by drag and drop or press Ctrl+A.
- Right-click, and then click Format Cells or press CTRL + 1.
- Click on the Protection tab, uncheck the Locked check box and click OK.
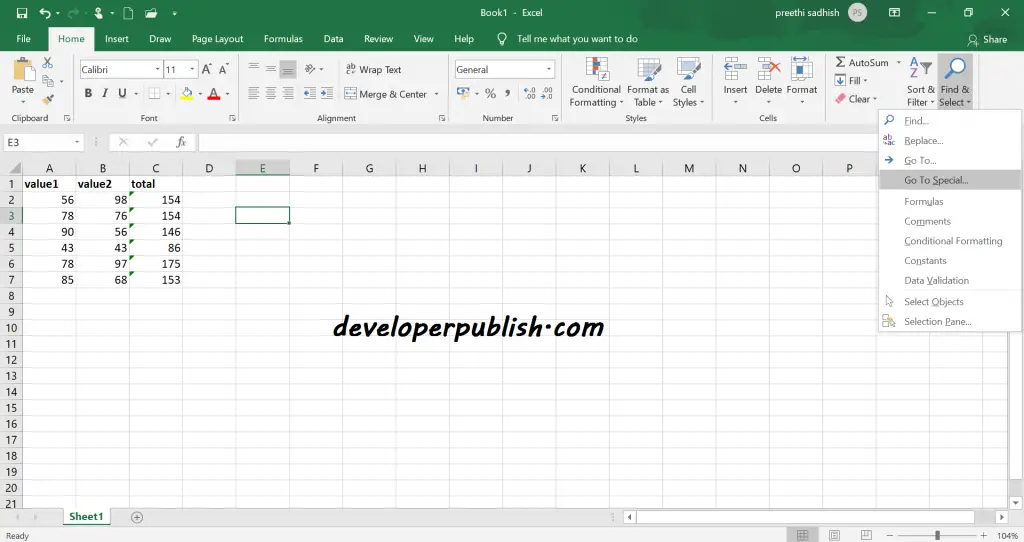
- Click Find & Select in the Editing group from the Home tab.
- Click Go To Special.
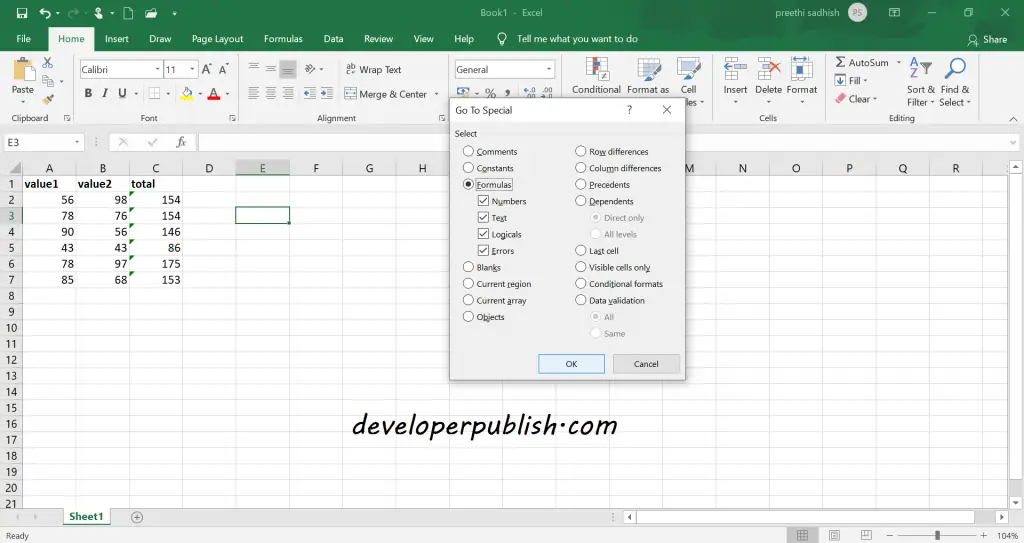
- Select Formulas and then click OK.
Now the cells with formulas are selected.
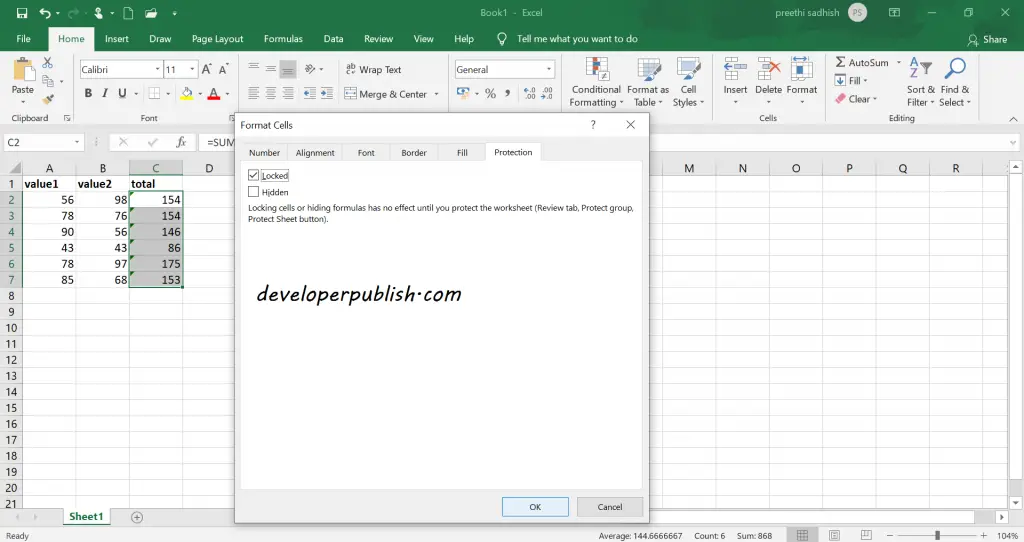
- Right-click and select format cells.
- Click on the Protection tab, check the Locked check box, and click OK.
But locking cells has no effect until you protect the worksheet.
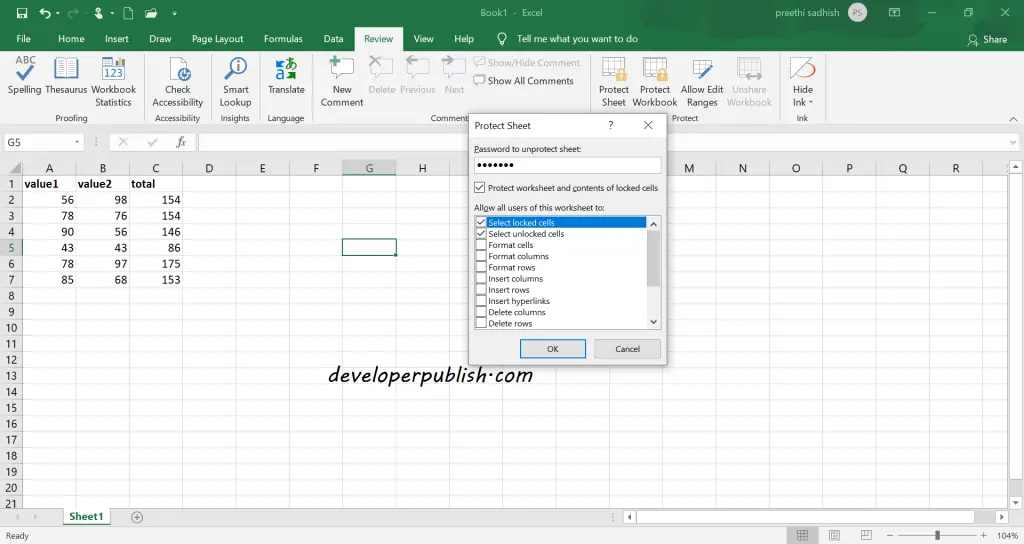
- Protect the worksheet by selecting the Protect Sheet option from the Review tab.
Now the selected cells are locked.
To unlock the cells select the unprotect sheet and uncheck the locked check box from format cells.


1 Comment
Well, this information was very useful, and thanks for sharing.