How to Enable or Disable System Protection for Drives in Windows 11?
In this post, you’ll learn what is System Protection and how to enable or disable this option on your Windows 11 PC.
When a drive’s system protection is enabled, System Restore will take that drive into account when creating restore points, enabling you to roll back unintended system changes by going back in time.
How to Enable or Disable System Protection for Drives in Windows 11?
To activate or deactivate system protection for a drive, you must be logged in as an administrator.
Follow the below steps to enable or disable System Protection for Drives in Windows 11.
- Open the Settings App in Windows 11.
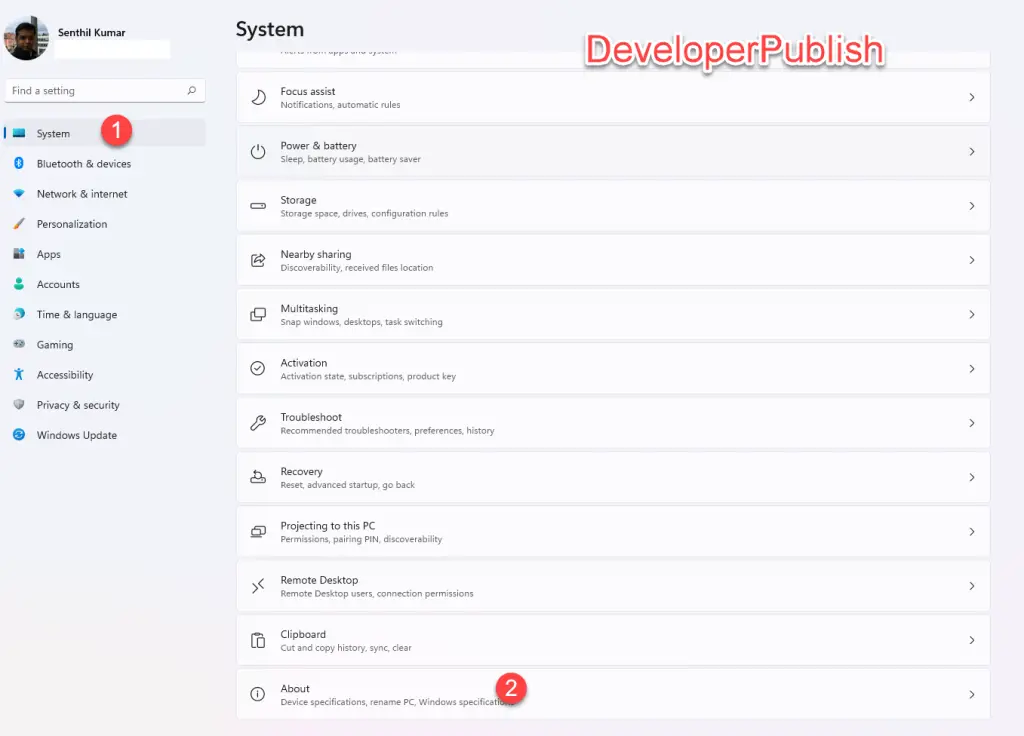
- Click “System” on the left side bar and then click or select the “About” from the right hand side content pane.
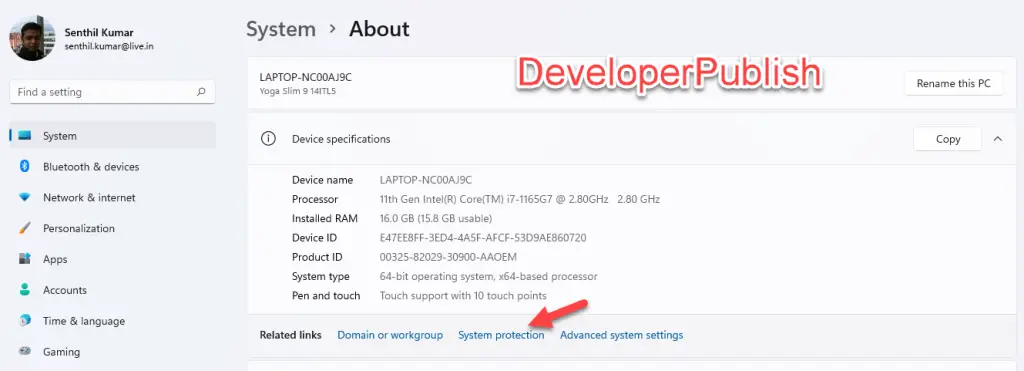
- Click “System Protection” link under the Related Links section.

- This will open the System Properties Dialog Window. Navigate to the “Protection Settings” and then select the drive that you wish to enable or disable the protection and then click on the configure button.
- By Default, the Protection is on.
- In the System Protection for Drive Dialog, you can then select “Turn on system protection” or “disable system protection” from the radio button. and then click on the “OK” button.
When you try to disable the System Protection, you’ll be shown a confirmation Dialog. Click on the “Yes” button in this scenario if you want to turn this feature off.
All restore points created for a drive will be deleted if system protection for that drive is turned off. It is strongly advised to keep system protection enabled on your Windows drive so you can easily roll back Windows 11 to a previous restore point when necessary.


Leave a Review