How to Enable or Disable Snipping Tool Auto Save Screenshots in Windows 11?
The Snipping Tool is a useful feature in Windows 11 that allows you to capture screenshots of your computer screen. By default, the Snipping Tool auto saves your screenshots to a default location. In this blog post, we’ll show you how to enable or disable Snipping Tool auto save screenshots in Windows 11.
How to Enable or Disable Snipping Tool Auto Save Screenshots in Windows 11?
In Windows 11, you can enable or disable auto-saving screenshots in Snipping tool by following these steps:
- Open the Snipping tool by pressing Windows Key + Shift + S.
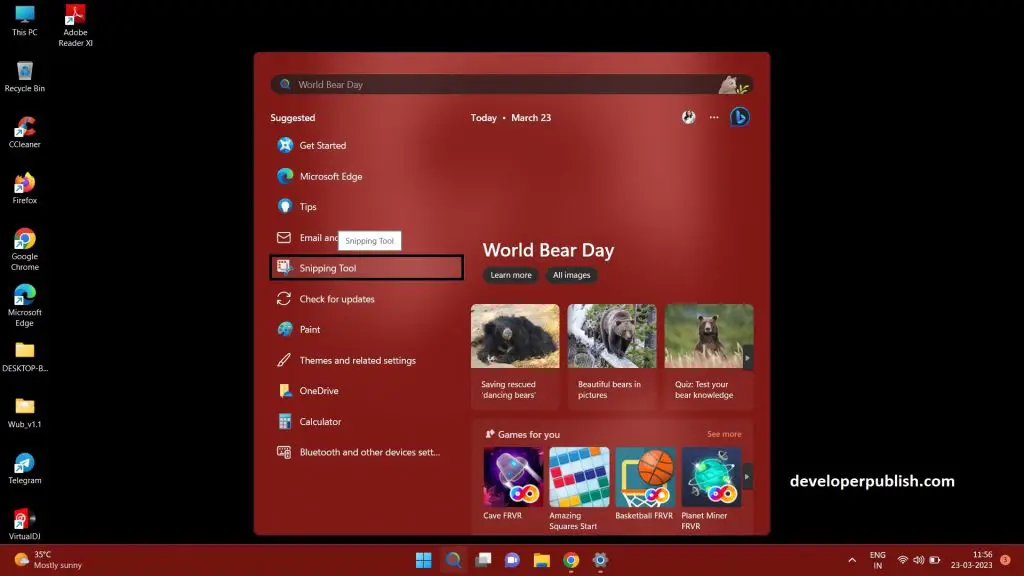
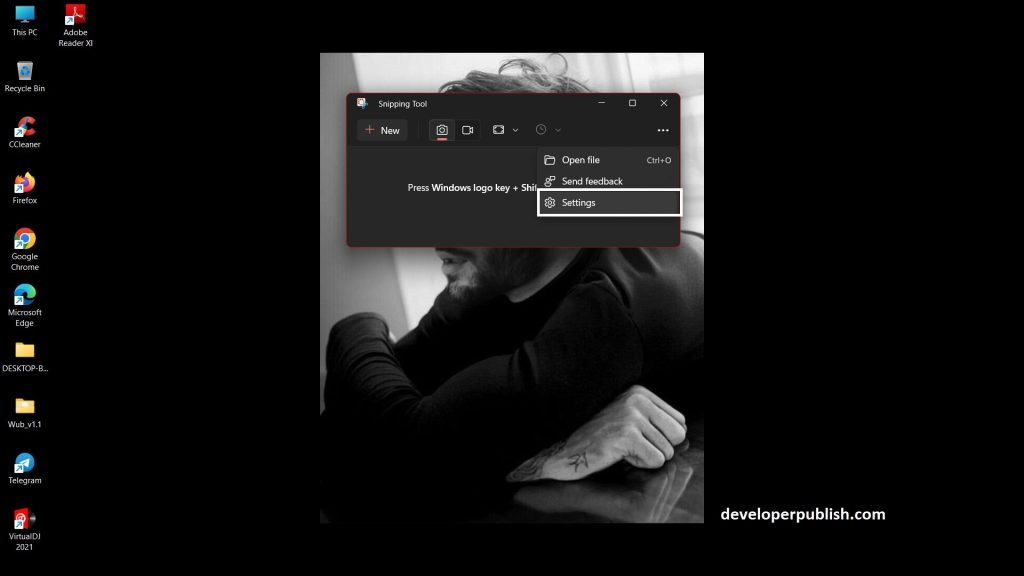
- Click on the three dots (…) at the top-right corner of the app.
- Select “Settings” from the dropdown menu.
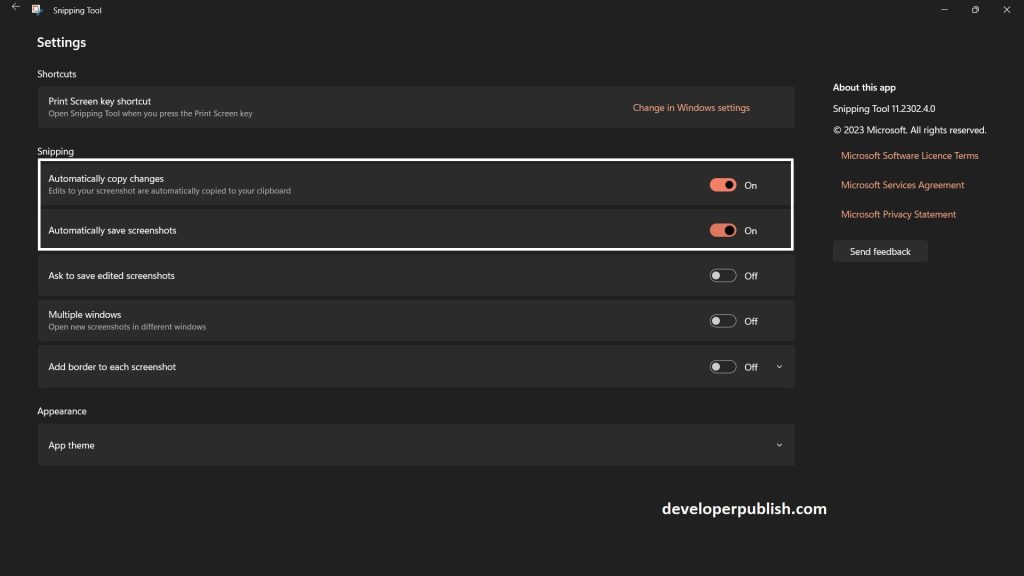
- Toggle the switch next to “Copy to clipboard” to enable or disable auto-saving screenshots.
- If the switch is turned on, then the screenshots will be automatically saved to the clipboard after capturing them.
- If you want to change the save location of the screenshots, click on the “Save screenshots” option and select a different folder.
- That’s it! Now you can enable or disable Snipping Tool Auto Save Screenshots in Windows 11.
Note: If you have a different version of Windows, the steps to enable or disable auto-saving screenshots may be slightly different.
In conclusion, enabling or disabling Snipping Tool auto save screenshots in Windows 11 can help you customize your screenshot preferences and make it easier to manage your captured images.



Leave a Review