How to Enable or Disable Snap Layouts on Top of Screen in Windows 11?
Windows 11 introduces a fresh and visually appealing interface, offering users an enhanced multitasking experience. One of the standout features is Snap Layouts, a powerful tool that allows you to organize and manage your open windows effectively. By understanding how to enable or disable Snap Layouts on the top of the screen in Windows 11, you can streamline your workflow and boost your productivity. In this blog post, we’ll guide you through the process step by step.
What is Snap layouts?
Snap Layouts is a feature in Windows 11 that allows users to easily snap and resize windows on their desktop, which can be very helpful for multitasking and increasing productivity. By default, Snap Layouts is enabled in Windows 11, but it can be disabled if desired.
How to Enable or Disable Snap Layouts on Top of Screen in Windows 11?
Here’s how to enable or disable Snap Layouts on top of the screen in Windows 11:
- Open Settings by clicking on the Start menu and selecting the gear icon, or by using the Windows key + I keyboard shortcut.
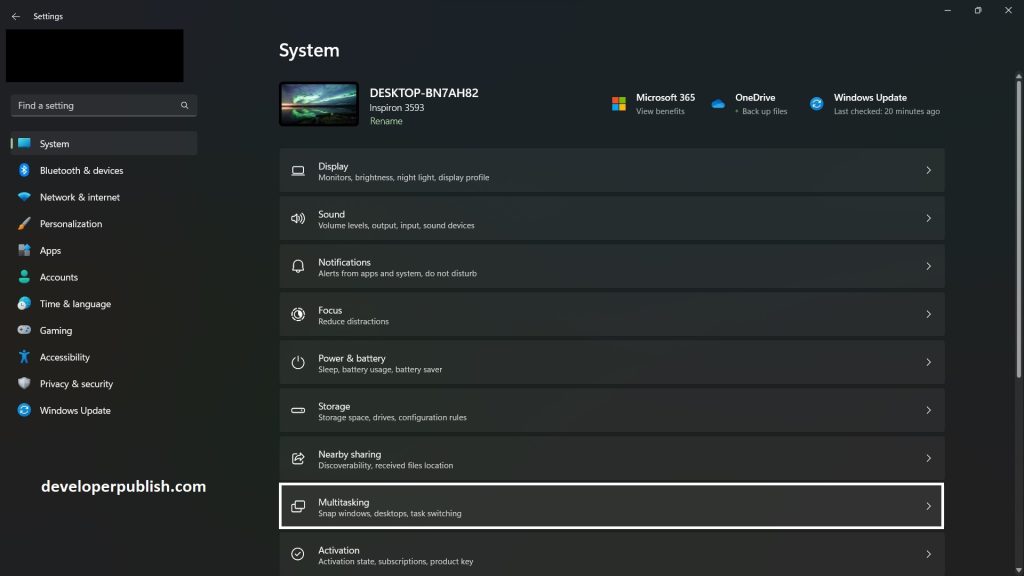
- Click on “System” in the Settings window.
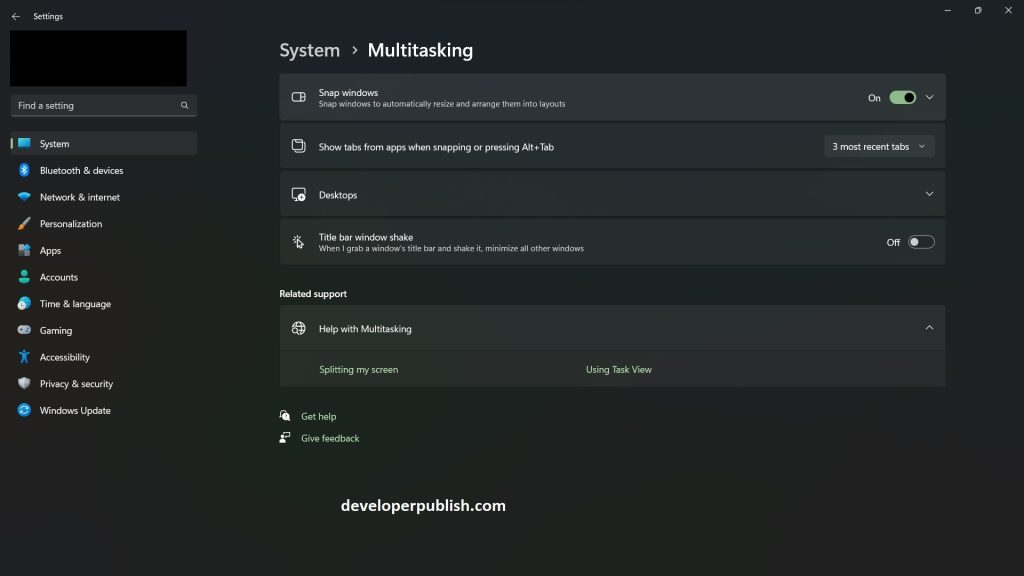
- Scroll down, and click on “Multitasking”.

- In the “Snap Windows” section, turn Snap Layouts on or off.
- If you want to disable Snap Layouts on top of the screen, use the “maximize button” to turn it off.

That’s it! You’ve now enabled or disabled Snap Layouts on top of the screen in Windows 11.
Windows 11’s Snap Layouts feature is a game-changer when it comes to multitasking and organizing your workspace. By enabling or disabling Snap Layouts on the top of the screen, you have the flexibility to tailor your window management experience to your preferences. Whether you choose to embrace the predefined layouts or opt for manual control, Windows 11 empowers you to optimize your workflow and boost productivity.
Mastering Snap Layouts is just one of the many ways you can make the most of Windows 11. Explore further and discover the range of features and enhancements designed to enhance your computing experience. Happy multitasking!


Leave a Review