How to easily configure a static IP and test it in Windows 7?
This article will explain how to easily configure a static IP address and test it in Windows 7.
Well Let’s Get Started .To Configure an IP Address. Follow the procedures below to configure a Static IP.
IP ADDRESS:
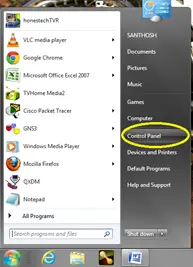
- Go To Start And Then Control Panel.
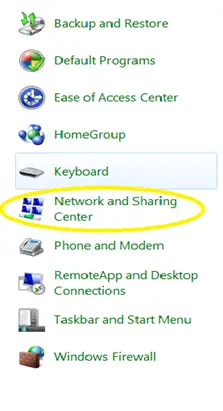
- Network and Sharing Center.
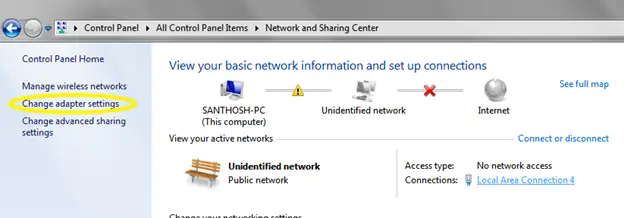
- Change adapter setting.
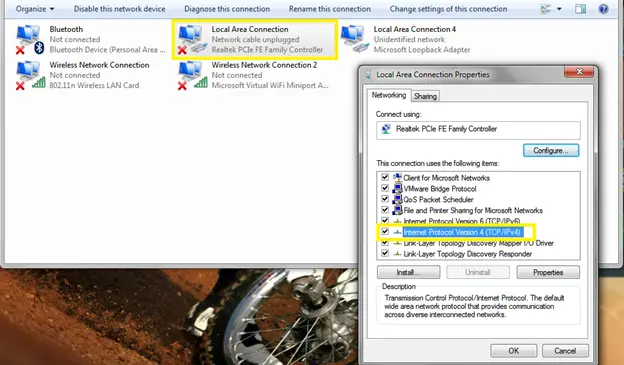
- Select local Area Lan (Your Network Ethernet Adapter), Right click and Go to Properties on It, Double Click on Internet Protocol Version 4 (IPV4).
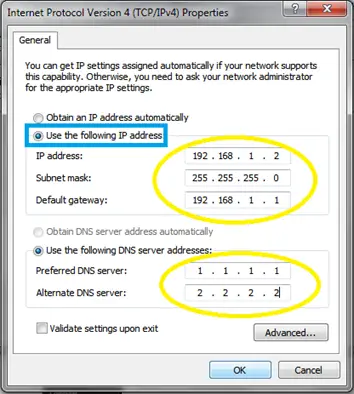
- Go To Use The Following IP Address For Static, Not DHCP If You Have DHCP Configured.
- Type in the IP Address in First Row (192.168.1.1), Subnet Mask (255.255.255.0), Gateway (192.168.1.2).If you have DNS Servers, Please Add It Also. Preferred DNS (1.1.1.1), Alternate DNS (2.2.2.2) And Click On OK.
TEST:
Now To Test the IP has Been Fully Converged.
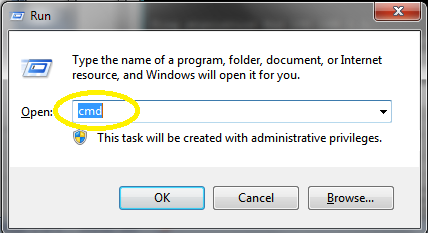
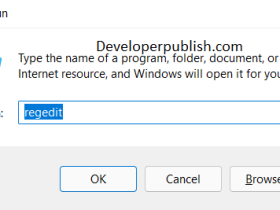
- Please Type CMD in Run Dialog BOX.
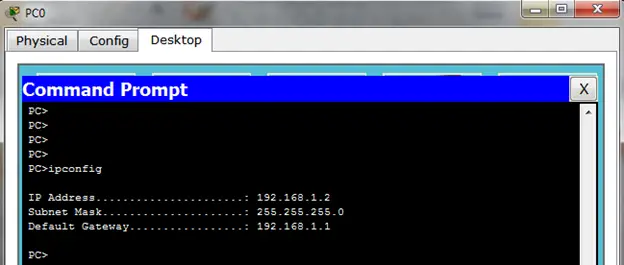
- Window Will Appear In It Type IPCONFIG To View The Converged IP Address.
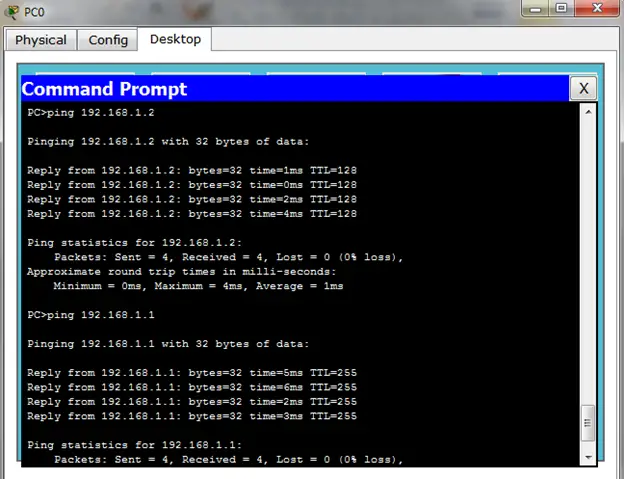
- Type Ping (IP Address, Gateway and DNS Servers).If Success You Will Get the Reply the Source and Destinations.
SCREEN SHOTS FOR IP ADDRESS:
STEP 1:
STEP 2:
STEP 3:
STEP 4:
STEP 5:
SCREENSHOTS FOR TESTING CONNECTIVITY:
STEP 1:
STEP 2:
STEP 3:
That’s the way To Do IT.



Leave a Review