Date Validation in Microsoft Excel
This post explains about the date validations in Microsoft Excel and how you can apply the date controls into the worksheet.
Date Validation in Microsoft Excel
By using the Date Validation you can limit the period or the date that is to be entered in a cell in the worksheet. And you can also prevent the entry of invalid dates.
This option is found in the Data Tools section from the Data tab in the Ribbon.
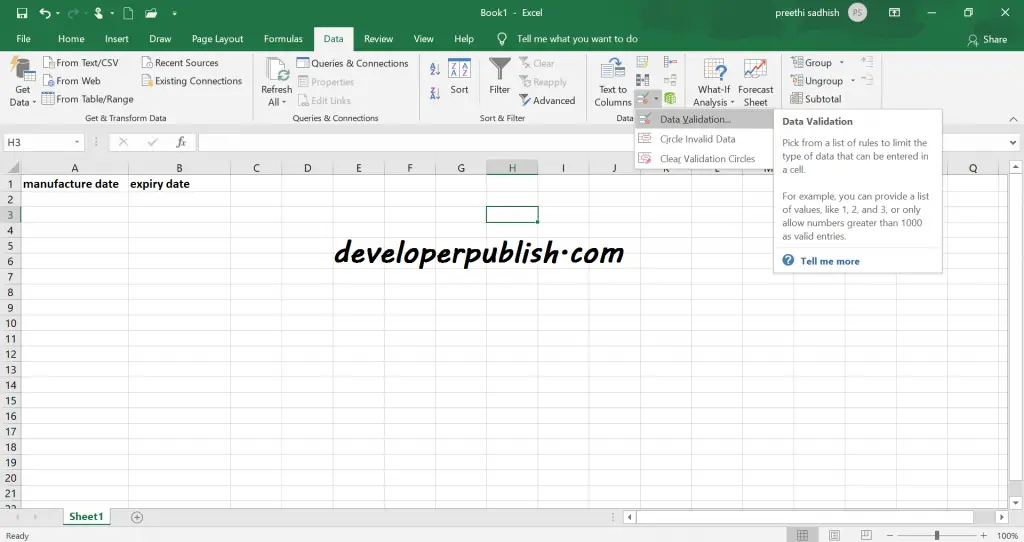
To start with, select an entire column where the date is to be validated. Then select the data validation option from the data tools section.
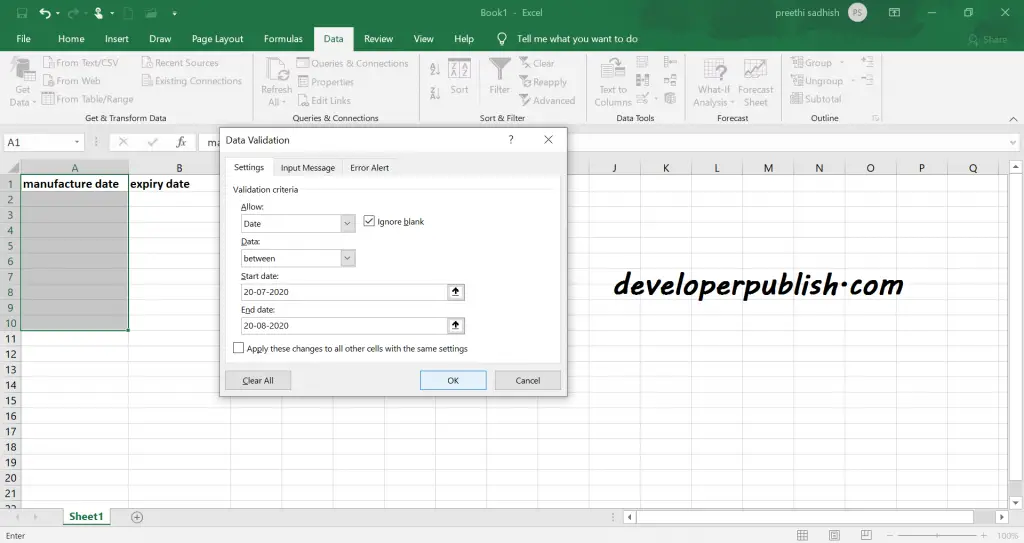
A dialog box appears, choose the date for the allow option. Also, choose how the range of date is to be. It might be between, equal to, greater, etc. Then enter the start date and the end date and click OK.
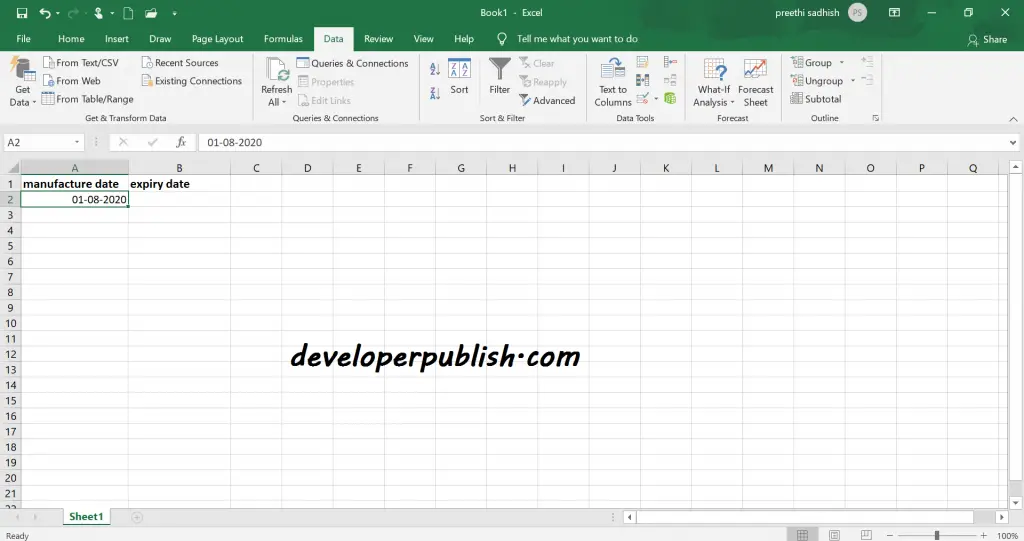
So now when you enter a date in that particular column it accepts and saves only if it lies within the range you have set.
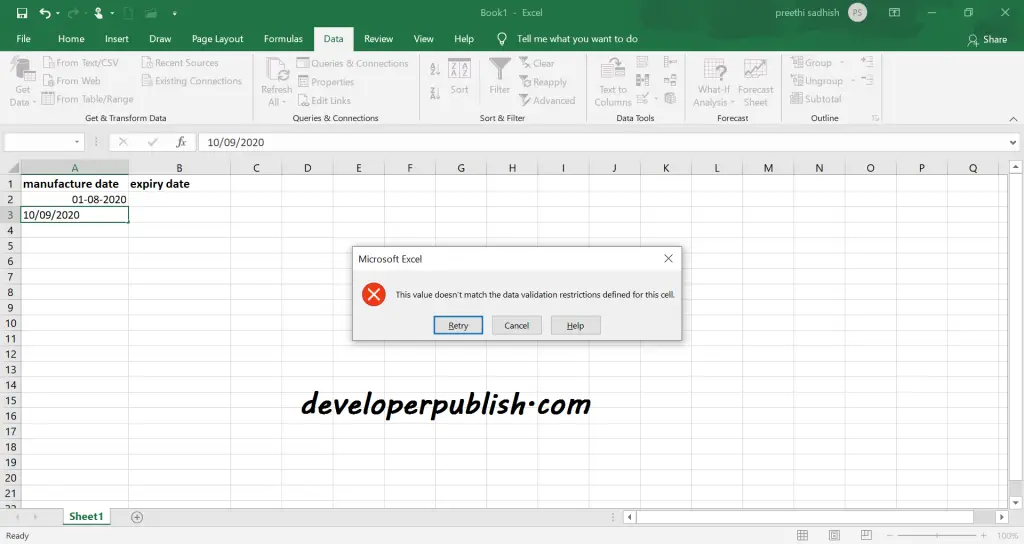
If you give a value that exceeds the limit you have set then the excel displays an error and the value will not be saved.
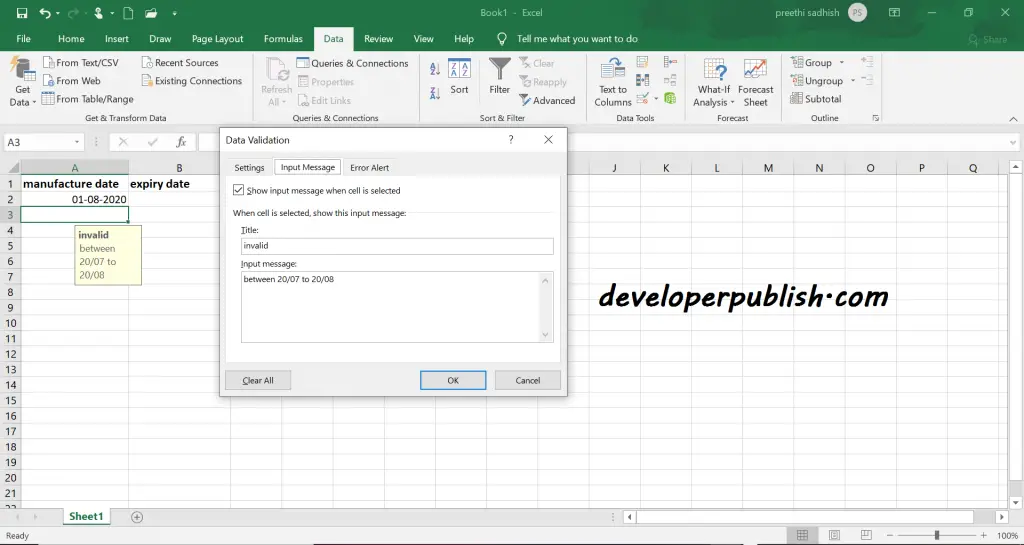
There is an option to set a reminder. To do open the data validation button again, move to the input message and there you can type a message so that it will display each time you hover over the cell.


Well, I got the same error while inserting my values now I was clear on how to rectify the error.