How to Integrate Twilio Verify in .NET Applications ?
This blog post will explain in simple steps on how you can integrate Twilio Verify in .NET applications using C#. The integration of Twilo Verify API in .NET is a 4 step process.
- Create the Service.
- Install the Twilio Nuget Library
- Request Phone Verification.
- Verify the Phone Verification code.
What is Twilio Verify ?
Twilio Verify is one of the product offerings from Twilio that is typically used for verification of the phone numbers and implementing the OTP in your application.
Twilio describes it as
“Verify is best used for proving the ownership of phone numbers and emails for new accounts, short term events or transactions, such as user registration. It provides SMS, Voice, and Email channels for one-time passwords. Its primary use is for phone/email verification.”
How to Integrate Twilio Verify in .NET Application ?
Create the Service.
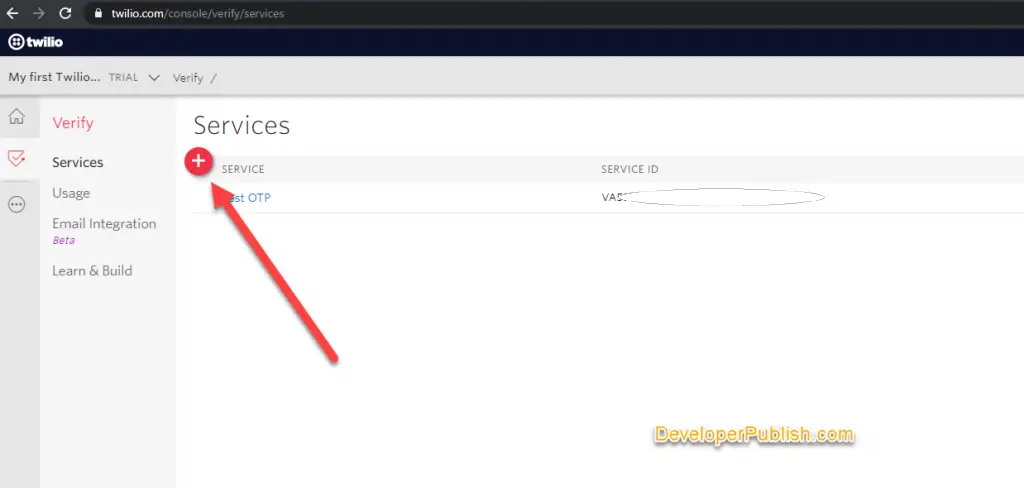
- You can typically create the service in Twilio Console or via API. Let’s use Twilio Console in this example to create the service. Navigate to the Verify Services in Twilio console and create a new Verify service.
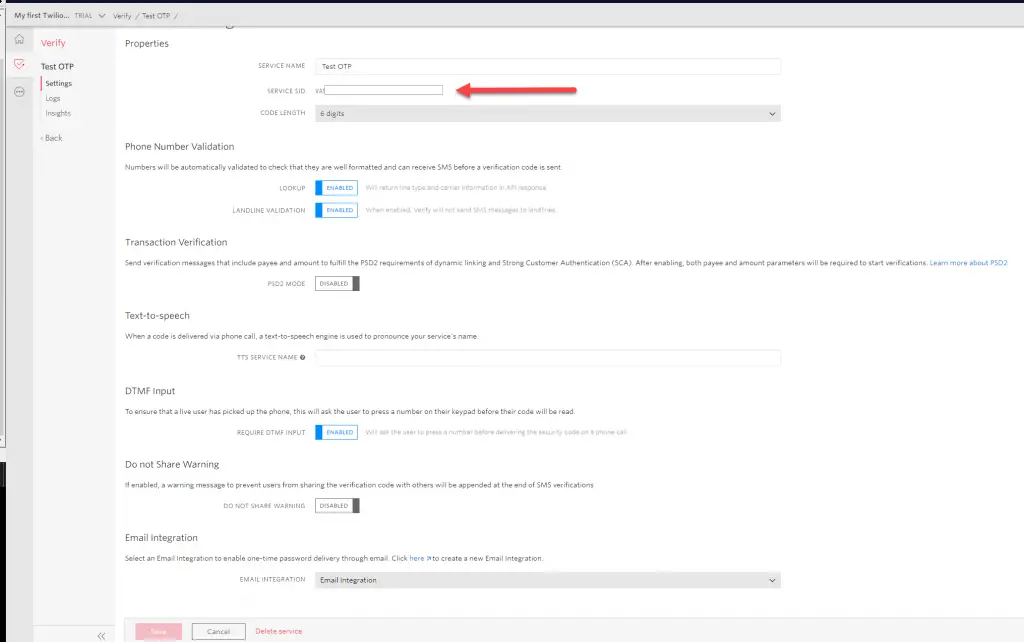
2. In the General Settings , copy the Service SID. Leave the default settings and click save button.
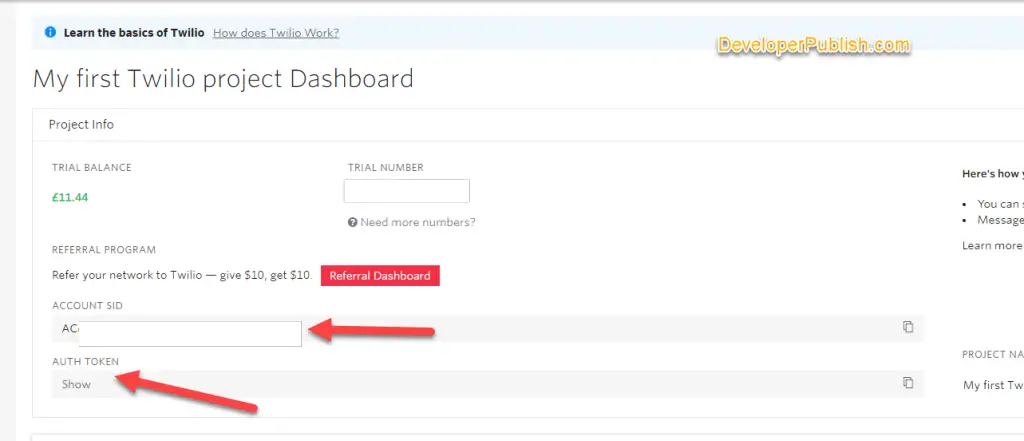
3. Copy the Account SID and the Auth Token from your Twilio Console Dashboard.
Install Twilio NuGet in your .NET application
The Twilio C# SDK makes it easier for the .NET developers to integrate Twilio with the .NET applications. To install the Twilio NuGet Package from Visual Studio , run the below command from Visual Studio Package Manager Console.
Install-Package Twilio
Request Phone Verification
To request the phone verification , we have to initialize the TwilioClient and use the VerificationResource.Create to send the one time passcode to the specified mobile number. Here’s a sample code demonstrating how to send the verification code in C#.
string accountSid = "Account Sid that we copied in step 3";
string authToken = "Auth Token we copied earlier in step 3";
string serviceSid = "Service Sid that we copied in step 2";
TwilioClient.Init(accountSid, authToken);
CreateVerificationOptions options = new CreateVerificationOptions(verifysid, "Your Mobile Number with Country Code where you need to send OTP","sms");
// Send the OTP
var verification = VerificationResource.Create(options);
Don’t forget to add the below namespaces to your page.
using Twilio;
using Twilio.Rest.Verify.V2.Service;
Note : If you are using Trial version of Twilio like me , you will need to verify the mobile numbers in Twilio Console before sending OTP to these numbers.
The above code will send the OTP code to the mobile with-in few seconds from your .NET application.
Verify the Phone Verification code
Verifying the mobile number in your .NET application using Twilio is as simple as entering the OTP code that was received via SMS and checking with the API if it is valid.
Below is a sample code snippet demonstrating how to verify the phone verification code.
TwilioClient.Init(accountSid, authToken);

var verificationCheck = VerificationCheckResource.Create(
	to: "Your Mobile Number with Country Code where you need to send OTP",
	code: "Code that was received via SMS",
	pathServiceSid: "Service Sid that we copied in step 2"
);
The verification check is an object that has the property called status which returns the string “Approved” or “Pending” depending on the results.


Leave a Review