Visual Studio 2012 Tips and Tricks – Create a New Project and Add to Existing Solution
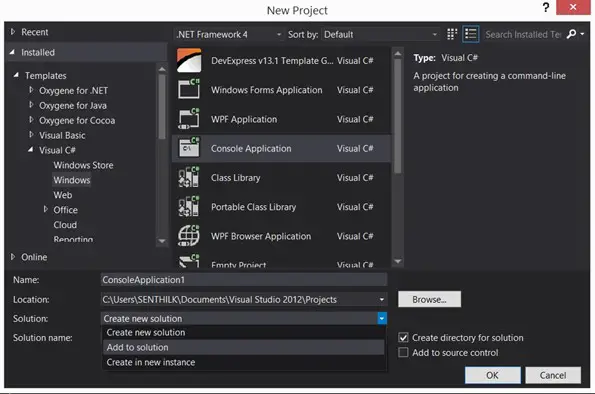
The simplest way to create a new project in Visual Studio 2012 is by selecting the menu New -> Project from the File Menu or using the short cut key “Ctrl + Shift + N”. This will display the New Project Dialog where the user can enter the details of the new project, select the template and create it.
By default, the project creates a new solution and adds the project under it. You can change it by “Adding the project to the existing solution. To do it, Open the existing solution and then hit “Ctrl + Shift + N” and in the “New Project Dialog”, select the template and set the option “Add to solution” from the solution DropDownList in the “Create new Project” dialog.


Leave a Review