You can share files with other users remotely on Windows 11. While it may appear difficult, it is actually a straightforward procedure when using the operating system’s built-in capabilities.
How to Share Files using File Explorer in Windows 11 & Windows 10?
The most effective way to share files on a local network is by using Windows 10’s built-in File Sharing function because it is more adaptable.
You may share files with almost any device, including Mac, Android, and Linux devices, and utilise more stringent permissions.
Follow the below steps to share files using the basic settings feature of File Explorer in Windows 11
- Open File Explorer on your Windows PC
- Navigate to the folder that you wish to share
-
Right click the folder or file that you wish to share and then select “Properties” and then navigate to the Sharing Tab.
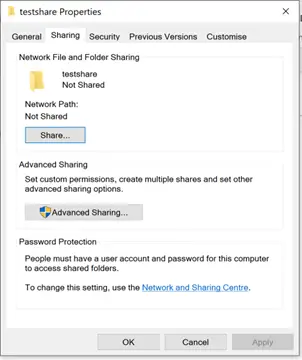
- Click on the Share button and then select the users or group to share a file or folder using the drop-down menu. You can add the users and then specify the permission Level for sharing the folder and once done, click on the Share button and complete the steps on the wizard where you would receive a shared folder path which can be passed on to the users to view the shared access.